


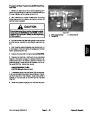


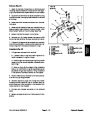


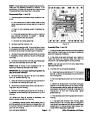


6.
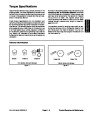
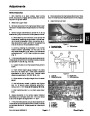
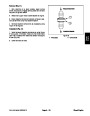
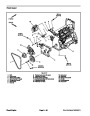
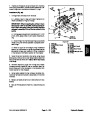
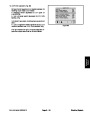
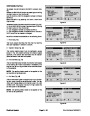
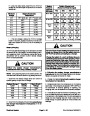
cooler and secure with hose clamps. Torque clamps
from 50 to 70 in--lb (5.7 to 7.9 N--m).
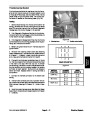
Connect air intake tubes (item14) to the charge air
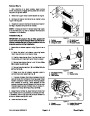
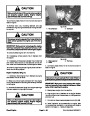
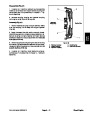
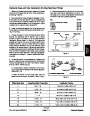
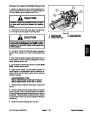
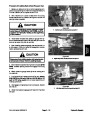
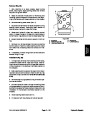
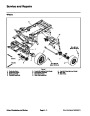
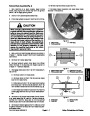
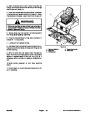
CAUTION
Do not open radiator cap or drain coolant if the
radiator or engine is hot. Pressurized, hot cool-
ant can escape and cause burns.
7. Connect wire harness connector to coolant level
sensor on right side of radiator.
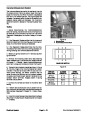
8.
Install coolant drain hose assembly to radiator fitting
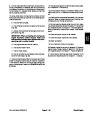
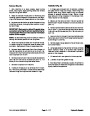
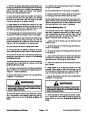
Ethylene--glycol antifreeze is poisonous. Dis-
pose of coolant properly, or store it in a properly
labeled container away from children and pets.
and secure with hose clamp.
9.
Connect reservoir hose (item 22) to the radiator vent
tube and secure with hose clamp.
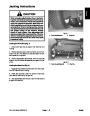
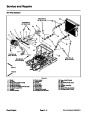
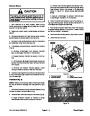
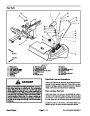
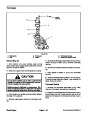
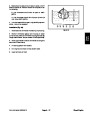
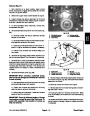
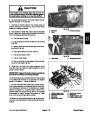
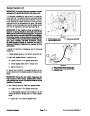
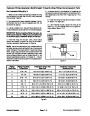
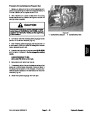
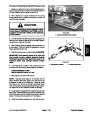
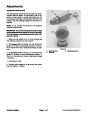
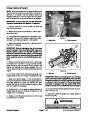
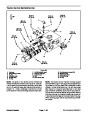
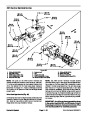
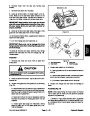
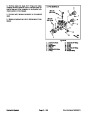
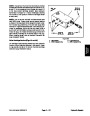
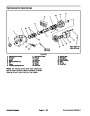
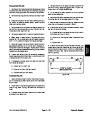
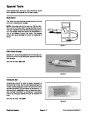
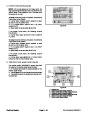
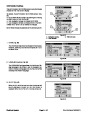
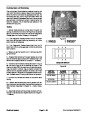
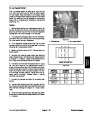
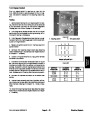
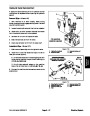
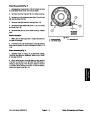
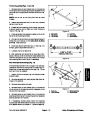
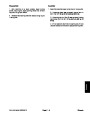
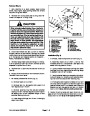
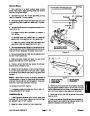
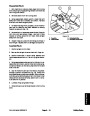
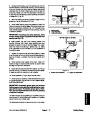
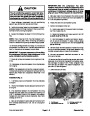
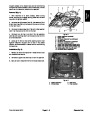
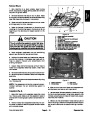
6.
Drain radiator into a suitable container using the ra-
diator drain. The radiator drain is located near the hy-
draulic 4WD manifold (Fig. 15).
10.Make
coolant.
sure radiator drain is closed. Fill radiator with
11.
Secure oil cooler to radiator frame.
7.
Loosen hose clamps and disconnect upper and low-
er coolant hoses (item 6) from the radiator.
12.Run
engine and check for any coolant leaks.
8.
tofitting(item36)onbottomofradiator.Removecoolant
drain hose assembly from radiator.
Loosen hose clamp that secures coolant drain hose
13.Lower
and secure hood.
3
9.
Disconnectreservoirhose(item22)fromtheradiator
vent tube.
1
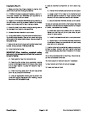
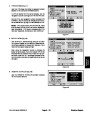
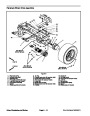
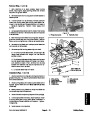
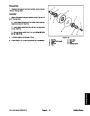
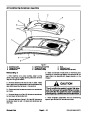
10.Detach
radiator from the fan shroud and support by
removing two(2)carriagescrews(item33),flatwashers
and flange nuts.
11.
Tilt radiator and charge air cooler assembly toward
rear of machine and carefully lift assembly from the ma-
chine.
2
12.Plug
all radiator and hose openings to prevent con-
tamination.
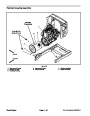
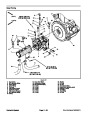
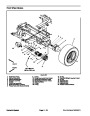
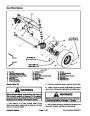
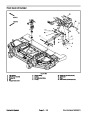
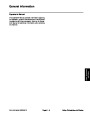
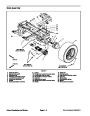
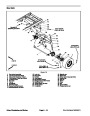
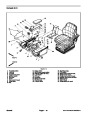
Figure 15
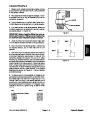
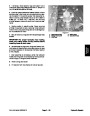
13.Inspect
Replace pads if worn or damaged.
rubber pads (item 5) at bottom of radiator.
1.
2.
Radiator hose
Radiator drain
3.
Air intake tube
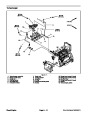
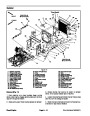
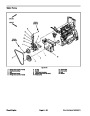
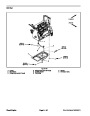
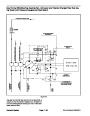
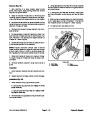
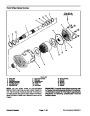
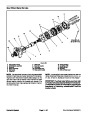
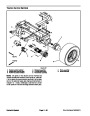
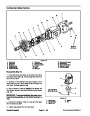
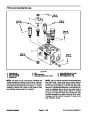
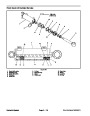
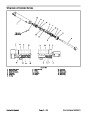
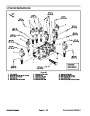
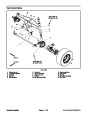
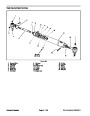
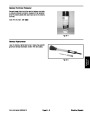
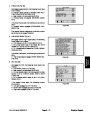
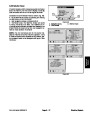
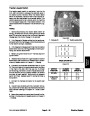
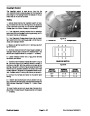
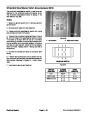
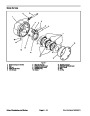
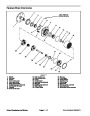
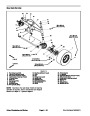
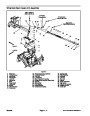
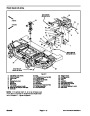
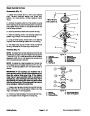
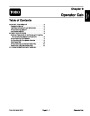
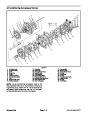
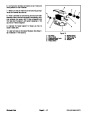
14.Disassemble
bly as needed using Figure 16 as a guide.
radiator and charge air cooler assem-
4
3
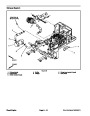
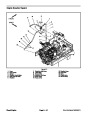
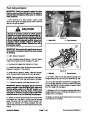
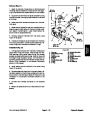
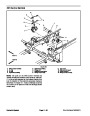
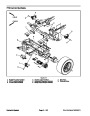
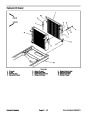
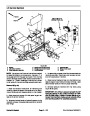
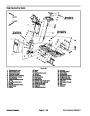
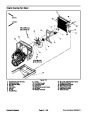
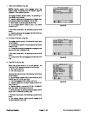
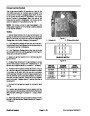
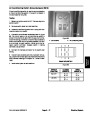
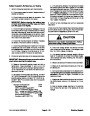
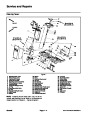
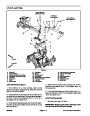
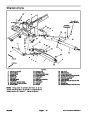
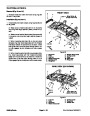
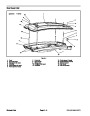
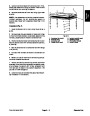
Installation (Fig. 14)
5
1.
as needed using Figure 14 as a guide. Apply thread
sealant to coolant level sensor if it was removed.
Assemble radiator and charge air cooler assembly
6
2
2.
Remove plugs from radiator and hoses placed dur-
ing the removal procedure.
3.
Carefully lower radiator and charge air cooler as-
sembly into the machine.
4.
two (2) carriage screws, flat washers and flange nuts.
Attach radiator to the fan shroud and support with
1
5.
the radiator. Secure hoses with hose clamps.
Connect upper and lower coolant hoses (item 6) to
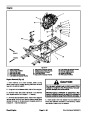
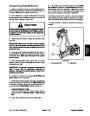
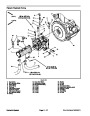
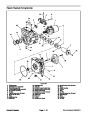
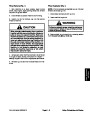
Figure 16
1.
2.
3.
Radiator
LH cooler bracket
Charge air cooler
4.
5.
6.
Pin clip (8 used)
Pin (8 used)
RH cooler bracket
Groundsmaster 5900/5910
Page 3 -- 17
Diesel Engine
| Categories | Lawn Mower Manual, Sprinkler and Irrigation Manuals, Toro Sprinkler and Irrigation Manuals |
|---|---|
| Tags | Toro Groundsmaster 5900, Toro Groundsmaster 5910 |
| Download File |
|
| Document Type | Service Manual |
| Language | English |
| Product Brand | Toro. Customer Service Representatives are available by phone:
Monday - Friday 7:30 a.m. to 9:00 p.m. (CDT) - Saturday 8:00 a.m. to 8:00 p.m. (CDT) - Sunday 10:00 a.m. to 8:00 p.m. (CDT)
Canada 1-888-225-4886 USA 1-888-384-9939, Lawn Mower |
| Document File Type | |
| Publisher | toro.com |
| Wikipedia's Page | Toro Company |
| Copyright | Attribution Non-commercial |
(0 votes, average: 0 out of 5)