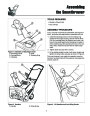
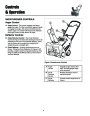


Controls & Operation
STARTING THE ENGINE
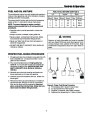
DANGER
NOTE: The snow thrower engine is designed to operate
at cold temperatures. Avoid operating the snow thrower if
air temperature is 40°C or warmer since engine may
vapor lock and stop running after a short time. Engine
will be difficult to start in warm weather.
Never run engine indoors or in enclosed, poorly venti-
lated areas. Engine exhaust contains CARBON
MONOXIDE, an ODORLESS and DEADLY GAS.
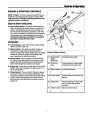
Electric Starting Steps
Manual (Recoil) Starting Steps
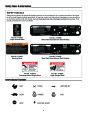
Note: The electric starter is designed to operate on 120V
AC household current, using power cord supplied with
electric start snow thrower. When using power cord,
match wide blade of plug to wide slot of receptacle.
1. Insert engine key in switch and turn key to the ON
position.
2.
3.
4.
If engine is cold, move choke control lever to the ON
position. (Do not choke a warm engine).
1.
2.
3.
4.
Insert engine key in switch and turn key to the ON
position.
Push the Primer Button two times if engine is cold.
(Do not prime a warm engine.)
If engine is cold, move choke control lever to the ON
position. (Do not choke a warm engine).
Grasp starter rope handle and slowly pull out rope
until resistance is felt. Allow rope to rewind slowly,
then pull rope out rapidly to start engine. Let rope
return slowly to starter.
Push the Primer Button two times if engine is cold.
(Do not prime a warm engine.)
Plug power cord for starter into receptacle on starter
switch, then plug other end into a 120Volt AC house-
hold receptacle. DO NOT use an extension cord with
the electric start power cord supplied.
NOTE: If engine does not start after three pulls,
push primer bulb once and again pull starter
rope.
5.
After engine starts and gradually warms up, move
choke lever to the OFF position. Be prepared to
move choke lever to the ON position if engine falters
during warm up.
CAUTION
Be sure there is no moisture present on cord ends or
receptacles when plugging cord into receptacle.
6.
7.
Allow engine to warm up before beginning snow
thrower operations. The engine will operate at full
throttle when thoroughly warmed up.
5.
Push starter button to crank engine. DO NOT crank
engine for more than a total of 15 seconds without
allowing electric starter to cool for 10 minutes before
additional cranking is attempted. Electric starter can
be severely damaged if recommended starter operat-
ing limitations are not observed.
To stop engine, turn Engine Key to the OFF position.
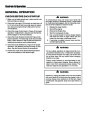
STOPPING THE ENGINE
1.
2.
3.
Release the Auger Control.
NOTE: Do not push primer button while engine is
being cranked.
Turn Engine Key to the OFF position.
Remove the key from the switch if you are leaving the
operating position or will be making adjustments or
repairs. (NOTE: Allow the unit to cool before storing
or making any adjustments or repairs.)
6.
Release starter button when engine starts and gradu-
ally move choke lever to the OFF position.
NOTE: Always disconnect power cord from
household receptacle first, then unplug from
starter switch.
If you will be storing the unit for the season, see the
STORAGE section for instructions on properly preparing
the unit for long-term storage.
7.
8.
Disconnect power cord from household receptacle
and then from starter switch on snow thrower. Store
cord in a dry, convenient place.
To stop engine, turn Engine Key to the OFF position.
10
| Categories | Simplicity Snow Blower Manuals, Snow Blower Manuals |
|---|---|
| Tags | Simplicity 1692917, Simplicity 1692918, Simplicity 1692977, Simplicity 1692978, Simplicity 1692979, Simplicity 1692980, Simplicity 1692981, Simplicity 1692984, Simplicity 1692985, Simplicity 1692986, Simplicity 1692991, Simplicity 1692992, Simplicity 1693166, Simplicity 520 |
| Download File |
|
| Document Type | Owner's Manual |
| Language | English |
| Product Brand | Simplicity, Snow Blower |
| Document File Type | |
| Publisher | simplicitymfg.com |
| Wikipedia's Page | Simplicity Outdoor |
| Copyright | Attribution Non-commercial |
(0 votes, average: 0 out of 5)