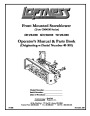


Owner’s Manual (Toro GM4100 Series Snowblower)
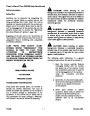
Set-up and Operating Instructions Continued
•
Return control valve to original setting when
removing the snowblower and reinstalling
the cutting unit.
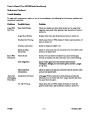
Switch Decals:
Adjusting Counterbalance:
•
Reduce counterbalance by unscrewing the
stem on the valve approximately 3 turns.
•
Return counterbalance pressure to original
settings when removing the snowblower
and reinstalling the cutting unit
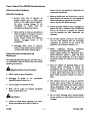
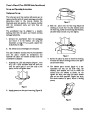
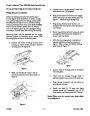
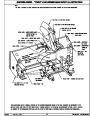
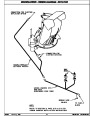
Hydraulic Hose Storage:
Figure 8
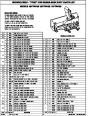
Attach the pressure line and return line hoses to the
hydraulic motor on the snowblower. Unused
hydraulic hoses or outlets used for other
attachments will be capped and plugged, using the
Cap & Plug Kit (P/N N15354).
Switch decal (supplied with wire harness kit) are cut
out graphics which only represent the snowblower
operation. Approximate size is shown by dotted
lines in figure 10. Each decal should be
approximately 1” by 1-1/4”.
Note:
Note:
Store unused hoses under traction unit and
secure with cable ties. Avoid any contact with
sharp edges or moving parts.
Check switch operation and reverse their
locations in control console if they don’t operate
in direction shown on decals. Tighten toggle
switch nuts
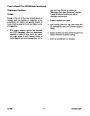
Operating:
Install control panel housing and secure with knobs.
The Loftness snowblower is an effective, reliable
machine used for the removal of snow. Before
operating this machine, become familiar with and
study all the hazard warning and safety precautions
listed in this book.
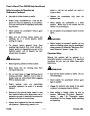
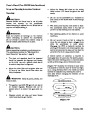
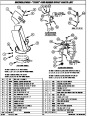
Adjusting the Cutting Unit Flow Control:
The flow control valve (Figure 9) is used to adjust
the rate at which the snowblower lowers.
Check the following items to insure the snowblower
is ready for use:
•
Loosen set screw on flow control valve,
(shown as #1) adjust valve as desired and
tighten set screw.
1.
Check the sprockets and drive chain for
alignment and proper tension on the chain.
Chain should have approximately one inch (1”)
of deflection.
2.
3.
Check all bolts and set screws.
Check to make sure that all shields are in place
and secure.
Figure 9
N14868
2 - 3
November, 2004
| Categories | Snow Blower Manuals, Toro Snow Blower |
|---|---|
| Tags | Toro 601TR4100, Toro 661TR4100, Toro 721TR4100 |
| Download File |
|
| Document Type | Operator's Manual |
| Language | English |
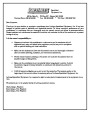
| Product Brand | Toro. Customer Service Representatives are available by phone:
Monday - Friday 7:30 a.m. to 9:00 p.m. (CDT) - Saturday 8:00 a.m. to 8:00 p.m. (CDT) - Sunday 10:00 a.m. to 8:00 p.m. (CDT)
Canada 1-888-225-4886 USA 1-888-384-9939, Snow Blower |
| Document File Type | |
| Publisher | toro.com |
| Wikipedia's Page | Toro Company |
| Copyright | Attribution Non-commercial |
(0 votes, average: 0 out of 5)