


MAINTENANCE
Important
If the pivot plate touches the wheel
frame before the control bar touches the handle, the
cable is too tight. Adjust the cable to increase the gap
between the pivot plate and the wheel frame, but
ensure that the gap is not more than 1/8 in. (3mm).
Adjusting the cable correctly minimizes the effort
needed to operate the control bar.
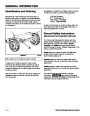
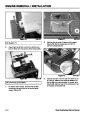
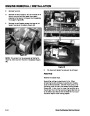
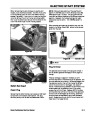
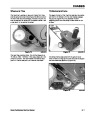
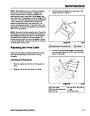
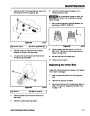
Adjusting the Pivot Cable
Unhook the Z-fitting from the pivot cable adjuster (Fig.
12), and position the Z-fitting in a different hole on the
pivot cable adjuster to obtain the proper gap between
the pivot plate and the wheel frame.
Figure 84
m-5058
Note: Moving the Z-fitting to a hole closer to the ground
decreases the gap between the pivot plate and the
wheel frame; moving it to a hole farther from the
ground increases the gap.
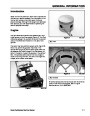
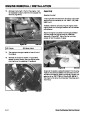
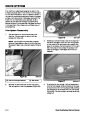
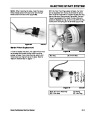
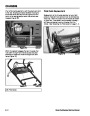
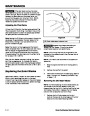
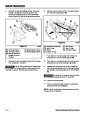
(A) Rotor blade wear indicator hole
Important Replace the scraper whenever you
replace the rotor blades. This ensures proper
snowthrower operation and performance.
Note: The traction is most aggressive (the traction
speed is fastest) when the rotor blades are new. If you
want to reduce the aggressiveness of the traction,
move the Z-fitting one hole farther from the ground.
The gap between the pivot plate and the wheel frame
will be about 1/4 in. (6mm).
NOTE: The running time and the roughness of the
driveway or the sidewalk determines the wear rate of
the rotor blades.
After the rotor blades have worn slightly, the traction
won’t feel as aggressive. To increase the traction,
adjust the pivot cable to attain the original gap between
the pivot plate and the wheel frame of 0 to 1/8 in. (0 to
3mm).
NOTE: You need a T27 Torx driver to complete this
procedure.
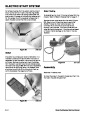
1.
Stop the engine and wait for all moving parts to
stop.
2.
3.
Remove the key from the switch.
Replacing the Rotor Blades
Disconnect the wire from the spark plug. Refer to
steps 1 through 3 of "Replacing the Spark Plug"
on page 7 - 6.
Before each season, inspect the rotor blades for wear.
When a rotor blade edge has worn to the wear
indicator hole (Figure 84), replace all three rotor blades
to ensure proper performance and to prevent damage
to the underside of the snowthrower.
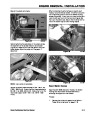
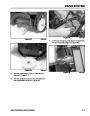
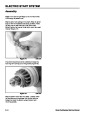
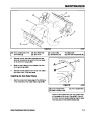
Removing the Old Rotor Blades
NOTE: To make replacing the rotor blades easier, do
not remove all the old rotor blades at once; this
disassembles the rotor drum, making installing the new
rotor blades more difficult. Replace the rotor blades
one at a time to keep the rotor drum intact.
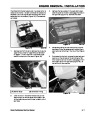
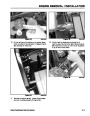
1.
Remove the four Torx screws and the four
locknuts that secure the outer edges of the rotor
blade to the rotor assembly (Figure 85).
7 - 4
Snow Commander Service Manual
| Categories | Snow Blower Manuals, Toro Snow Blower |
|---|---|
| Tags | Toro 38600, Toro 38601, Toro 38602, Toro 38603, Toro Snow Commander |
| Model Year | 2006 |
| Download File |
|
| Document Type | Service Manual |
| Language | English, Français |
| Serial Number | 260010001 - 260999999 |
| Product Name | Toro Snow Commander Snowthrower |
| Product Brand | Toro. Customer Service Representatives are available by phone:
Monday - Friday 7:30 a.m. to 9:00 p.m. (CDT) - Saturday 8:00 a.m. to 8:00 p.m. (CDT) - Sunday 10:00 a.m. to 8:00 p.m. (CDT)
Canada 1-888-225-4886 USA 1-888-384-9939, Snow Blower |
| Product Type | Snowthrower |
| Product Series | Single Stage Snow Commander |
| Swath | 24 inch |
| Discharge | Single Stage |
| Engine Manufacturer | Briggs & Stratton |
| Engine Oil Type | 38602 |
| Engine Motor Model # | 084333-0199-E1 |
| Engine Motor Size | 141cc |
| Engine Motor Type | 2 Cycle EPA2 |
| Document File Type | |
| Publisher | toro.com |
| Wikipedia's Page | Toro Company |
| Copyright | Attribution Non-commercial |
(0 votes, average: 0 out of 5)