


3.
When disconnecting the extension cord, always
unplug the end at the three-prong wall outlet before
unplugging the opposite end from the snow thrower.
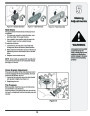
Auger Control Test
Perform the following test before operating your snow
thrower for the first time and at the start of each winter.
Check the adjustment of the auger control as follows:
4.
5.
Move throttle control to STOP position.
1.
2.
3.
When the auger control is released and in the
disengaged “up” position, the cable should have very
little slack. It should NOT be tight.
Removeunauthorizedthe ignitionuse of equipment.key (Do not turn key) to prevent
Wipe all snow and moisture from the area around the
engine as well as the area in and around the drive
control and auger control. Also, engage and release
both controls several times.
6.
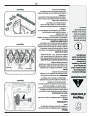
In a well-ventilated area, start the snow thrower
engine as instructed on the previous page. Make sure
the throttle is set in the FAST position.
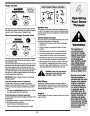
WARNING
The muffler, engine
and surrounding
While standing in the operator’s position (behind the
snow thrower), engage the auger.
NOTE: Keep the key in a safe place. The engine cannot
areas become hot
and can cause a burn
start without the ignition key.
4. Allow the auger to remain engaged for approximately
ten (10) seconds before releasing the auger control.
Repeat this several times.
150°F
(65°C). Do not
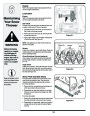
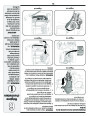
Recoil Starter
1.
With engine running, pull starter rope with a rapid,
continuous full arm stroke three or four times. Pulling
the starter rope will produce a loud clattering sound,
which is not harmful to engine.
Move throttle control to STOP position.
Removeunauthorizedthe ignitionuse of equipment.key (Do not turn key) to prevent
touch.
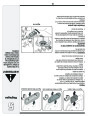
5.
With the throttle control in the FAST (rabbit) position
and the auger control in the disengaged “up” position,
walk to the front of the machine.
6.
Confirm that the auger has completely stopped
rotating and shows NO signs of motion. If the auger
shows ANY signs of rotating, immediately return to
the operator’s position and shut off the engine. Wait
for ALL moving parts to stop before re-adjusting the
auger control.
2.
3.
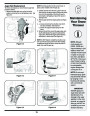
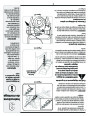
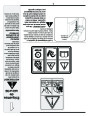
When selecting a
Drive Speed, use the
slower speeds until
you are comfortable
and familiar with the
operation of the snow
thrower.
NOTE: Keep the key in a safe place. The engine cannot
start without the ignition key.
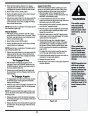
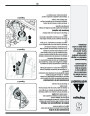
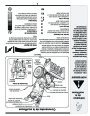
7.
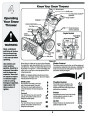
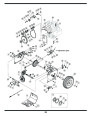
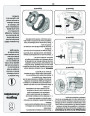
To readjust the control cable, loosen the upper hex
4.
Wipe all snow and moisture from the area around the
engine as well as the area in and around the drive
control and auger control. Also, engage and release
both controls several times.
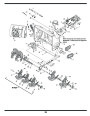
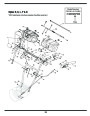
nut on the auger cable bracket. See Figure 4-2.
8.
Position the bracket upward to provide more slack (or
downward to increase cable tension).
9.
10.
Retighten the upper hex nut.
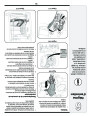
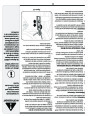
To Engage Drive
Repeat Auger Control Test to verify proper adjustment
1.
2.
With the engine running near top speed, move
shift lever to one of six FORWARD positions or two
REVERSE positions. Select a speed appropriate for
the snow conditions that exist.
NEVER reposition the
shift lever (change
speeds or direction
of travel) without first
releasing the drive
control and bringing
the snow thrower
to a complete stop.
Doing so will result in
premature wear to the
snow thrower’s drive
system.
has been achieved.
Squeeze drive control against the right handle and
the snow thrower will move. Release it and the drive
motion will stop.
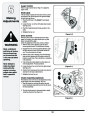
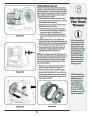
To Engage Augers
1.
2.
To engage augers and start snow throwing, squeeze
the left hand auger control against the left handle.
Release to stop augers.
While the auger control is engaged, squeeze the drive
control to move, release to stop. Do not shift speeds
while the drive is engaged.
NOTE: This same lever also locks auger control so you
can turn the chute control without interrupting the snow
throwing process.
3.
Release the auger control; the interlock mechanism
should keep the auger control engaged until the drive
control is released.
Release the drive control to stop both the augers and
the wheel drive. To stop the auger, both levers must
be released.
Figure 4-
4.
11
| Categories | MTD Snow Blower Manuals, Snow Blower Manuals, Yardworks Snow Blower Manuals |
|---|---|
| Tags | MTD 769-03250, MTD Snow Blower Manual, Yardworks 769-03250 |
| Download File |
|
| Document Type | Owner's Manual |
| Language | English |
| Product Brand | Yardworks, 769-03250, Snow Blower |
| Document File Type | |
| Publisher | mtdproducts.com |
| Wikipedia's Page | MTD Products |
| Copyright | Attribution Non-commercial |
(3 votes, average: 2 out of 3)
Lawn and Garden readers have rated Yardworks 769-03250 Snow Blower Owners Manual by MTD 2.0 out of 3.0 based on 3 product reviews. Not a bad snowblower. Just need to keep maintenance up.
My snowblower is not working properly . . . the engine starts fine and goes in forward and reverse but the auger won’t turn. Any suggestions?
my blower belts broke can you send me email page on how to replace also friction wheel? thank you if you can. ernie