

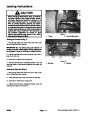


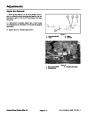

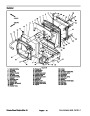


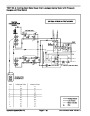


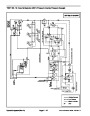
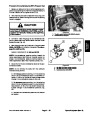
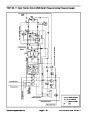
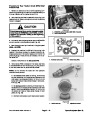

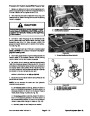


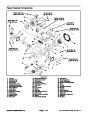


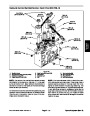


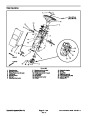
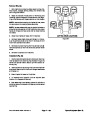


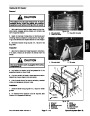

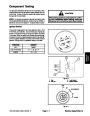
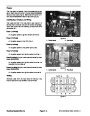
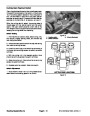


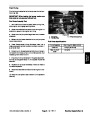


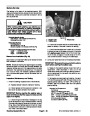
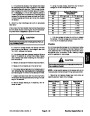


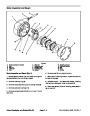

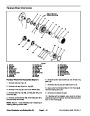
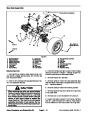


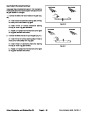

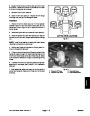
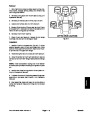


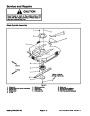
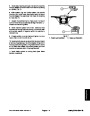


NOTE: Cleanliness is extremely important when
repairing hydraulic components. Work in a clean area.
Before disassembly, drain the oil, then plug the ports
and thoroughly clean the exterior. During repairs,
always protect machined surfaces.
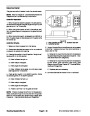
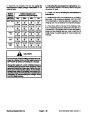
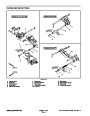
Assembly
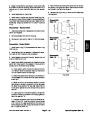
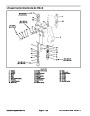
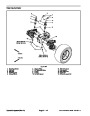
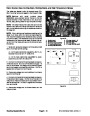
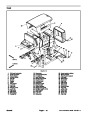
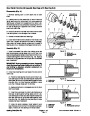
1.
ing of clean hydraulic oil to parts prior to assembly.
Thoroughlycleananddryallparts.Applyalightcoat-
NOTE: All O--rings, back--up washers, wiper seals and
nylon poppet should be replaced as new items.
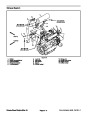
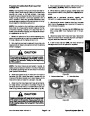
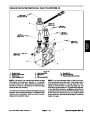
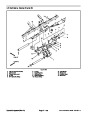
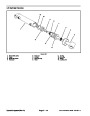
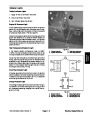
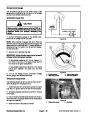
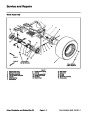
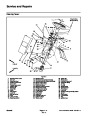
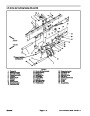
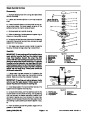
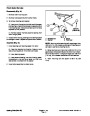
Disassembly
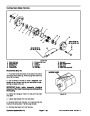
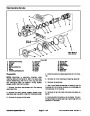
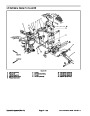
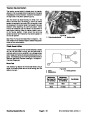
2.
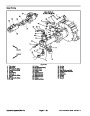
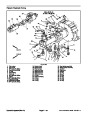
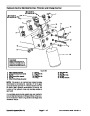
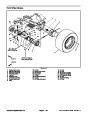
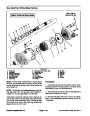
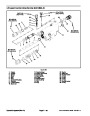
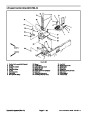
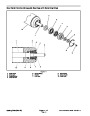
bore.
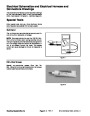
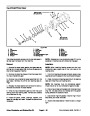
Install new O--ring (15) in proper groove in spool
1.
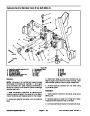
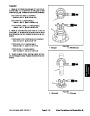
Plug all ports and clean outside of valve thoroughly.
2.
(16)
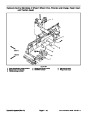
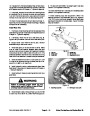
Removespoolcap(10).Donotremoveretainingring
from spool (4) unless spool spring (14) is broken.
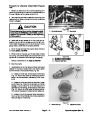
3.
ring (23). Torque plug from 30 to 45 ft--lb (41 to 48 N--m).
Installplug(6)withnewback--upwasher(22)andO--
3.
4.
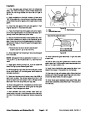
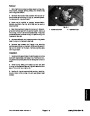
Remove spool (4) from control valve body (12).
Remove bushing (8) and O--rings (15) from spool
4.
install it into control valve body.
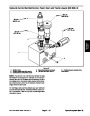
Lubricate plunger (2) with clean hydraulic oil and
and O--ring from spool bore.
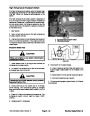
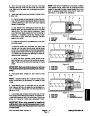
IMPORTANT: Check location and positioning of
plunger during installation.
5.
Remove plug (6).
IMPORTANT: Check location and positioning of
plunger when removing from body to assure proper
assembly.
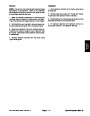
5. Install new O--ring (28) on seat (5). Install new back--
up washer (27) and O--ring (26) on seat retaining plug
(7).
6.
poppet (1), seat (5) and plunger (2).
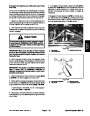
Remove seat retaining plug (7), lockout spring (9),
6. Lubricate seat(5)withclean hydraulicoil.Installseat
(5),newpoppet (1),lockout spring (9)and seatretaining
plug (7). Torque plug from 30 to 45 ft--lb (41 to 48 N--m).
7.
8.
Remove plug (19).
7.
Install plug (19) with new O--ring (24).
Remove detent plug (13), disc (18), spring (17) and
detent plunger (11).
8. Lubricatedetentplunger(11)withcleanhydraulicoil.
Install plunger, detent spring (17), disc (18), and detent
plug (13) with new O--ring (25).
9.
RemoveallO--ringsandback--upringsfromallplugs
and seats.
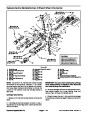
9.
spring (14), install washer (20), spring (14), spacer (3),
and secure with retaining ring (16).
If retaining ring (16) was removed to replace spool
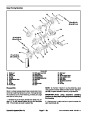
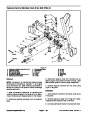
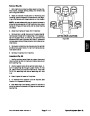
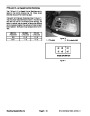
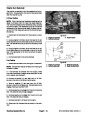
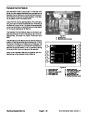
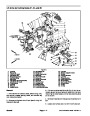
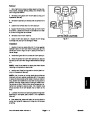
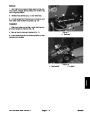
Inspection
1.
Remove all nicks and burns from parts and inspect
for excessive wear.
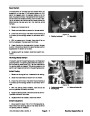
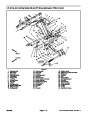
10.Slide
bushing (8) over spool. Slide new O--ring (21)
over spool and position next to bushing. Dip spool in
cleanhydraulicoilandinstallspoolassemblyintoproper
location of control valve body.
2.
3.
Inspect plunger and seats for burrs or roughness.
Inspectspoolspring(14),lockout spring(9),anddet-
ent spring (17) for breakage.
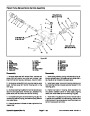
11.
(27
Install spool cap (10) and tighten from 20 to 25 ft--lb
to 33 N--m).
4.
If spool (4) has excessive wear, the control valve be-
comes non--serviceableasthespool andspool boreare
matched. Damaged spools cannot be replaced.
12.Install
new wiper seal (21).
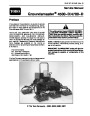
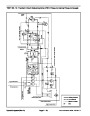
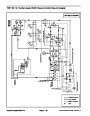
Groundsmaster 4500--D/4700--D
Page 4 -- 97
Hydraulic System (Rev. A)
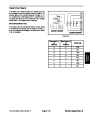
| Categories | Lawn Mower Manual, Sprinkler and Irrigation Manuals, Toro Sprinkler and Irrigation Manuals |
|---|---|
| Tags | Toro Groundsmaster 4500 D, Toro Groundsmaster 4700 D |
| Download File |
|
| Document Type | Service Manual |
| Language | English |
| Product Brand | Toro. Customer Service Representatives are available by phone:
Monday - Friday 7:30 a.m. to 9:00 p.m. (CDT) - Saturday 8:00 a.m. to 8:00 p.m. (CDT) - Sunday 10:00 a.m. to 8:00 p.m. (CDT)
Canada 1-888-225-4886 USA 1-888-384-9939, Lawn Mower |
| Document File Type | |
| Publisher | toro.com |
| Wikipedia's Page | Toro Company |
| Copyright | Attribution Non-commercial |
(0 votes, average: 0 out of 5)