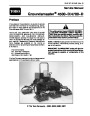


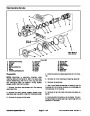
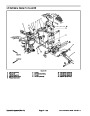
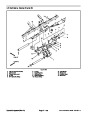


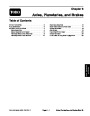


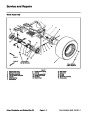


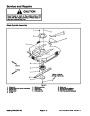
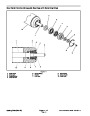


Service and Repairs
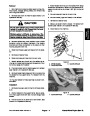
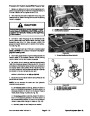
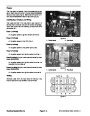
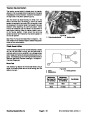
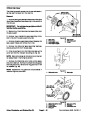
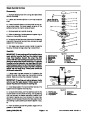
General Precautions for Removing and Installing Hydraulic System Components
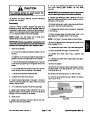
Before Repair or Replacement of Components
Before removing any parts from the hydraulic sys-
tem, park machine on a level surface, engage parking
brake, lower cutting units or attachments, and stop en-
gine. Remove key from the ignition switch.
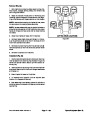
After Repair or Replacement of Components
1.
1. Checkoillevelinthehydraulic reservoir andaddcor-
rect oil if necessary. Drain and refill hydraulic system
reservoir, and change oil filter if component failure was
severe or system is contaminated (see Flush Hydraulic
System).
2.
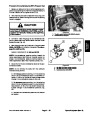
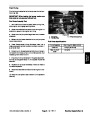
Clean machine before disconnecting, removing, or
disassembling any hydraulic components. Make sure
hydraulic components, hoses connections, and fittings
are cleaned thoroughly. Always keep in mind the need
for cleanliness when working on hydraulic equipment.
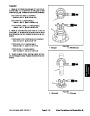
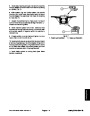
2. Lubricate O--rings and seals with clean hydraulic oil
before installing hydraulic components.
3.
Make sure caps or plugs are removed from the hy-
draulic tubes, hydraulic fittings, and components before
reconnecting.
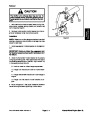
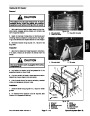
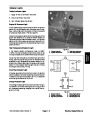
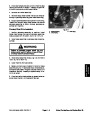
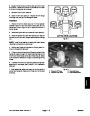
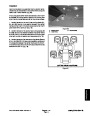
CAUTION
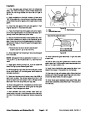
4.
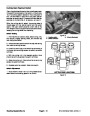
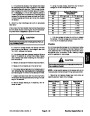
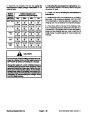
Use proper tightening methods when installing hy-
draulic hoses and fittings (see Hydraulic Fitting Installa-
tion).
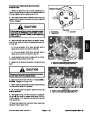
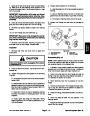
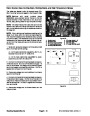
Operate all hydraulic controls to relieve system
pressure and avoid injury from pressurized hy-
draulic oil. Controls must be operated with the
ignition switch in RUN and the engine OFF. Make
sure all electrically operated control valves are
actuated. Return ignition switch to OFF when
pressure has been relieved. Remove key from
the ignition switch.
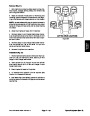
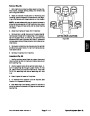
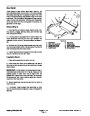
5. After repairs, check control linkages or cables for
proper adjustment, binding, or broken parts.
6.
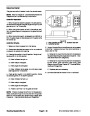
ponents, operate machine functions slowly until air is
out of system (see Charge Hydraulic System).
After disconnecting or replacing any hydraulic com-
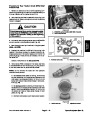
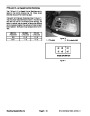
3.
tings, and components left open or exposed to prevent
contamination.
Putcapsorplugsonanyhydrauliclines,hydraulicfit-
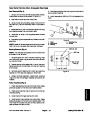
7. Checkforhydraulicoilleaks.Shutoffengineandcor-
rectleaksifnecessary.Checkoillevelinhydraulicreser-
voir and add correct oil if necessary.
4.
hosesforproperinstallationafterrepairsarecompleted.
Put labels on disconnected hydraulic lines and
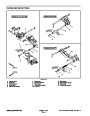
5.
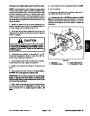
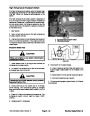
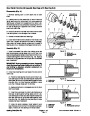
Note the position of hydraulic fittings (especially el-
bow fittings) on hydraulic components before removal.
Markpartsifnecessarytomakesuretheywillbealigned
properly when reinstalling hydraulic hoses and tubes.
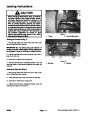
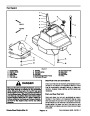
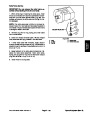
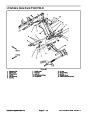
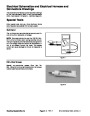
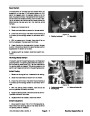
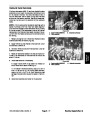
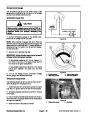
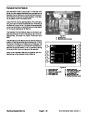
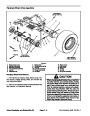
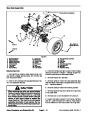
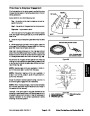
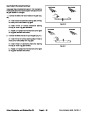
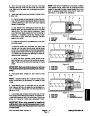
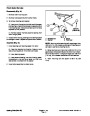
Check Hydraulic Lines and Hoses
IMPORTANT: Checkhydraulic linesandhosesdaily
for leaks, kinked lines, loose mounting supports,
wear, loose fittings, weather deterioration and
chemical deterioration. Make all necessary repairs
before operating.
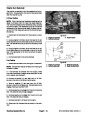
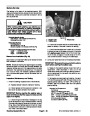
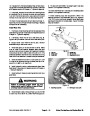
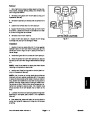
WARNING
Keep body and hands away from pin hole leaks
or nozzles that eject hydraulic fluid under high
pressure. Use paper or cardboard, not hands, to
search for leaks. Hydraulic fluid escaping under
pressure can have sufficient force to penetrate
the skin and cause serious injury. If fluid is in-
jected into the skin, it must be surgically re-
moved within a few hours by a doctor familiar
withthistypeofinjury.Gangrenemayresultfrom
such an injury.
Hydraulic System (Rev. A)
Page 4 -- 52
Groundsmaster 4500--D/4700--D
| Categories | Lawn Mower Manual, Sprinkler and Irrigation Manuals, Toro Sprinkler and Irrigation Manuals |
|---|---|
| Tags | Toro Groundsmaster 4500 D, Toro Groundsmaster 4700 D |
| Download File |
|
| Document Type | Service Manual |
| Language | English |
| Product Brand | Toro. Customer Service Representatives are available by phone:
Monday - Friday 7:30 a.m. to 9:00 p.m. (CDT) - Saturday 8:00 a.m. to 8:00 p.m. (CDT) - Sunday 10:00 a.m. to 8:00 p.m. (CDT)
Canada 1-888-225-4886 USA 1-888-384-9939, Lawn Mower |
| Document File Type | |
| Publisher | toro.com |
| Wikipedia's Page | Toro Company |
| Copyright | Attribution Non-commercial |
(0 votes, average: 0 out of 5)