

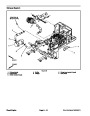


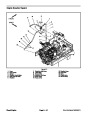
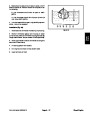
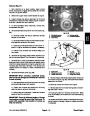

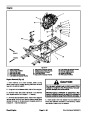
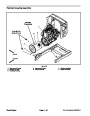

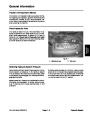
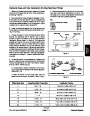
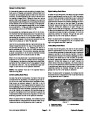


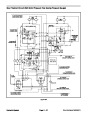

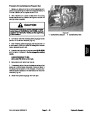

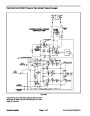
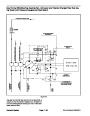
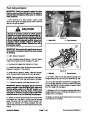
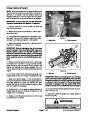

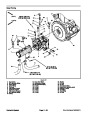


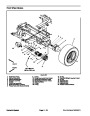

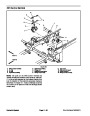


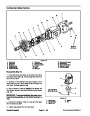

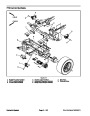


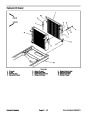


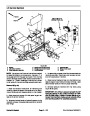


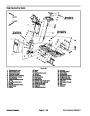

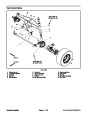
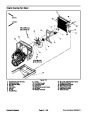


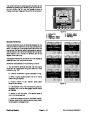


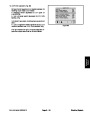
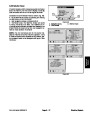


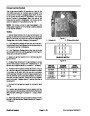
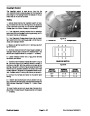


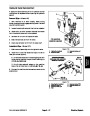

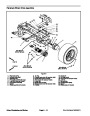
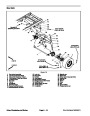
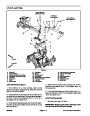

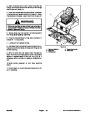


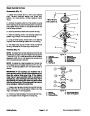


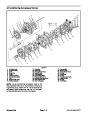
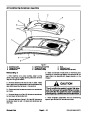


Main Power, Controller, Start and Cab (Groundsmaster 5910) Relays
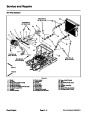
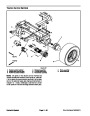
TheGroundsmaster 5900and5910 usethree (3)identi-
cal relays to control electrical power circuits. The
Groundsmaster 5910 uses an additional relay for the
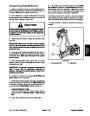
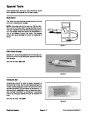
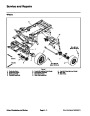
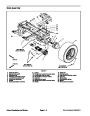
cab electrical components. The relays are attached to
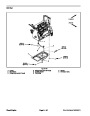
theoperatorplatformunderthepowercenter cover(Fig.
93).
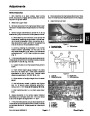
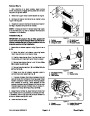
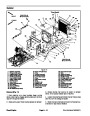
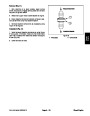
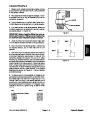
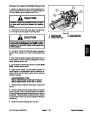
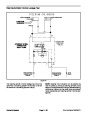
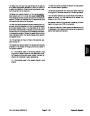
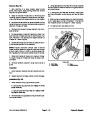
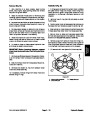
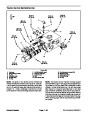
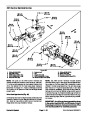
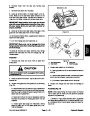
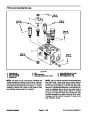
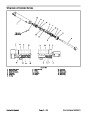
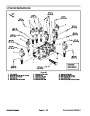
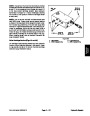
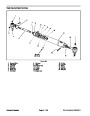
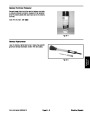
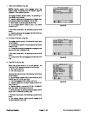
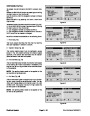
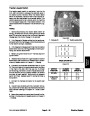
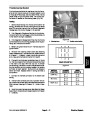
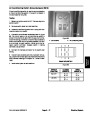
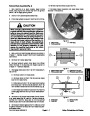
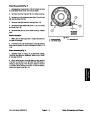
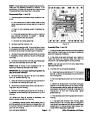
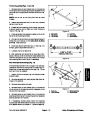
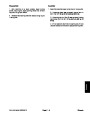
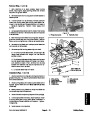
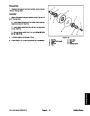
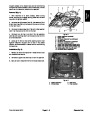
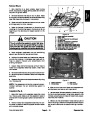
6. Connectmultimeter (ohmssetting) leadstorelayter-
minals 30 and 87. Ground terminal 86 and apply +12
VDC to terminal 85. The relay should make and break
continuity between terminals 30 and 87 as +12 VDC is
applied and removed from terminal 85.
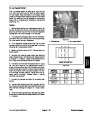
7.
Disconnect meter leads and jumper wires from the
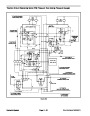
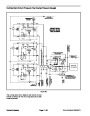
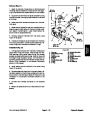
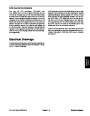
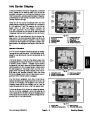
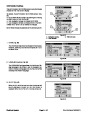
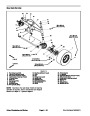
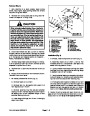
The main power relay supplies electrical power for the
Info Center Display, operator seat, power point recep-
tacle, horn, road lights, brake lights and optional electri-
cal equipment. The main power relay is energized when
the ignition switch is in the START or RUN position.
relay terminals. Reconnect machine wire harness con-
nector to relay.
8.
Install and secure power center cover.
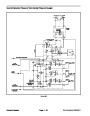
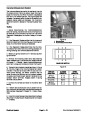
The controller relay supplies electrical input power for
the two (2) electrical controllers (TEC--5001 and
TEC--5002). The controller relay is energized when the
ignition switch is in the START or RUN position.
1
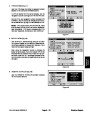
The start relay supplies electrical power for the engine
starter solenoid. The start relay is energized by the
TEC--5002 controller when the correct start functions
are initiated (ignition switch to RUN, traction pedal in
neutral, PTO switch OFF).
2
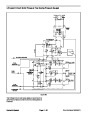
The cab relay used on the Groundsmaster 5910 sup-
plies power for cab electrical functions (air conditioning,
fan, windshield washer/wiper, cab work lights). This
relay is energized when the ignition switch is in the
START or RUN position.
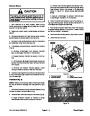
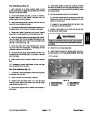
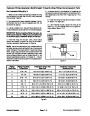
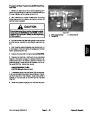
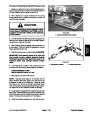
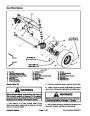
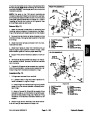
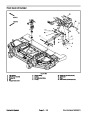
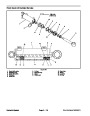
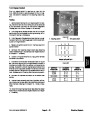
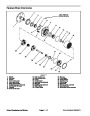
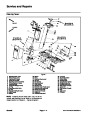
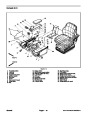
Figure 93
1.
Cover attachment screw
2.
Relay location
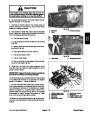
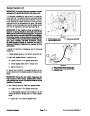
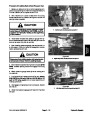
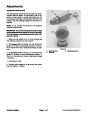
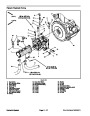
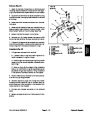
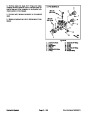
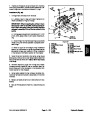
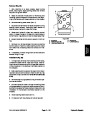
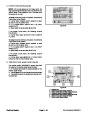
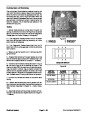
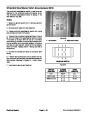
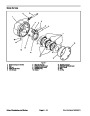
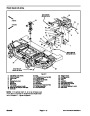
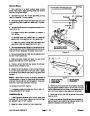
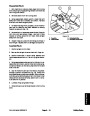
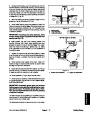
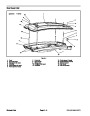
Testing
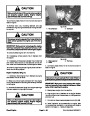
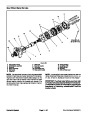
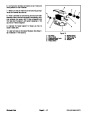
30
1.
Make sure ignition switch is OFF. Remove key from
ignition switch.
85
86
87
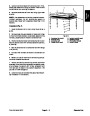
2.
Remove power center cover from operator platform
to access relays.
3.
from the relay to be tested.
Disconnect the machine wire harness connector
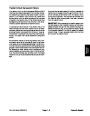
86
85
87
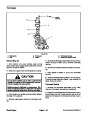
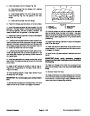
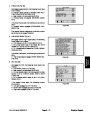
NOTE: Prior to taking small resistance readings with a
digital multimeter, short the meter test leads together.
The meter will display a small resistance value (usually
30
0.5
ohms or less). This resistance is due to the internal
resistance of the meter and test leads. Subtract this val-
ue from the measured value for the tested component.
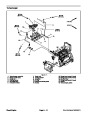
Figure 94
4.
sistance between terminals 85 and 86 (Fig. 94). Resist-
ance should be between 70 and 100 ohms.
Using a multimeter (ohms setting), measure coil re-
5.
Verify infinite resistance (no continuity) between ter-
minals 30 and 87.
Electrical System
Page 5 -- 52
Groundsmaster 5900/5910
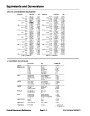
| Categories | Lawn Mower Manual, Sprinkler and Irrigation Manuals, Toro Sprinkler and Irrigation Manuals |
|---|---|
| Tags | Toro Groundsmaster 5900, Toro Groundsmaster 5910 |
| Download File |
|
| Document Type | Service Manual |
| Language | English |
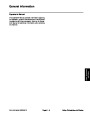
| Product Brand | Toro. Customer Service Representatives are available by phone:
Monday - Friday 7:30 a.m. to 9:00 p.m. (CDT) - Saturday 8:00 a.m. to 8:00 p.m. (CDT) - Sunday 10:00 a.m. to 8:00 p.m. (CDT)
Canada 1-888-225-4886 USA 1-888-384-9939, Lawn Mower |
| Document File Type | |
| Publisher | toro.com |
| Wikipedia's Page | Toro Company |
| Copyright | Attribution Non-commercial |
(0 votes, average: 0 out of 5)