


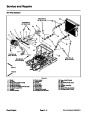
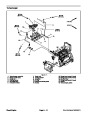
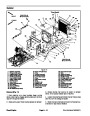


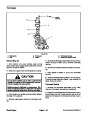
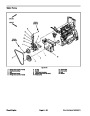
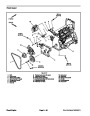

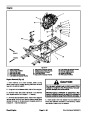

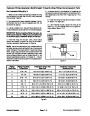


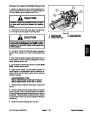
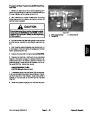

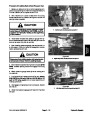

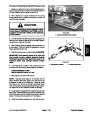
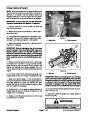

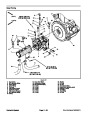


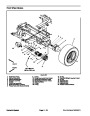

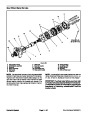

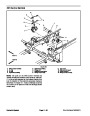
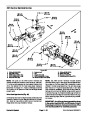


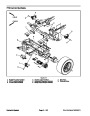


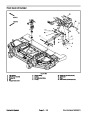

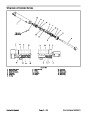
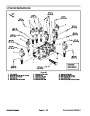


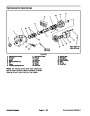

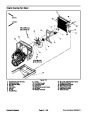


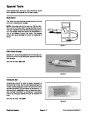


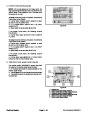
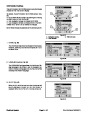
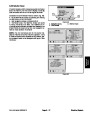


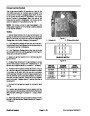


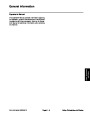
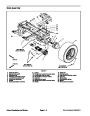
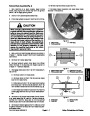


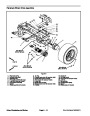

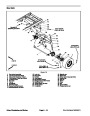
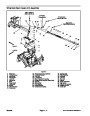

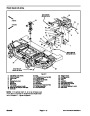

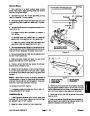


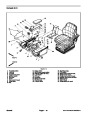


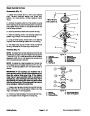


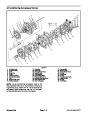


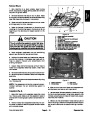


Install Brake Assembly (Fig. 2)
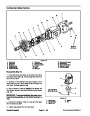
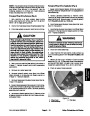
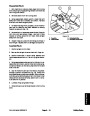
Make sure that internal retaining rings are fully
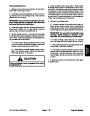
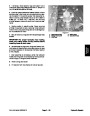
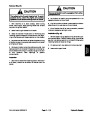
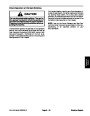
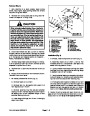
WARNING
1.
seated in grooves inside splined brake coupler (item 2).
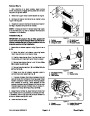
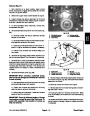
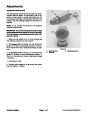
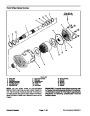
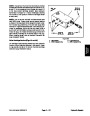
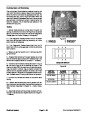
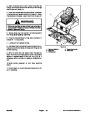
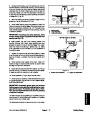
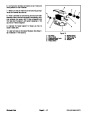
Slide splined brake coupler into brake assembly. Note:
Thestepped endofthecoupler mustbe installed toward
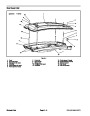
the hydraulic wheel motor (Fig. 4).
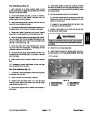
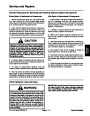
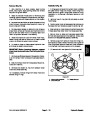
Failure to maintain proper wheel lug nut torque
could result in failure or loss of wheel and may
result in personal injury.
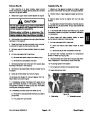
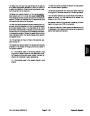
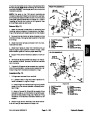
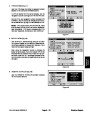
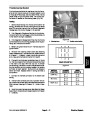
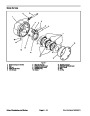
2.
sealing surfaces of new gasket (item 7). Apply gasket to
brake assembly.
Apply Loctite Gasket Sealant #2 (or equivalent) to
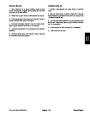
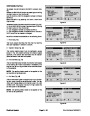
8.
a crossing pattern from 70 to 90 ft--lb (95 to 122 N--m).
Lower machine to ground. Torque wheel lug nuts in
9.
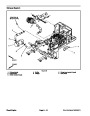
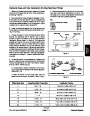
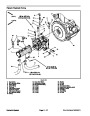
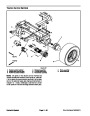
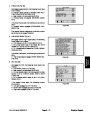
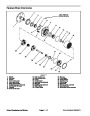
Make sure drain plug is installed in bottom of brake
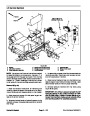
3.
brake coupler with input shaft on planetary wheel drive.
Position brake assembly to frame, aligning splined
assembly. Fill planetary wheel drive/brake assembly
with SAE 85W--140 gear lube to proper level. Capacity
is approximately 16 fl. oz. (0.47 l) per wheel.
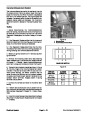
4.
Install four (4) flange head screws to secure brake
assembly to frame. Torque screws in a crossing pattern
from 75 to 85 ft--lb (101 to 115 N--m).
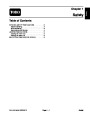
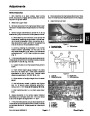
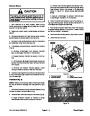
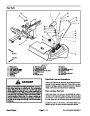
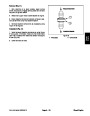
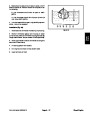
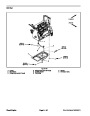
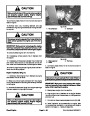
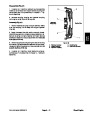
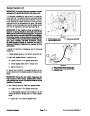
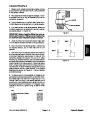
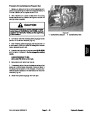
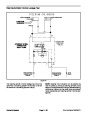
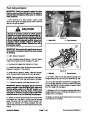
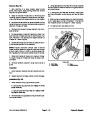
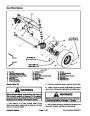
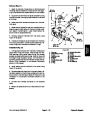
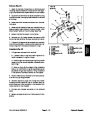
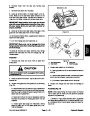
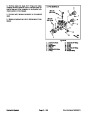
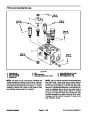
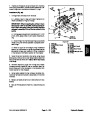
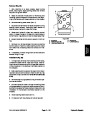
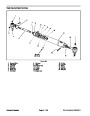
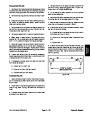
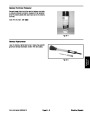
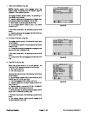
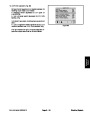
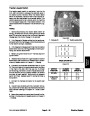
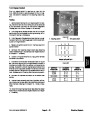
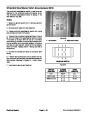
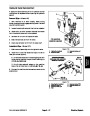
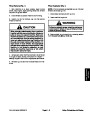
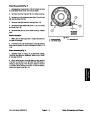
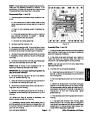
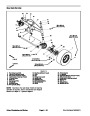
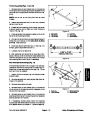
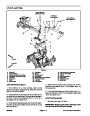
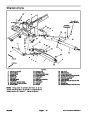
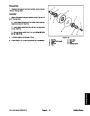
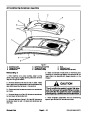
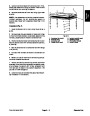
10.Check
and adjust brake cable for proper brake op-
eration. Brake lever should be from 0.470” to 0.530”
to 13.4 mm) from brake casting surface when
brake is disengaged (Fig. 6).
(12.0
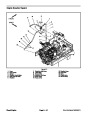
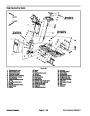
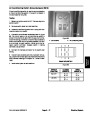
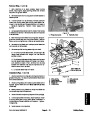
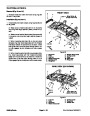
5.
Secure brake lever (item 14) to brake pull rod:
A. Position brake lever so that brake lever slot fits
around pull rod on brake assembly (Fig. 6).
B. Place two (2) washers (item 16) between brake
lever and frame bracket (Fig. 5).
0.470”
to 0.530”
(12.0
to 13.4 mm)
2
C. Slide clevis pin (item 17) through frame bracket,
washers and brake lever.
3
D. Secure brake lever to front axle frame with cotter
pin (item 13).
E. Make sure that brake lever rotates freely after as-
sembly.
4
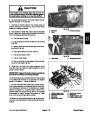
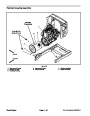
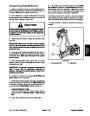
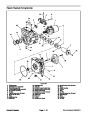
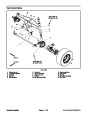
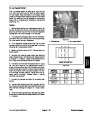
6.
wheel motor and torque cap screws from 75 to 85 ft--lb
Install new o--ring on hydraulic wheel motor. Install
(101
to 115 N--m) (see Front Wheel Motor Installation in
1
the Service and Repairs section of Chapter 4 -- Hydrau-
lic System).
Figure 6
7.
Install front wheel assembly.
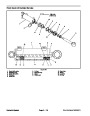
1.
2.
Brake assembly
Jam nut (2 used)
3.
4.
Brake pull rod
Brake lever
Axles, Planetaries and Brakes
Page 6 -- 8
Groundsmaster 5900/5910
| Categories | Lawn Mower Manual, Sprinkler and Irrigation Manuals, Toro Sprinkler and Irrigation Manuals |
|---|---|
| Tags | Toro Groundsmaster 5900, Toro Groundsmaster 5910 |
| Download File |
|
| Document Type | Service Manual |
| Language | English |
| Product Brand | Toro. Customer Service Representatives are available by phone:
Monday - Friday 7:30 a.m. to 9:00 p.m. (CDT) - Saturday 8:00 a.m. to 8:00 p.m. (CDT) - Sunday 10:00 a.m. to 8:00 p.m. (CDT)
Canada 1-888-225-4886 USA 1-888-384-9939, Lawn Mower |
| Document File Type | |
| Publisher | toro.com |
| Wikipedia's Page | Toro Company |
| Copyright | Attribution Non-commercial |
(0 votes, average: 0 out of 5)