


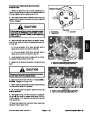


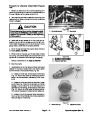


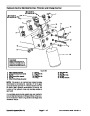


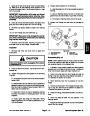


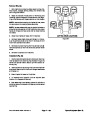


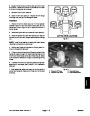


Relief Valve Service
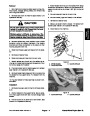
IMPORTANT: Do not remove the relief valve as-
sembly unless testing shows it to be faulty.
1.
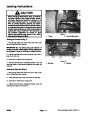
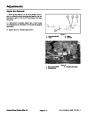
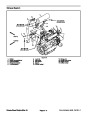
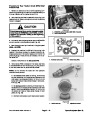
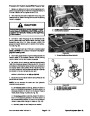
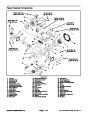
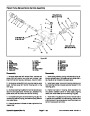
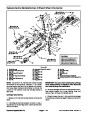
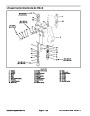
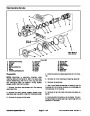
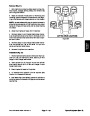
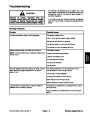
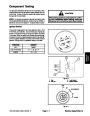
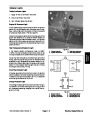
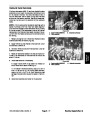
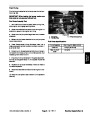
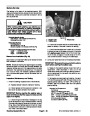
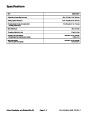
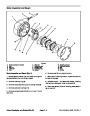
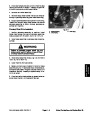
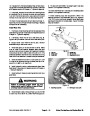
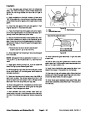
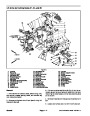
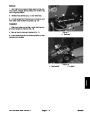
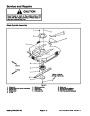
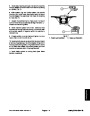
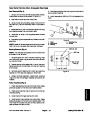
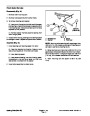
When removing or installing the relief valve, motor
should be removed from deck and positioned horizon-
tally with the relief valve pointed down (Fig. 83). This
process will prevent the relief valve from falling into mo-
tor passages.
5
4
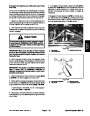
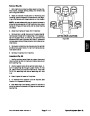
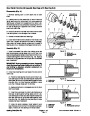
NOTE: The relief valve seat is difficult to remove be-
cause it has a thin, hex head and has sealant applied to
thethreads.Inspecttheseatcarefullyandremoveitonly
if damage or wear is identified.
3
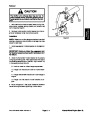
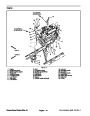
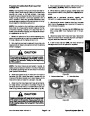
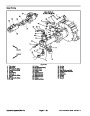
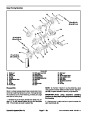
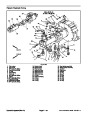
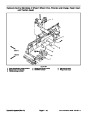
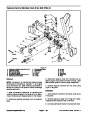
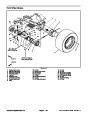
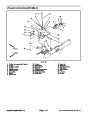
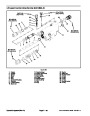
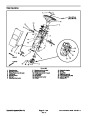
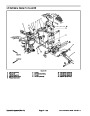
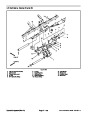
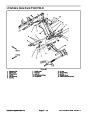
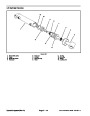
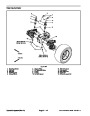
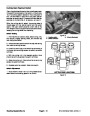
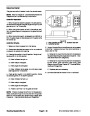
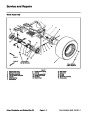
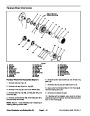
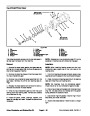
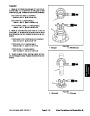
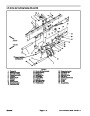
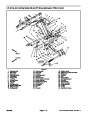
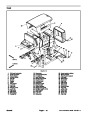
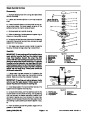
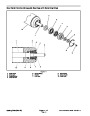
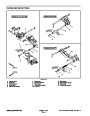
RELIEF VALVE KIT
2
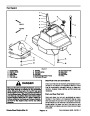
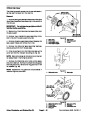
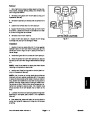
2.
from the rear cover.
Remove plug with o--ring, spring, and relief valve
1
3.
relief valve seat and plug threads in the rear cover.
Clean and inspect removed parts. Visually inspect
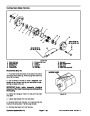
Figure 83
4.
5.
1.
2.
3.
Plug
O--ring
Spring
Relief valve
Relief valve seat
4.
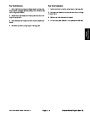
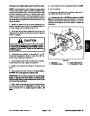
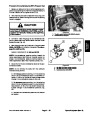
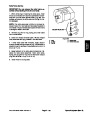
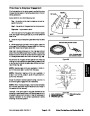
If relief valve seat was removed, apply medium
strength thread locking compound (e.g. Loctite #242) to
seatandinstallinrearcover.Torqueseatfrom4to6ft--lb
(5.4
to 8.1 N--m).
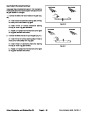
5.
Apply hydraulic oil to relief valve components. Re-
place the relief valve assembly: install relief valve,
spring, and plug with o--ring into the rear cover. Torque
plug from 30 to 35 ft--lb (41 to 47 N--m).
6.
Install motor on cutting deck.
Groundsmaster 4500--D/4700--D
Page 4 -- 93
Hydraulic System (Rev. A)
| Categories | Lawn Mower Manual, Sprinkler and Irrigation Manuals, Toro Sprinkler and Irrigation Manuals |
|---|---|
| Tags | Toro Groundsmaster 4500 D, Toro Groundsmaster 4700 D |
| Download File |
|
| Document Type | Service Manual |
| Language | English |
| Product Brand | Toro. Customer Service Representatives are available by phone:
Monday - Friday 7:30 a.m. to 9:00 p.m. (CDT) - Saturday 8:00 a.m. to 8:00 p.m. (CDT) - Sunday 10:00 a.m. to 8:00 p.m. (CDT)
Canada 1-888-225-4886 USA 1-888-384-9939, Lawn Mower |
| Document File Type | |
| Publisher | toro.com |
| Wikipedia's Page | Toro Company |
| Copyright | Attribution Non-commercial |
(0 votes, average: 0 out of 5)