


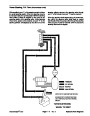
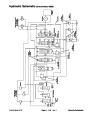


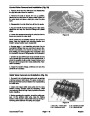
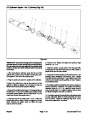
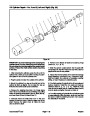


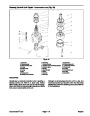
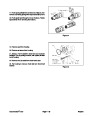


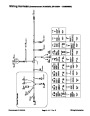


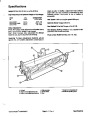


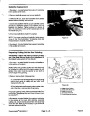


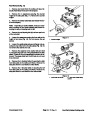


9.
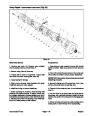
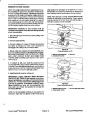
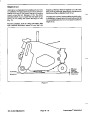
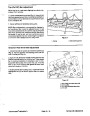
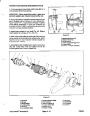
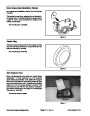
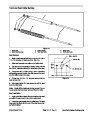
Place rotor set on a flat surface and center rotor
Before Assembling Motor
(Item 19) in stator (Item 21) such that two rotor lobes
are 180° apart and a roller vane (Item 20) centerline are
on the same stator centerline. Check the rotor lobe to
roller vane clearance with a feeler gage at this common
centerline. If there is more than .005 inches (0.13 mm)
of clearance, replace rotor set.
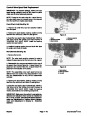
Replace all seals and seal rings with new ones. Lubri-
cate all seals and seal rings with hydraulic oil or clean
grease before assembly.
NOTE: Unless otherwise indicated, do not oil or grease
parts before assembly.
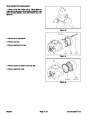
10.
Remove drive link (Item 13) from coupling shaft
(Item 11) if it was not removed with rotor set and wear
plate. Inspect drive link for cracks and for worn or
damaged splines. There should be no lash (play) be-
tween mating spline parts.
Wash all parts in clean petroleum-based solvents before
assembly. Blow them dry with compressed air. Remove
any paint chips from mating surfaces of the end cover,
sleeve, and housing and from port and sealing areas.
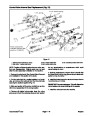
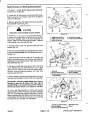
11.
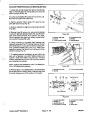
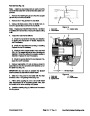
Remove thrust bearing (Item 12) and inspect for
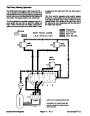
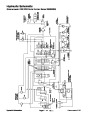
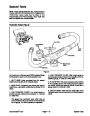
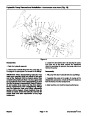
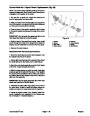
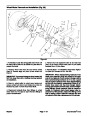
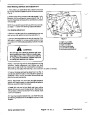
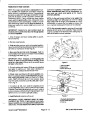
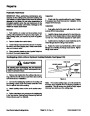
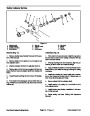
Assembly of Motor (Fig. 37, 38)
wear, brinelling, corrosion, and a complete set of rollers
retained in position.
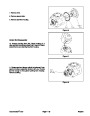
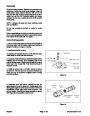
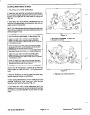
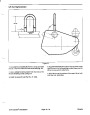
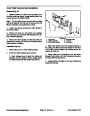
1. Place housing (Item 3) in a vise and clamp down on
housing port bosses with large bore end pointed up.
Apply clean grease to new seal (Item ) and assemble
into housing with seal lip pointed inward.
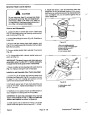
12. Remove coupling shaft (Item 11) by pushing on the
output end of shaft. Inspect coupling shaft bearing and
seal surfaces for spalling, nicks, grooves, severe wear
or corrosion and discoloration. Inspect for damaged or
worn keyway. Replace coupling shaft if any of these
conditions exist.
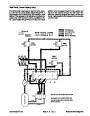
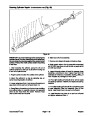
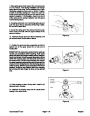
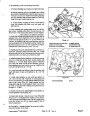
2. Install back-up washer (Item 4) into housing. Install
back-up washer (Item 6) into housing with beveled side
facing out so it will mate to inner seal (Item 7).
NOTE: Minor shaft wear in seal area is permissible. If
wear exceeds .020 inches (0.51 mm) diametrically,
replace coupling shaft.
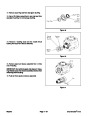
3. Apply a small amount of clean grease to back side of
new inner seal (Item 7) and assemble into housing.
4.
Lubricate and assemble coupling shaft (Item 11),
A slight “polish” is permissible in the shaft bearing area.
Anything more would require coupling shaft replace-
ment.
firmly seating it against thrust washer (Item 8).
5. Assemble thrust bearing (Item 12) onto end of cou-
pling shaft (Item 11).
13.
Remove inner seal (Item 7), back-up washer
(Item 6) and back-up washer (Item 4). Discard seal and
back up rings.
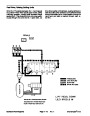
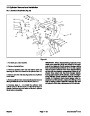
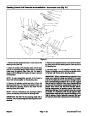
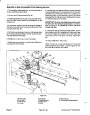
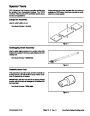
6. Assemble drive link (Item 13) into coupling shaft
(Item 11) with their splines in mesh. Align hole in drive
link with hole in coupling shaft.
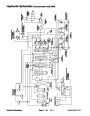
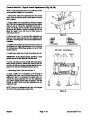
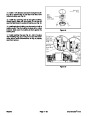
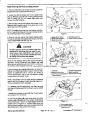
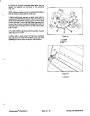
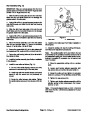
14. Remove housing (Item 3) from vise, turn over and
re-clamp in vise with dirt seal (Item 1) end pointed up.
NOTE: Two alignment studs screwed finger tight into
housing (Item ) bolt holes, approximately 180° apart, will
facilitate the assembly and alignment of components as
required in the following procedures.
15. Remove dirt seal (Item 1) and discard.
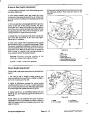
16. Inspect housing (Item 3) assembly for cracks, the
machined surfaces for nicks, burrs, brinelling or corro-
sion. Remove burrs that can be removed without chang-
ing dimensional characteristics. Inspect tapped holes
for thread damage.
NOTE: Make sure new seal rings (Item 5) are installed
between each section of motor as it is assembled.
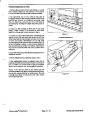
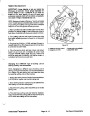
7. Assemble wear plate (Item 18) over drive link and
studs onto housing.
17.
Inspect the bearings (Item 2, 9, 10) and thrust
washers (Item 8). The bearing rollers must be firmly
retained in the bearing cages, but must rotate and orbit
freely. All rollers and the thrust washers must be free of
brinelling and corrosion.
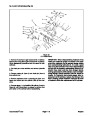
8. Install assembled rotor set (Item 21) with counterbore
in rotor (Item 19) down, if applicable, and splines in
mesh with drive link splines.
NOTE: If necessary, go to “Rotor, Stator, Vane Assem-
bly” procedures on next page.
Repairs
Page 4 - 56
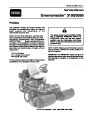
Greensmaster® 3100
| Categories | Lawn Mower Manual, Sprinkler and Irrigation Manuals, Toro Sprinkler and Irrigation Manuals |
|---|---|
| Tags | Toro Groundsmaster 3050, Toro Groundsmaster 3100 |
| Download File |
|
| Document Type | Catalog |
| Language | English |
| Product Brand | Toro. Customer Service Representatives are available by phone:
Monday - Friday 7:30 a.m. to 9:00 p.m. (CDT) - Saturday 8:00 a.m. to 8:00 p.m. (CDT) - Sunday 10:00 a.m. to 8:00 p.m. (CDT)
Canada 1-888-225-4886 USA 1-888-384-9939, Lawn Mower |
| Document File Type | |
| Publisher | toro.com |
| Wikipedia's Page | Toro Company |
| Copyright | Attribution Non-commercial |
(0 votes, average: 0 out of 5)