


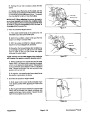
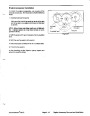


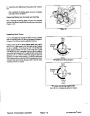


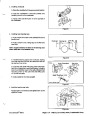
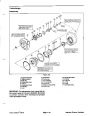
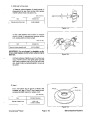


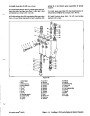
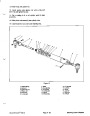


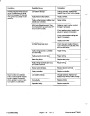


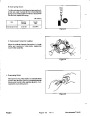
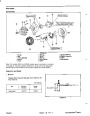
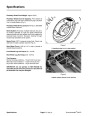


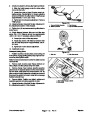
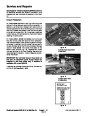


Check the shaft seal recess for scoring or damage that
could result in oil leakage around the outside diameter
of the shaft seal.
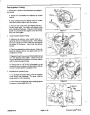
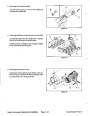
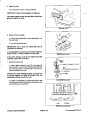
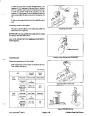
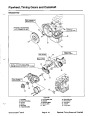
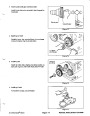
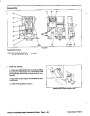
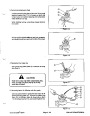
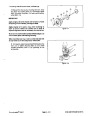
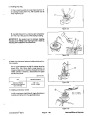
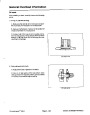
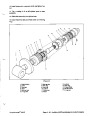
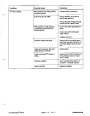
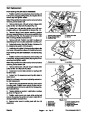
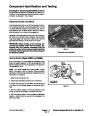
2. Put body on work bench so gear openings face up.
Install gears into their original positions in the body.
NOTE: Install gear with driveshaft into the side of the
body you marked in step 1 under Disassembly.
3.
NOTE: Replacement shaft seals can be refitted with
Loctite hydraulic sealant to overcome slight damage to
this area.
4.
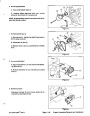
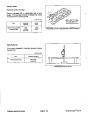
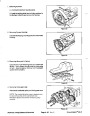
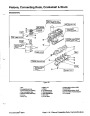
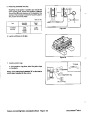
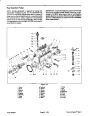
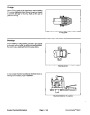
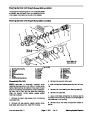
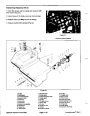
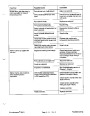
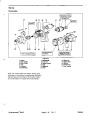
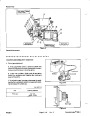
Install new load seals (7) on the load plate (4) you
marked “F”. Install load plate into mounting flange.
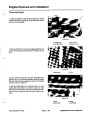
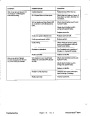
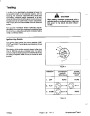
3.
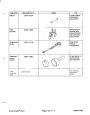
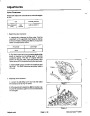
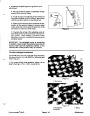
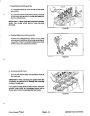
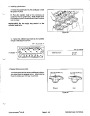
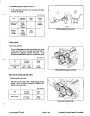
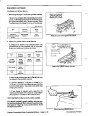
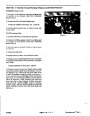
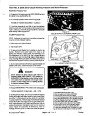
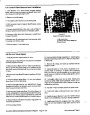
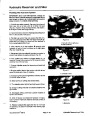
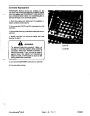
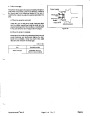
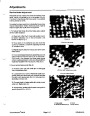
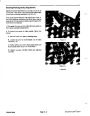
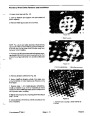
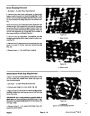
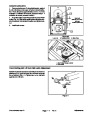
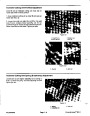
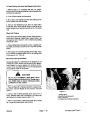
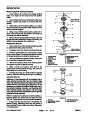
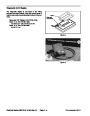
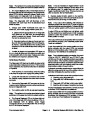
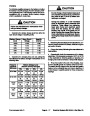
Load Plates: The side faces which are against the
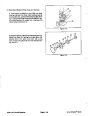
5.
6.
Install new O-ring seal (6) in mounting flange.
gears should be perfectly flat showing no signs of scor-
ing. Typically there are bright polished areas on this sur-
face caused by loading against the gear side faces. This
is often more noticeable on the low pressure side. The
load plates should be replaced if there is any general
scoring, fine scoring with a dull appearance, or tearing
of the surface material. Often there is an area where the
tips of the opposing gears have wiped an overlap with
a half moon shape. There must be no noticeable wear
step;itiscritical thattheload plate sideface iscomplete-
ly flat to the gear side face. The load plate bearing liners
should not show any scoring or other damage. The gen-
eral outside area of the load plate should not show any
significant wear.
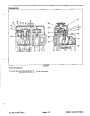
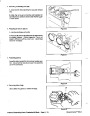
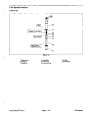
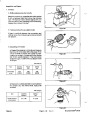
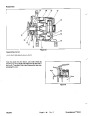
Install mounting flange over drive shaft and onto the
body.
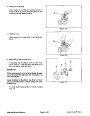
7.
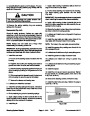
in a crossing pattern to a torque of 70 + ft--lb.
Install washers (2) and nuts (1). Tighten nuts evenly
8.
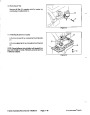
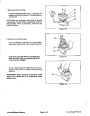
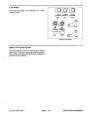
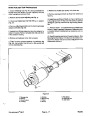
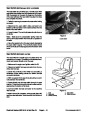
Install shaft seal.
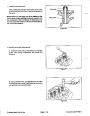
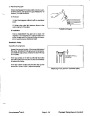
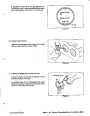
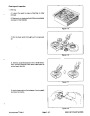
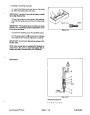
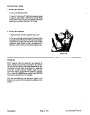
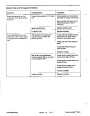
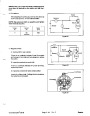
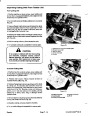
Shaft Seal Installation
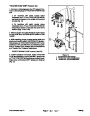
1. Apply grease to seal bore in mounting flange. NOTE:
If using Loctite hydraulic sealant to overcome slight
damage to the seal bore area, do not apply grease.
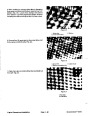
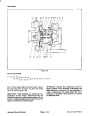
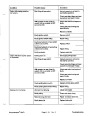
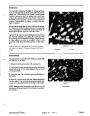
4.
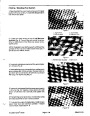
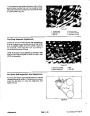
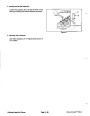
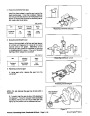
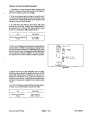
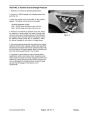
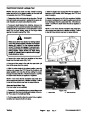
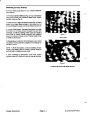
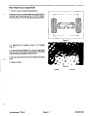
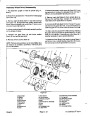
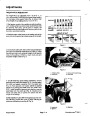
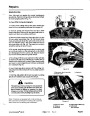
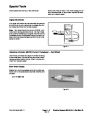
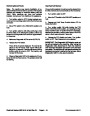
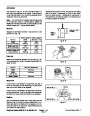
Gears: The gear faces should be examined for bruis-
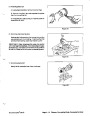
2. Pack lips of new shaft seal (3) with high melting point
grease.
ing or scoring. Operation with contaminated hydraulic
fluid will often show scoring between the root of the gear
and the journal that leaves a wear step. If a wear step
can be felt, along the root diameter, by drawing a sharp
pointed tool across the surface from the journal out-
wards toward the tip of the gear, then the gear is unser-
viceable and the motor should be replaced.
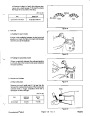
3. Install Mylar sleeve from seal kit onto drive shaft,
checking to make sure that the sleeve covers all sharp
edges of the shaft.
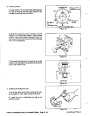
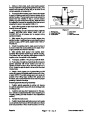
4.
Slidenewshaftsealontoshaftdowntoflangehousing
withtheexposedspringsideofthesealfacingthemotor.
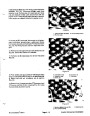
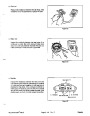
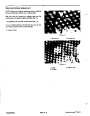
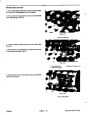
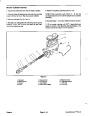
Thegearteethshouldbecarefullyexaminedforbruising
or pitting.
5.
bore.
Press the shaft seal in until it bottoms squarely in the
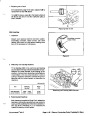
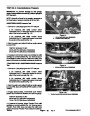
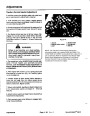
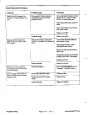
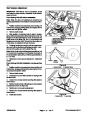
The journal bearing surfaces should be completely free
from scoring or bruising. The surface should appear
highly polished and smooth to the touch.
6.
a face shield, then install the retaining ring (6).
Put on protective eyewear, such as safety glasses or
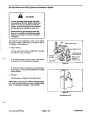
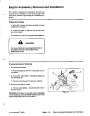
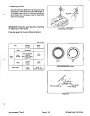
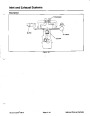
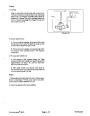
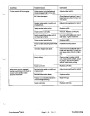
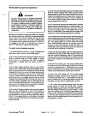
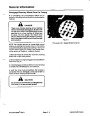
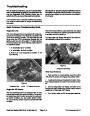
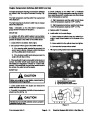
Running--in
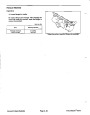
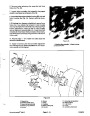
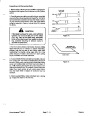
Examinetheareawheretheshaftseallipsrunonthedri-
veshaft, this shows up as a polished ring or rings. If a no-
ticeable groove can be felt or there is scoring, the shaft
is unserviceable and the motor should be replaced.
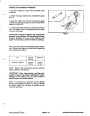
A motor which has been rebuilt with new load plates,
must be run-in before it is subjected to full load condi-
tions. Ideally this should be done on a test stand where
pressure can be gradually applied. If a test stand is not
available, install the motor on the machine and operate
thecuttingdeckatlowspeedwithnoloadforatleastone
minute. Gradually increase speed, running for one min-
ute at a time at each speed until you reach full engine
RPM.Stop themachineandchecktomakesure themo-
tor is not running hotter than the others.
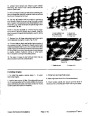
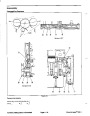
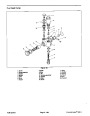
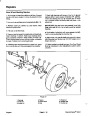
Reassembly
NOTE: Install new seals when reassembling the motor.
Use petroleum jelly to hold seals and O-rings in place
during assembly.
1.
Install new load seals (7) on the load plate (4) you
marked “B”. Install load plate (4) into body.
PTO System Repairs
Rev. A
Groundsmaster 580-D
Page 4 - 40.2
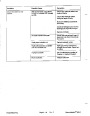
| Categories | Lawn Mower Manual, Sprinkler and Irrigation Manuals, Toro Sprinkler and Irrigation Manuals |
|---|---|
| Tags | Toro Groundsmaster 30581, Toro Groundsmaster 580 D |
| Download File |
|
| Document Type | Service Manual |
| Language | English |
| Product Brand | Toro. Customer Service Representatives are available by phone:
Monday - Friday 7:30 a.m. to 9:00 p.m. (CDT) - Saturday 8:00 a.m. to 8:00 p.m. (CDT) - Sunday 10:00 a.m. to 8:00 p.m. (CDT)
Canada 1-888-225-4886 USA 1-888-384-9939, Lawn Mower |
| Document File Type | |
| Publisher | toro.com |
| Wikipedia's Page | Toro Company |
| Copyright | Attribution Non-commercial |
(0 votes, average: 0 out of 5)