


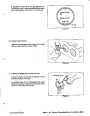
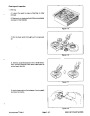


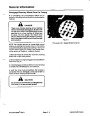


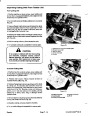

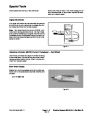


Belt Replacement
Front Cutting Unit (S/N below 220000000)
5
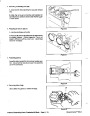
1.
Position machine onlevel surface, lower cutting unit
3
to shop floor, engage parking brake, shut engine off and
remove key from ignition switch.
2
Note: Wing spindle drive belts must be removed before
removing center section belt.
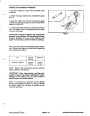
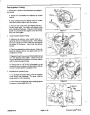
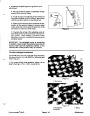
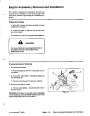
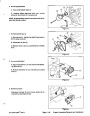
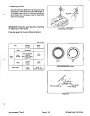
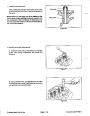
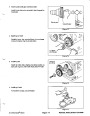
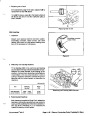
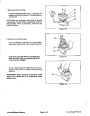
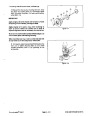
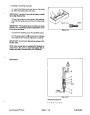
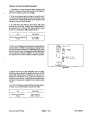
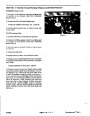
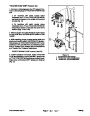
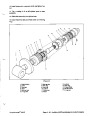
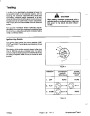
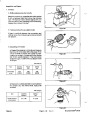
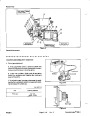
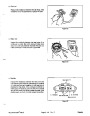
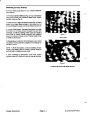
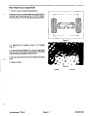
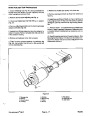
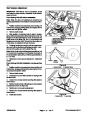
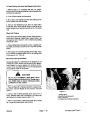
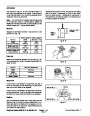
2.
pulley tension and slip belt off pulleys (Fig. 20).
Remove belt covers. Lift each wing to release idler
4
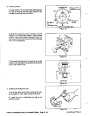
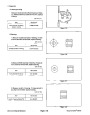
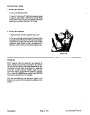
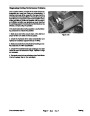
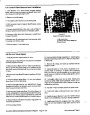
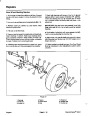
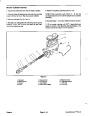
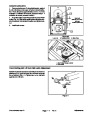
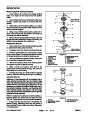
3.
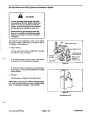
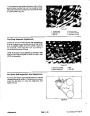
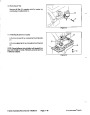
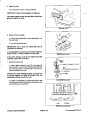
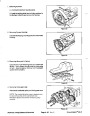
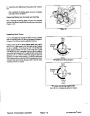
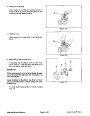
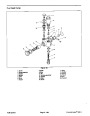
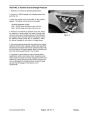
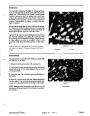
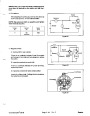
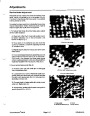
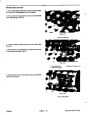
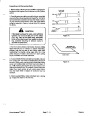
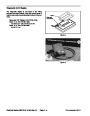
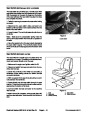
Loosen jam nuts securing tension arm until com-
pression spring on idler assembly is relaxed (Fig. 21).
1
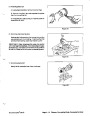
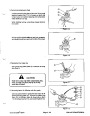
4.
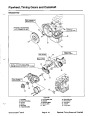
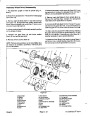
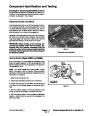
Remove flange head screws securing gearbox
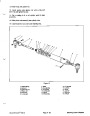
Figure 20
plate and separate plate and drive motor assembly from
the cutting unit (Fig. 20). Be careful not to bend, twist,
kink or damage flexible hydraulic lines.
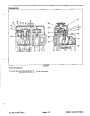
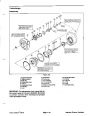
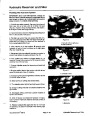
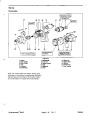
1.
2.
3.
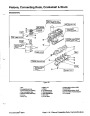
Tension Plate & Spring
Wing Unit Drive Belt
Gearbox Plate
4. Center Drive Belt
5. Lift Arm
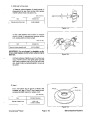
5.
Remove old belt. Position new belt in pulleys and
assemble gear box and plate assembly to cutting unit.
6.
Adjust belt tension (See Belt Tension Adjustment in
the Adjustments section of this chapter).
7.
over outer drive spindle pulleys and install belt covers.
Installwingdrivebelts.Liftwingstoallowbeltstoslip
2
2
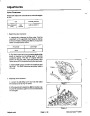
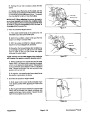
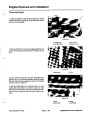
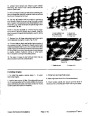
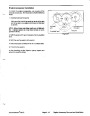
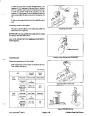
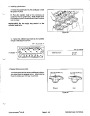
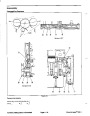
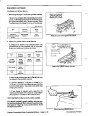
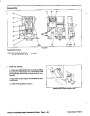
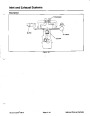
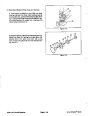
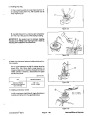
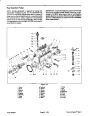
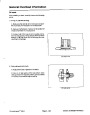
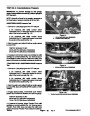
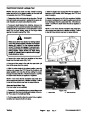
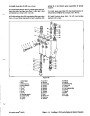
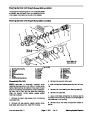
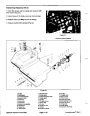
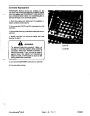
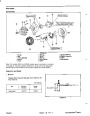
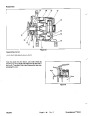
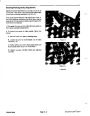
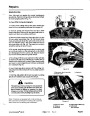
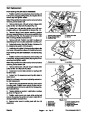
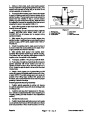
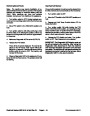
Front Cutting Unit (S/N 220000001 and above) (Fig.
21A)
1
1.
Position machine onlevel surface, lower cutting unit
to shop floor, engage parking brake, stop engine and re-
move key from ignition switch.
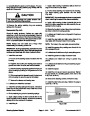
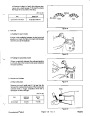
Figure 21
1.
Tension Arm
2. Jam Nuts
Note: Wing spindle drive belts must be removed before
removing center section belt.
2.
Remove belt covers. Lift each wing to release idler
pulley tension and slip belt off pulleys.
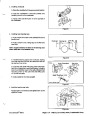
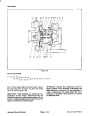
3.
Loosen jam nut and relieve tension on springs with
tensioner bolt.
5
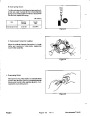
4.
motor mount.
Loosen four (4) capscrews securing slide plate to
1
5
Note: Do not loosen motor mount adjusting screws dur-
ing belt replacement.
2
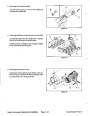
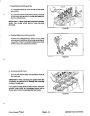
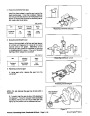
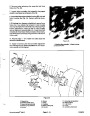
5.
Remove four (4) capscrews securing motor mount
to cutting deck. Position motor mount to allow belt re-
movaltakingcarenottobend,twist,kinkordamageflex-
ible hydraulic lines.
6
7
5
4
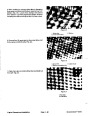
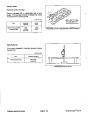
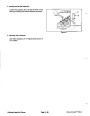
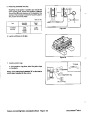
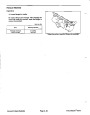
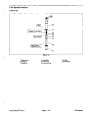
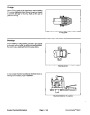
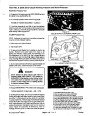
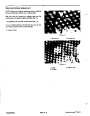
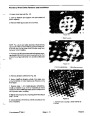
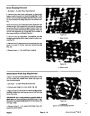
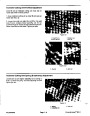
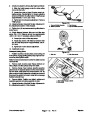
6.
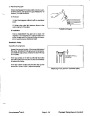
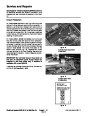
Replace belt(s) as required. Install belts on pulleys
as shown in Figure 21B.
8
7.
Position motor mount onto deck while routing belt
around drive pulley. Be careful not to bend, twist, kink or
damage flexible hydraulic lines.
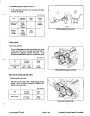
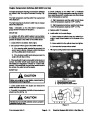
Figure 21A
8.
Secure motor mount to cutting deck with four (4)
1.
2.
3.
4.
Slide Plate
5. Mount Adjusting Screw
6. Tensioner Bolt
7. Center Deck Spindle
8. Height Gauge
capscrews.
Motor Mount
Drive Motor
Drive Pulley
Repairs
Groundsmaster 580--D
Page 7 -- 12 Rev. E
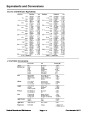
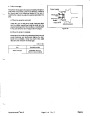
| Categories | Lawn Mower Manual, Sprinkler and Irrigation Manuals, Toro Sprinkler and Irrigation Manuals |
|---|---|
| Tags | Toro Groundsmaster 30581, Toro Groundsmaster 580 D |
| Download File |
|
| Document Type | Service Manual |
| Language | English |
| Product Brand | Toro. Customer Service Representatives are available by phone:
Monday - Friday 7:30 a.m. to 9:00 p.m. (CDT) - Saturday 8:00 a.m. to 8:00 p.m. (CDT) - Sunday 10:00 a.m. to 8:00 p.m. (CDT)
Canada 1-888-225-4886 USA 1-888-384-9939, Lawn Mower |
| Document File Type | |
| Publisher | toro.com |
| Wikipedia's Page | Toro Company |
| Copyright | Attribution Non-commercial |
(0 votes, average: 0 out of 5)