


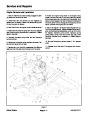


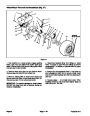

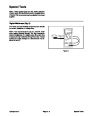

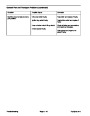
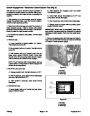
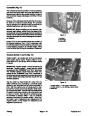
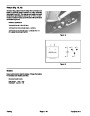


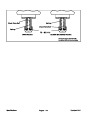
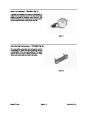
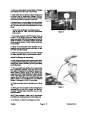
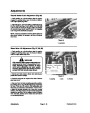
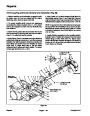
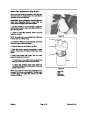
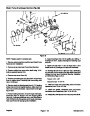
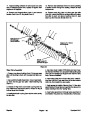
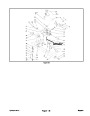


Water Valve Service (Fig. 39, 40)
The water valve controls the release of high pressure
water. The water valve is opened when a cam contacts
and moves a roller follower. The follower moves the
valve stem against spring pressure, which opens the
water valve. After discharge, the valve spring closes the
watervalve,divertingpumpflowintotheaccumulatorfor
storage. The valve stem is installed completely through
the water valve body and guided through a replaceable
bushing and two sealing assemblies.
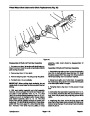
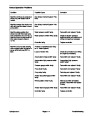
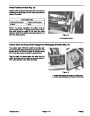
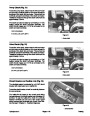
Water Valve Disassembly
Park machine on a level surface, stop the engine, en-
gage the parking brake, open the hood and disconnect
the engine spark plug wires.
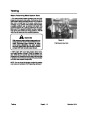
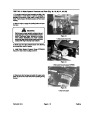
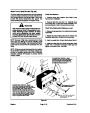
1.
WARNING: High pressure water system compo�
nents can cause personal injury if disassembled in�
correctly. Discharge water pressure at bleed valve
before attempting any water system servicing.
Open bleed valve slowly and avoid contact with
high velocity water stream.
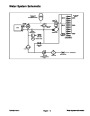
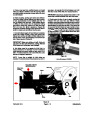
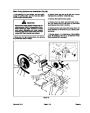
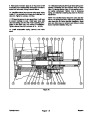
Thewatervalveconsistsofataperedvalvestemsealing
against a captured valve seat. The valve seat is sealed
on both sides. One valve seat seal contacts the water
valve body and the other seal contacts the manifold
feeder. When the manifold feeder is installed on the wa-
ter valve, the seals are compressed, locking in and
maintaining correct alignment of the water valve and
also preventing blow by.
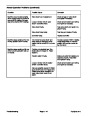
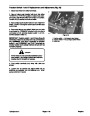
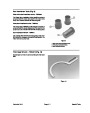
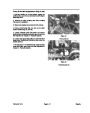
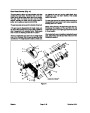
2.
Open High Pressure bleed valve. Remove accumula-
tor (see Accumulator Replacement). Remove manifold,
manifold feeder and manifold support as an assembly
from water valve body.
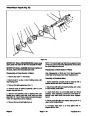
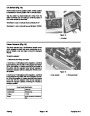
3.
Disconnect drive coupler from gear case hub adapter
(see Drive Coupling and Clutch Removal and Installa-
tion).
Any abrasives in the water will rapidly erode the valve
surfaces. The valve and valve seat can be ground and
lapped to renew their working surfaces. After grinding,
adjust the valve lift by measuring the lift and adjusting
the shim stack thickness. The shim stack is located be-
tween the water valve body and gear case flange.
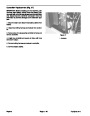
4.
Drain oil from gearcase. Disconnect hydraulic lines
from gearcase. Remove four (4) capscrews securing
gear case to water valve and carefully pull gear case off
of gear box pilot on water valve.
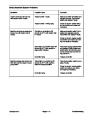
If the high pressure seal leaks for extended periods of
time, water may be forced past the oil seal and into the
gearbox.Ifthegearboxoillooksmilkyorbrown,flushthe
system immediately, replacing oil, filter, and fluids in hy-
drostatic transmission and wheel motor.
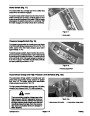
5.
Disconnect valve seal drain tube by unscrewing small
fitting at pump inlet. Remove two (2) locknuts from studs
securing water valve to frame. Remove four (4) caps-
crews connecting water valve to water pump head. Re-
move water valve and put it on a clean work bench.
The water valve assembly is similar to the pump head.
It uses the same ceramic sleeve and seals. Since the
water valve is the junction point for all high pressure liq-
uid movement and is fairly difficult to access, complete
rebuilding is recommended when this assembly is re-
moved.
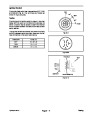
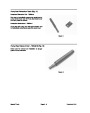
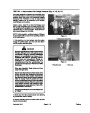
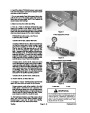
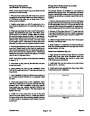
6.
Compressor (TOR4008) and into threaded holes of wa-
ter valve.
InstallvalvespringtoolstudsthroughtheValveSpring
7.
Tighten nuts to compress tool until retaining ring
(Item14) can be removed from valve spool. Remove re-
taining ring, then carefully loosen nuts on special tool re-
leasing valve spring compression.
Seal Replacement
There are two major seals in the water valve that will re-
quire regular maintenance or replacement. One seal
keeps high pressure water in the high pressure water
system and the other seal keeps the gear case oil within
the gear case.
8.
Remove spring retainer (Item 15) and spring (Item16)
from water valve stem. Remove screws (Item13) from
gear case pilot. Remove gear case pilot (Item18) from
water valve.
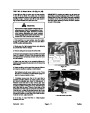
9.
and use a deep wall socket to loosen jam nut (Item 22)
on valve spool.
Use a wrench to keep spool valve (Item1) stationary
The high pressure water seal is identical to the pump
head displacement rod seal. The major difference is the
different brass insert.
10.
23),
Valve seat (Item 2) will come out with the valve.
Remove jam nut (Item 22) and large washer (Item
then gently push valve spool through valve body.
If the oil seal leaks, oil will leak down and through the
gear case shims. If low pressure water seal fails water
will leak out between shims. If low pressure water seal
and oil seal fail water will leak into the gear case.
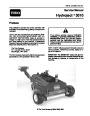
Hydroject 3010
Repairs
Page 6 – 29
Rev. B
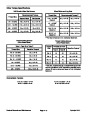
| Categories | Lawn Mower Manual, Sprinkler and Irrigation Manuals, Toro Sprinkler and Irrigation Manuals |
|---|---|
| Tags | Toro Hydroject 3010 |
| Download File |
|
| Document Type | Service Manual |
| Language | English |
| Product Brand | Toro. Customer Service Representatives are available by phone:
Monday - Friday 7:30 a.m. to 9:00 p.m. (CDT) - Saturday 8:00 a.m. to 8:00 p.m. (CDT) - Sunday 10:00 a.m. to 8:00 p.m. (CDT)
Canada 1-888-225-4886 USA 1-888-384-9939, Lawn Mower |
| Document File Type | |
| Publisher | toro.com |
| Wikipedia's Page | Toro Company |
| Copyright | Attribution Non-commercial |
(0 votes, average: 0 out of 5)