


MAINTENANCE
WHEEL BRACKET REPLACEMENT
AND OLDER MODELS)
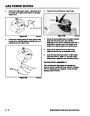
1977 And Newer Models — The muffler and wheel
bracket assembly must be removed. If the muffler will
not easily separate from the exhaust pipe, remove the
two bolts holding the exhaust pipe to the engine.
(1975
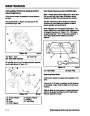
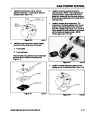
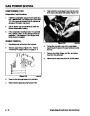
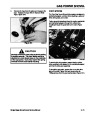
Often, when a single stage snowthrower is operated on
the wheels instead of tipped forward, the wheel bracket
holes will “wallow” (become oval shaped) and
necessitate replacement.
IMPORTANT: Model 38014 14” Snowmaster
8000001 and up. The 1978 14” Snowmasters use
the larger wheels found on the 20” model. To
obtain the proper spacing between the wheels, the
wheel brackets have been reversed and the axle
slightly shortened.
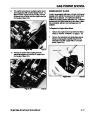
To replace the wheel brackets:
1.
2.
Drain all fuel from the fuel tank. Refer to "Draining
The Fuel Tank" on page 2 - 5. Complete step 1.
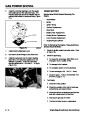
If the wheel brackets are bent inward, the axle appears
to be too long. If this occurs, the wheel and tire
assembly may contact the lower handle.
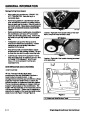
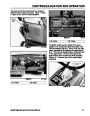
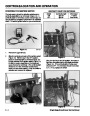
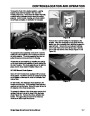
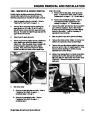
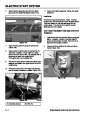
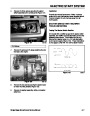
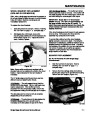
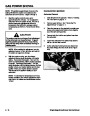
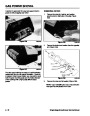
After tipping the unit forward, remove the
mounting bolts retaining the wheel brackets to the
lower handle (Figure 161). Inspect the axle for
wear, if evident, replace.
To correct this rubbing, bend the wheel brackets
slightly outward to remove the slack. If bending the
brackets is not satisfactory, additional washers can be
installed between the bracket and wheel. If bending
the brackets or the addition of one or two washers does
not remove the slack, use a bushing as a spacer.
Install the bushing between the wheel bracket and
single washer on each side.
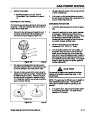
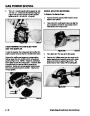
SCRAPER REPLACEMENT
For All 16" Powerlite And 20" Single Stage
Snowthrowers:
1.
Drain the fuel from the fuel tank. Refer to
"Draining The Fuel Tank" on page 2 - 5.
Complete Step 1.
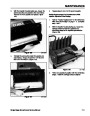
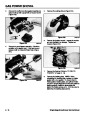
Figure 161
0217-073
Note: Some earlier models were equipped with a
shoulder bolt and nut retaining the wheel to the wheel
bracket. Inspect all parts for wear and replace if
necessary.
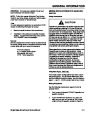
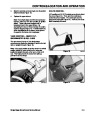
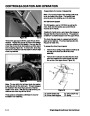
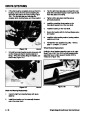
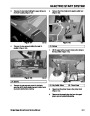
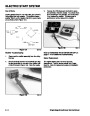
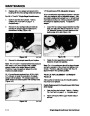
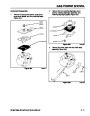
2.
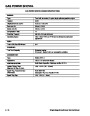
Remove the three carriage bolts and locknuts
securing the scraper to the snowthrower housing.
Remove the worn scraper (Figure 162).
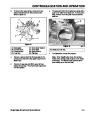
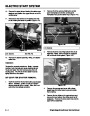
The 20” single stage snowthrowers have used two
different means of attaching the wheels.
1975 Models
— The axle passes through both the
muffler and the side plates. Either or both parts may
require replacement. If the muffler cannot be
separated from the exhaust pipe easily, remove the
two capscrews holding the exhaust pipe to the engine.
The side plates can be removed only by complete
disassembly of the snowthrower.
1976 Models — The axle rides on the side plates only.
Complete disassembly of the snowthrower is
necessary as the side plates are part of the frame.
Figure 162
0217-074
Single Stage Snowthrower Service Manual
7 - 1
| Categories | Snow Blower Manuals, Toro Snow Blower |
|---|---|
| Tags | Toro 1028 Power Shift, Toro 1332 Power Shift, Toro 38014, Toro 38030, Toro 38079, Toro 38087, Toro 38400, Toro 38405, Toro 38513, Toro 38543, Toro 38558, Toro 38559, Toro 38574, Toro 624, Toro 824, Toro 828, Toro 924, Toro CCR 1000 |
| Model Year | 1978, 1992, 1993, 1994, 1995, 1996, 1997, 1998, 1999, 2000, 2001, 2002, 2003 |
| Download File |
|
| Document Type | Service Manual |
| Language | English |
| Serial Number | 200000001 - 200999999 |
| Product Name | Toro CCR 1000 Snowthrower |
| Product Brand | Toro. Customer Service Representatives are available by phone:
Monday - Friday 7:30 a.m. to 9:00 p.m. (CDT) - Saturday 8:00 a.m. to 8:00 p.m. (CDT) - Sunday 10:00 a.m. to 8:00 p.m. (CDT)
Canada 1-888-225-4886 USA 1-888-384-9939, Snow Blower |
| Product Type | Snowthrower |
| Product Series | CCR 1000/2400/2500, Single Stage, Snowthrower |
| Swath | 20 inch |
| Discharge | Single Stage |
| Engine Manufacturer | Tecumseh |
| Engine Oil Type | Toro 2 cycle / NMMA-TCW3 |
| Engine Motor Model # | HSK635-1721A |
| Engine Motor Size | 3.5 hp |
| Engine Motor Type | 2 Cycle EPA1 |
| Document File Type | |
| Publisher | toro.com |
| Wikipedia's Page | Toro Company |
| Copyright | Attribution Non-commercial |
(0 votes, average: 0 out of 5)