


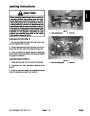

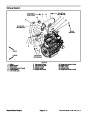
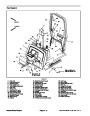


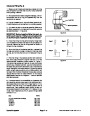

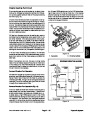
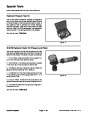

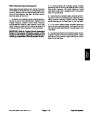
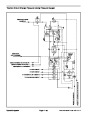

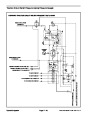
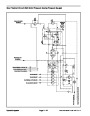
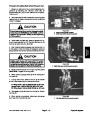
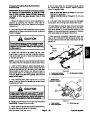


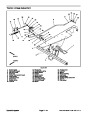

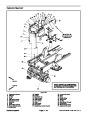
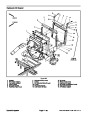

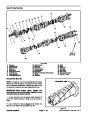


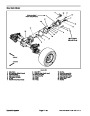
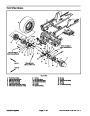


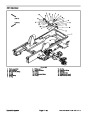
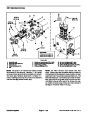
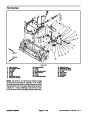
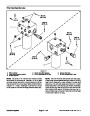


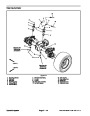

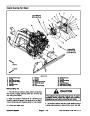


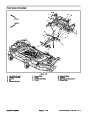
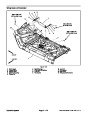


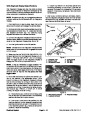


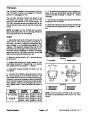
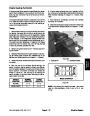
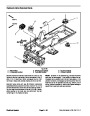
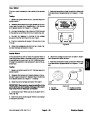
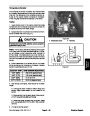
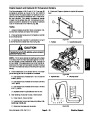


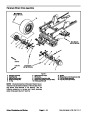
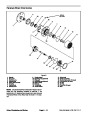

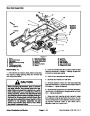
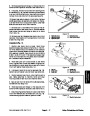


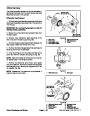
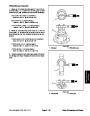


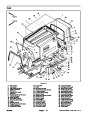


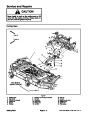

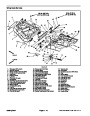
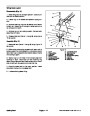

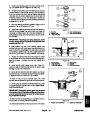


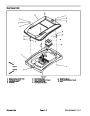


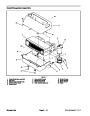


Removal (Fig. 77)
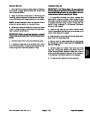
Park machine on a level surface, lower cutting deck,
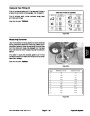
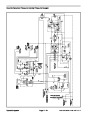
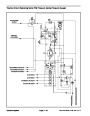
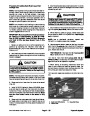
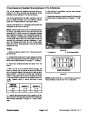
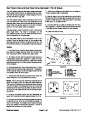
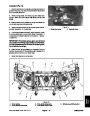
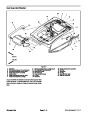
Installation (Fig. 77)
1.
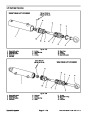
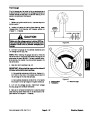
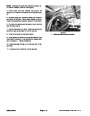
1. If removed, install ball joints into steering cylinder.
stop engine, engage parking brake and remove key
from the ignition switch.
2.
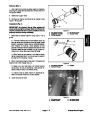
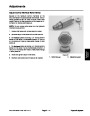
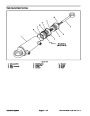
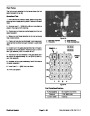
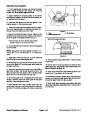
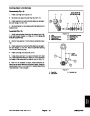
If fittings were removed from steering cylinder, lubri-
cate and place new O--rings onto fittings. Install fittings
intoportopeningsusingmarksmadeduringtheremoval
process to properly orientate fittings. Tighten fittings
(see Hydraulic Fitting Installation in the General Infor-
mation section of this chapter).
2.
Installing Hydraulic System Components at the begin-
ning of this section.
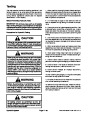
Read the General Precautions for Removing and
3.
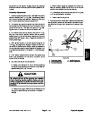
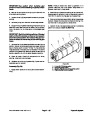
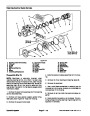
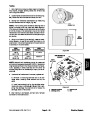
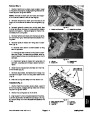
To prevent contamination of hydraulic system during
steering cylinder removal, thoroughly clean exterior of
cylinder and fittings.
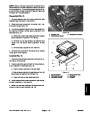
3. Thoroughly clean tapered surfaces of ball joints and
axle bores.
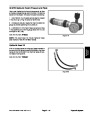
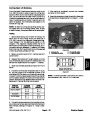
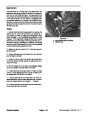
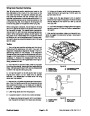
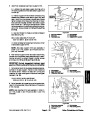
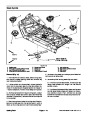
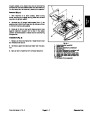
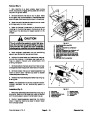
NOTE: Toeaseinstallation,labelthehydraulichosesto
show their correct position on the steering cylinder.
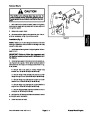
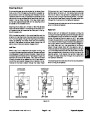
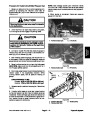
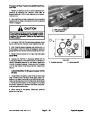
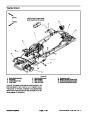
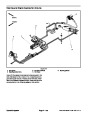
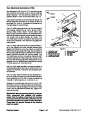
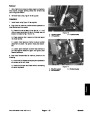
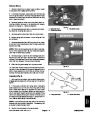
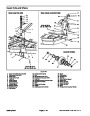
4. Slide rod end ball joint through hole on steering arm.
Secure with axle washer and hex slotted nut. Slide bar-
rel end ball joint through hole on axle. Secure with ball
joint spacer and slotted hex nut. Torque slotted hex nuts
to 100 ft--lbs (135 N--m) and then continue tightening
the nut until hex nut groove aligns with cotter pin hole in
ball joint (final torque on hex nuts should be from 100 to
4.
5.
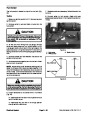
and ball joint spacer from the threaded ends of ball
joints.
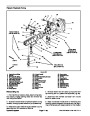
Remove hydraulic hoses from steering cylinder.
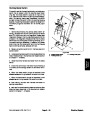
Remove cotter pins, hex slotted nuts, axle washer
125
ft--lb (136 to 169 N--m)). Install cotter pin to nut and
ball joint.
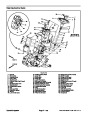
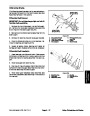
6.
Separate steering cylinder ball joints from rear axle.
Remove steering cylinder with ball joints from machine.
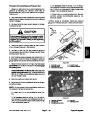
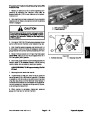
5.
Using labels placed during cylinder removal, proper-
ly install hydraulic hoses to steering cylinder (see Hy-
draulic Hose and Tube Installation in the General
Information section of this chapter).
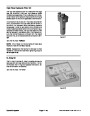
7.
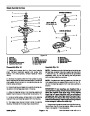
cylinder, mark fitting orientation to allow correct assem-
bly. Remove fittings from cylinder and discard O--rings.
If hydraulic fittings are to be removed from steering
6.
Fill reservoir with hydraulic fluid as required.
8.
If needed, remove ball joints from steering cylinder.
7.
dertoverifythathydraulichosesandfittingsarenotcon-
tacted by anything.
After assembly is completed, operate steering cylin-
Groundsmaster 4100--D/4110--D
Page 4 -- 113
Hydraulic System
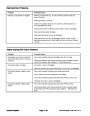
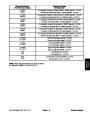
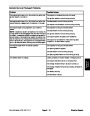
| Categories | Lawn Mower Manual, Sprinkler and Irrigation Manuals, Toro Sprinkler and Irrigation Manuals |
|---|---|
| Tags | Toro Groundsmaster 10177SL, Toro Groundsmaster 30447, Toro Groundsmaster 30449, Toro Groundsmaster 4100, Toro Groundsmaster 4110 D |
| Download File |
|
| Document Type | Service Manual |
| Language | English |
| Product Brand | Toro. Customer Service Representatives are available by phone:
Monday - Friday 7:30 a.m. to 9:00 p.m. (CDT) - Saturday 8:00 a.m. to 8:00 p.m. (CDT) - Sunday 10:00 a.m. to 8:00 p.m. (CDT)
Canada 1-888-225-4886 USA 1-888-384-9939, Lawn Mower |
| Document File Type | |
| Publisher | toro.com |
| Wikipedia's Page | Toro Company |
| Copyright | Attribution Non-commercial |
(0 votes, average: 0 out of 5)