


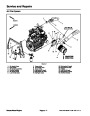


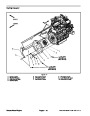


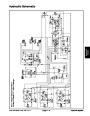
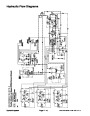
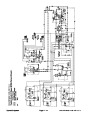
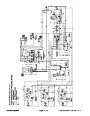
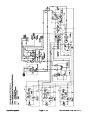
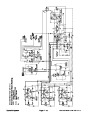

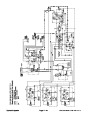
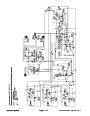
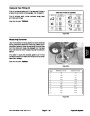

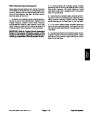
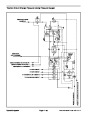

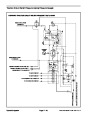
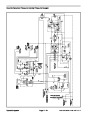
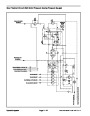
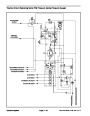
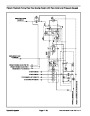
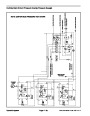
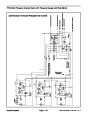
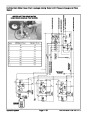
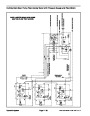


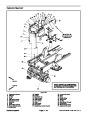

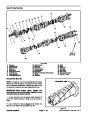

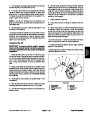


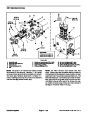
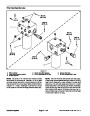


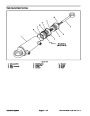

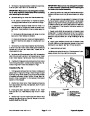


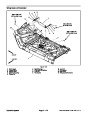


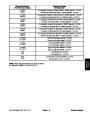


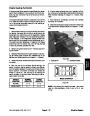
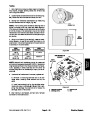
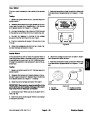
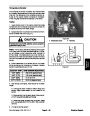
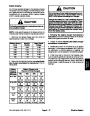


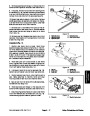


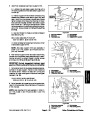

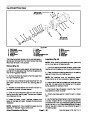
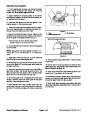


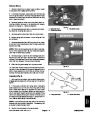

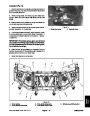


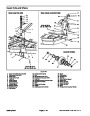


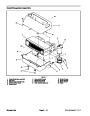


NOTE: The ports on the PTO manifolds are marked for
easy identification of components. Example: SV1 is the
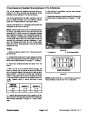
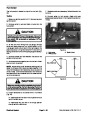
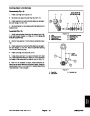
deck solenoid valve and P1 is a gear pump connection
port (see Hydraulic Schematic in Chapter 10 -- Foldout
Drawings to identify the function of the hydraulic lines
and cartridge valves at each manifold port).
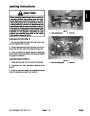
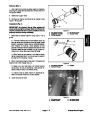
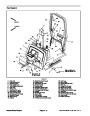
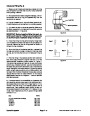
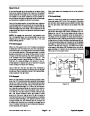
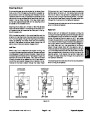
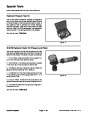
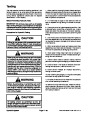
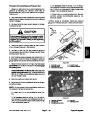
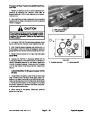
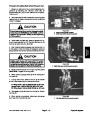
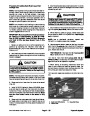
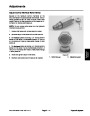
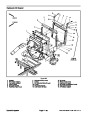
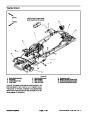
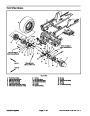
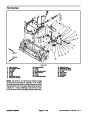
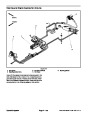
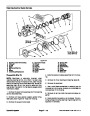
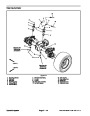
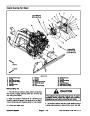
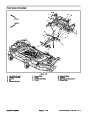
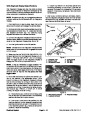
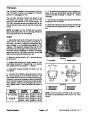
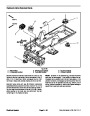
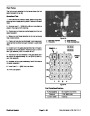
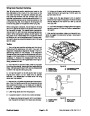
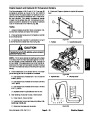
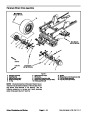
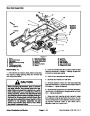
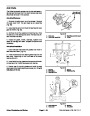
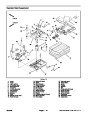
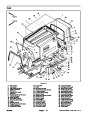
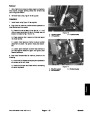
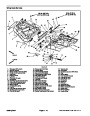
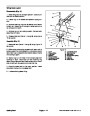
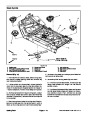
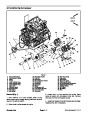
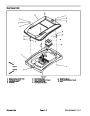
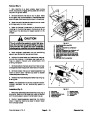
Installation (Fig. 96)
If fittings were removed from manifold, lubricate and
place new O--rings onto fittings. Install fittings into man-
ifold openings using marks made during the removal
process to properly orientate fittings. Tighten fittings
(see Hydraulic Fitting Installation in the General Infor-
mation section of this chapter).
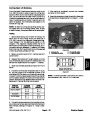
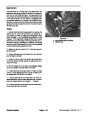
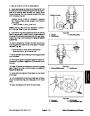
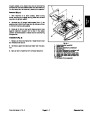
1.
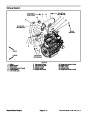
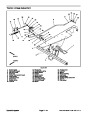
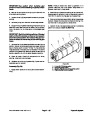
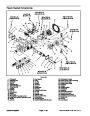
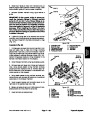
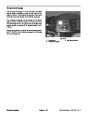
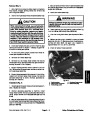
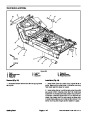
The PTO control manifolds for the three (3) cutting deck
sections are very similar.
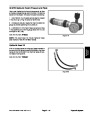
2.
InstallhydraulicPTOmanifoldtotheframeusingFig-
IMPORTANT: When servicing the PTO manifolds,
DO NOT interchange parts from one control man-
ifold to another.
ure 96 as guide.
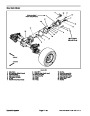
NOTE: Make sure that lock washer and ground cable
arepositioned underuppercapscrewheadwheninstal-
ling RH PTO manifold.
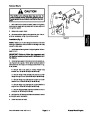
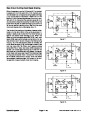
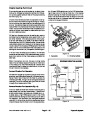
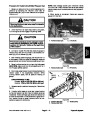
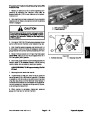
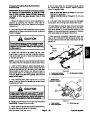
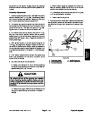
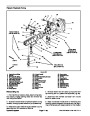
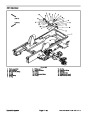
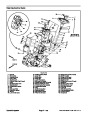
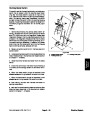
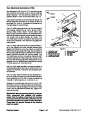
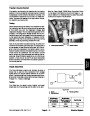
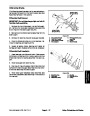
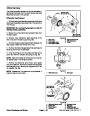
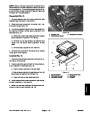
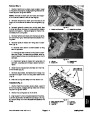
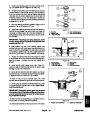
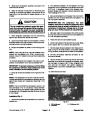
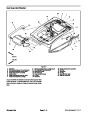
Removal (Fig. 96)
1.
Installing Hydraulic System Components at the begin-
ning of this section.
Read the General Precautions for Removing and
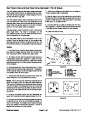
3. Remove caps and plugs from fittings and hoses. Us-
inglabelsplacedduringmanifoldremoval,properlycon-
necthydrauliclinestomanifold(seeHydraulicHoseand
Tube Installation in the General Information section of
this chapter).
2.
manifold removal, thoroughly clean exterior of manifold
and fittings.
To prevent contamination of hydraulic system during
4. Connect wire harness connector to the solenoid
valve coil on the PTO manifold.
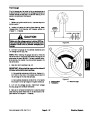
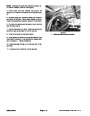
3.
Disconnect wire harness connector from the sole-
noid valve.
5. Makesurehydraulic tankisfull.Addcorrectoilifnec-
essary before returning machine to service.
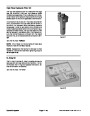
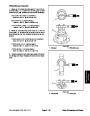
4.
Disconnect hydraulic lines from manifold and put
caps or plugs on open hydraulic lines and fittings. Label
disconnected hydraulic lines for proper installation.
NOTE: The upper cap screw on the right side PTO
manifold also secures the ground cable and has a lock
washer to ensure a good grounding path. Make sure
that lock washer is retrieved when removing RH PTO
manifold from frame.
5.
Remove hydraulic PTO manifold from the frame us-
ing Figure 96 as guide.
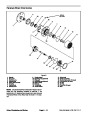
6.
mark fitting orientation to allow correct assembly. Re-
move fittings from manifold and discard O--rings.
If hydraulic fittings are to be removed from manifold,
Groundsmaster 4100--D/4110--D
Page 4 -- 133
Hydraulic System
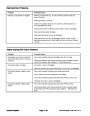
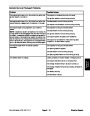
| Categories | Lawn Mower Manual, Sprinkler and Irrigation Manuals, Toro Sprinkler and Irrigation Manuals |
|---|---|
| Tags | Toro Groundsmaster 10177SL, Toro Groundsmaster 30447, Toro Groundsmaster 30449, Toro Groundsmaster 4100, Toro Groundsmaster 4110 D |
| Download File |
|
| Document Type | Service Manual |
| Language | English |
| Product Brand | Toro. Customer Service Representatives are available by phone:
Monday - Friday 7:30 a.m. to 9:00 p.m. (CDT) - Saturday 8:00 a.m. to 8:00 p.m. (CDT) - Sunday 10:00 a.m. to 8:00 p.m. (CDT)
Canada 1-888-225-4886 USA 1-888-384-9939, Lawn Mower |
| Document File Type | |
| Publisher | toro.com |
| Wikipedia's Page | Toro Company |
| Copyright | Attribution Non-commercial |
(0 votes, average: 0 out of 5)