

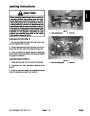

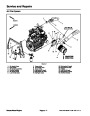
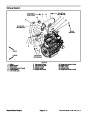


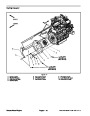

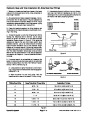
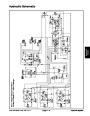
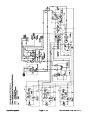
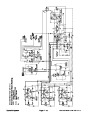

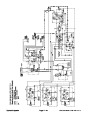
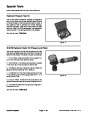

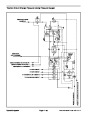

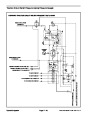
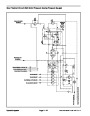
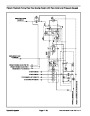
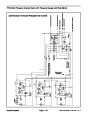
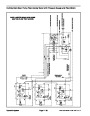


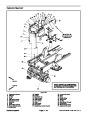
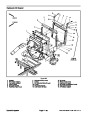

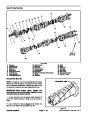
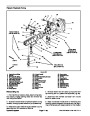
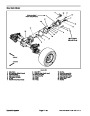


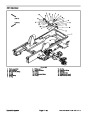
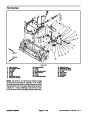
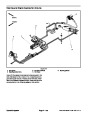


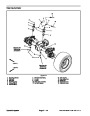

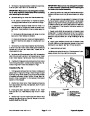


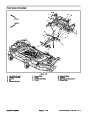
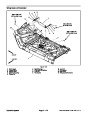


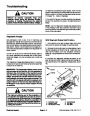
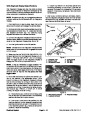


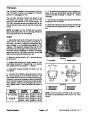
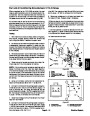
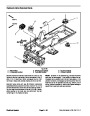
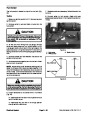
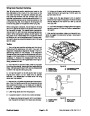
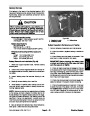


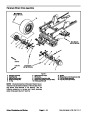
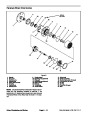

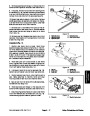


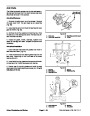


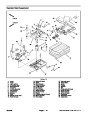
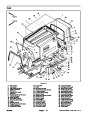


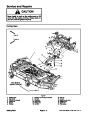

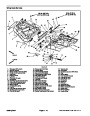
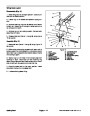

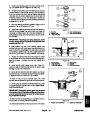


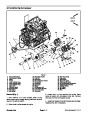
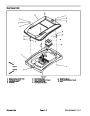


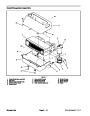


Fuel Tank Installation (Fig. 7)
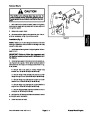
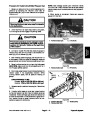
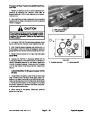
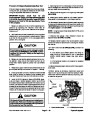
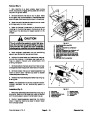
DANGER
1.
Install fuel tank using Figure 7 as a guide.
A. Torque two (2) flange nuts that secure the fuel
tank to the frame from 60 to 80 in--lb (7 to 9 N--m).
Becausedieselfuelishighlyflammable,usecau-
tion when storing or handling it. Do not smoke
while filling the fuel tank. Do not fill fuel tank
while engine is running, hot or when machine is
in an enclosed area. Always fill fuel tank outside
and wipe up any spilled diesel fuel before start-
ing the engine. Store fuel in a clean, safety--ap-
proved container and keep cap in place. Use die-
sel fuel for the engine only; not for any other
purpose.
2.
3.
Install two (2) tank covers to ROPS assembly.
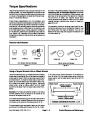
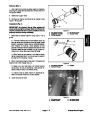
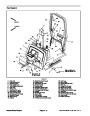
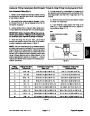
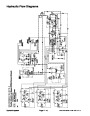
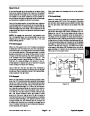
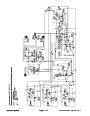
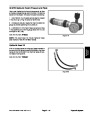
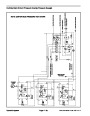
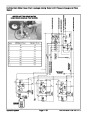
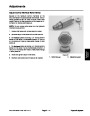
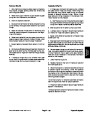
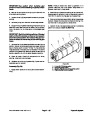
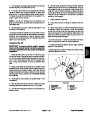
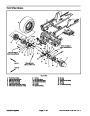
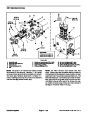
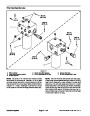
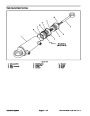
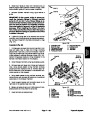
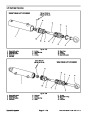
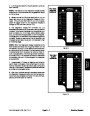
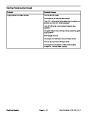
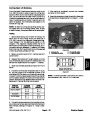
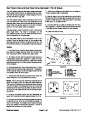
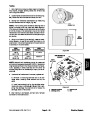
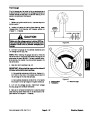
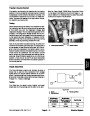
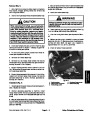
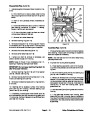
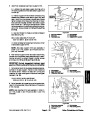
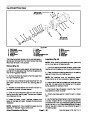
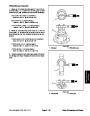
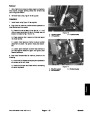
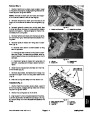
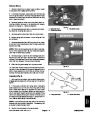
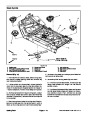
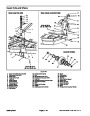
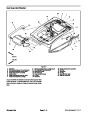
Connect fuel supply hose to the standpipe and vent
and overflow hoses to the elbow fittings (Fig. 8).
4.
er.
Connect wire harness connections to the fuel send-
A. Connect white wire to the center terminal and
black wire to any of the screws that secure the fuel
sender to the fuel tank.
Check Fuel Lines and Connections
Check fuel lines and connections periodically as recom-
mended in the Operator’s Manual. Check lines for dete-
rioration, damage, leaks or loose connections. Replace
hoses, clamps and connections as necessary.
B. Apply skin--over grease to the wire terminal con-
nections.
Empty and Clean Fuel Tank
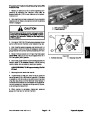
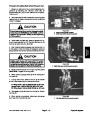
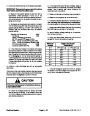
CAUTION
Empty and clean the fuel tank periodically as recom-
mended in the Operator’s Manual. Also, empty and
clean the fuel tank if the fuel system becomes contami-
nated or if the machine is to be stored for an extended
period.
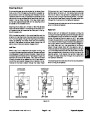
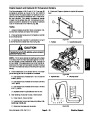
Connecting battery cables to the wrong battery
post could result in personal injury and/or dam-
age to the electrical system.
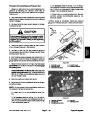
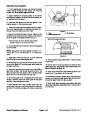
5.
Positionbatteryinmachine.Connectpositivebattery
cable first and then negative battery cable. Install bat-
tery strap and cover.
To clean fuel tank, flush tank out with clean diesel fuel.
Make sure tank is free of contaminates and debris.
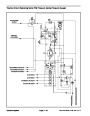
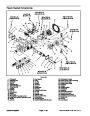
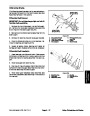
Fuel Tank Removal (Fig. 7)
6.
7.
Lower and secure seat and hood.
Fill fuel tank.
1.
Park machine on a level surface, lower cutting deck,
stop engine, engage parking brake and remove key
from the ignition switch.
2.
3.
tive battery cable first and then positive battery cable.
Remove battery from machine.
Raise and support seat and hood.
Remove battery cover and strap. Disconnect nega-
3
1
4.
Use a fuel transfer pump to remove fuel from the fuel
tank and into a suitable container.
5.
the fuel tank.
Disconnect electrical wiring from the fuel sender on
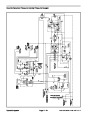
2
6.
ventandoverflowhosesfromelbowfittingsintopoftank
(Fig. 8).
Disconnect fuel supply hose from standpipe and
4
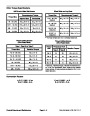
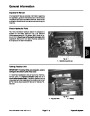
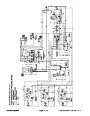
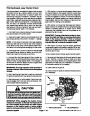
Figure 8
7.
tank covers (item 35) to ROPS assembly. Remove tank
covers.
Remove phillips head screws that secure two (2)
1. Fuel supply hose
2. Vent hose
3.
4.
Overflow hose
Fuel sender
8.
Remove fuel tank using Figure 7 as a guide.
Groundsmaster 4100--D/4110--D
Page 3 -- 9
Kubota Diesel Engine
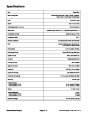
| Categories | Lawn Mower Manual, Sprinkler and Irrigation Manuals, Toro Sprinkler and Irrigation Manuals |
|---|---|
| Tags | Toro Groundsmaster 10177SL, Toro Groundsmaster 30447, Toro Groundsmaster 30449, Toro Groundsmaster 4100, Toro Groundsmaster 4110 D |
| Download File |
|
| Document Type | Service Manual |
| Language | English |
| Product Brand | Toro. Customer Service Representatives are available by phone:
Monday - Friday 7:30 a.m. to 9:00 p.m. (CDT) - Saturday 8:00 a.m. to 8:00 p.m. (CDT) - Sunday 10:00 a.m. to 8:00 p.m. (CDT)
Canada 1-888-225-4886 USA 1-888-384-9939, Lawn Mower |
| Document File Type | |
| Publisher | toro.com |
| Wikipedia's Page | Toro Company |
| Copyright | Attribution Non-commercial |
(0 votes, average: 0 out of 5)