

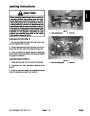
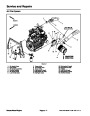
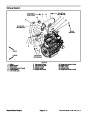


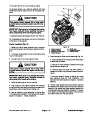
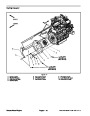

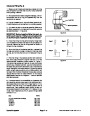
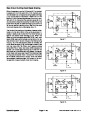

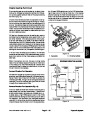
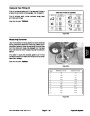


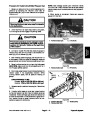
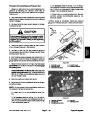
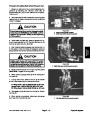
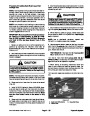


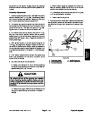

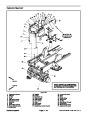

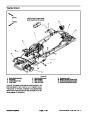
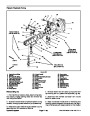
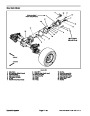


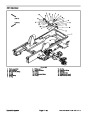
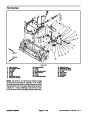
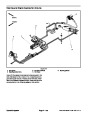


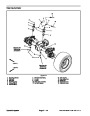

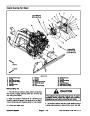


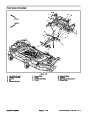
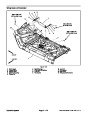

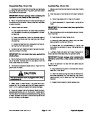


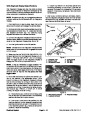


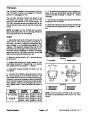
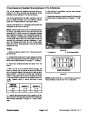
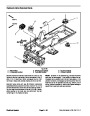
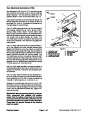
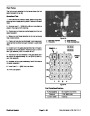
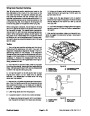


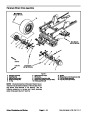
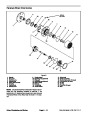

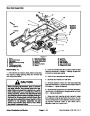


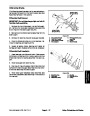

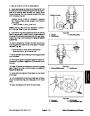


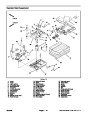
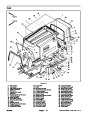


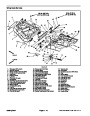

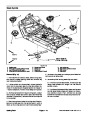


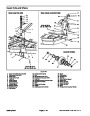
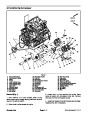
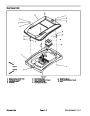


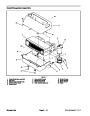


Removal (Fig. 9)
Park machine on a level surface, lower cutting deck,
stop engine, apply parking brake and remove key from
the ignition switch.
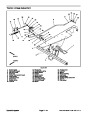
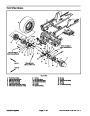
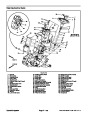
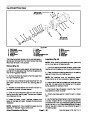
Installation (Fig. 9)
1.
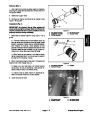
1. Remove all plugs from radiator and hose openings
that were placed during the removal procedure.
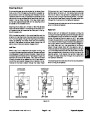
2.
Carefully position radiator to the support frame. Se-
2.
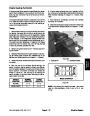
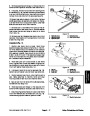
Open and support hood.
cure radiator to the support frame with cap screws and
flange nuts.
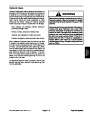
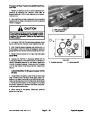
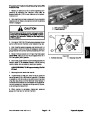
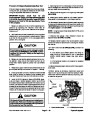
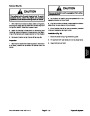
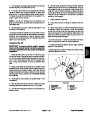
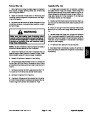
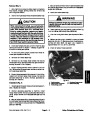
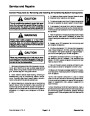
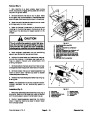
CAUTION
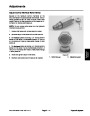
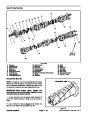
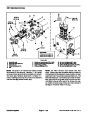
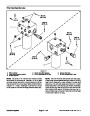
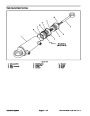
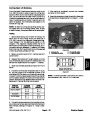
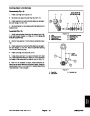
3. If temperature sender (item 8) was removed from ra-
diator, install new O--ring on sender and thread sender
into radiator. Torque sender from 9 to 11 ft--lb (12.3 to
14.9 N--m). Reconnect wire harness connector to send-
er.
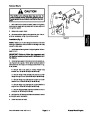
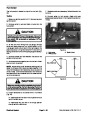
Do not open radiator cap or drain coolant if the
radiator or engine is hot. Pressurized, hot cool-
ant can escape and cause burns.
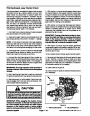
4.
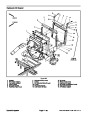
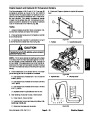
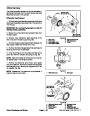
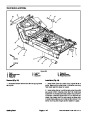
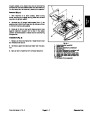
assembly to the radiator.
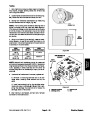
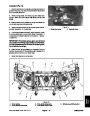
Position lower radiator shroud andfan motor bracket
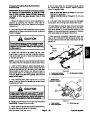
Ethylene--glycol antifreeze is poisonous. Dis-
pose of coolant properly or store it in a properly
labeled container away from children and pets.
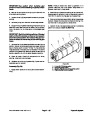
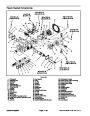
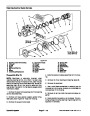
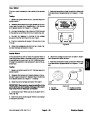
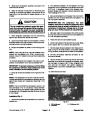
5.
Secure fan motor bracket to radiator with six (6)
flange head screws and flange nuts. Position bracket as
far as possible from radiator to maximize distance be-
tween radiator and fan motor location.
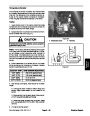
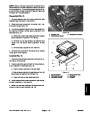
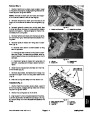
3.
Drain radiator into a suitable container using the ra-
diator drain. The radiator drain hose is located near the
engine oil filter.
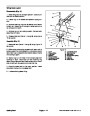
6.
Position upper radiator shroud to lower radiator
shroud to radiator. Secure shrouds with removed fas-
teners.
4.
radiator.
Disconnect upper and lower radiator hoses from the
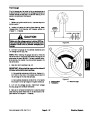
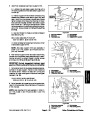
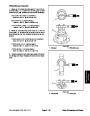
7.
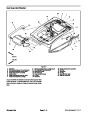
Attach radiator shroud assembly to the radiator with
5.
6.
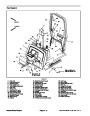
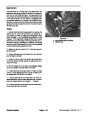
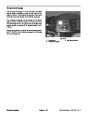
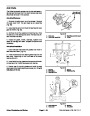
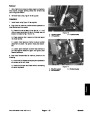
Remove air cleaner hose (item 61).
Disconnect reservoir hose from the vent tube near
cap screws and flat washers. Make sure that clearance
between shroud and cooling fan is at least 0.180” (4.6
mm) at all points.
the radiator cap.
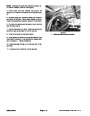
7.
lower radiator shroud. Remove upper shroud from ma-
chine.
Detach upper radiator shroud from the radiator and
8. Connect reservoir hose to the vent tube near the ra-
diator cap.
9.
Connectupperandlowerradiator hosestotheradia-
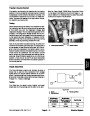
8.
Remove fasteners that secure lower radiator shroud
tor.
to radiator.
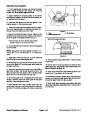
10.Reinstall
air cleaner hose (item 61).
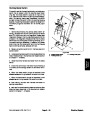
9.
that secure fan motor bracket to radiator.
Remove six (6) flange head screws and flange nuts
11.
coolant.
Make sure radiator drain is closed. Fill radiator with
10.Position
assembly away from radiator.
lower radiator shroud andfan motor bracket
12.Close
and secure hood.
11.
Disconnect wire harness connector from tempera-
ture sender (item 8).
12.Remove
capscrews andflange nuts securing thera-
diator to the support frame. Carefully pull radiator from
the machine.
13.Plug
all radiator and hose openings to prevent con-
tamination.
Groundsmaster 4100--D/4110--D
Page 3 -- 11
Kubota Diesel Engine
| Categories | Lawn Mower Manual, Sprinkler and Irrigation Manuals, Toro Sprinkler and Irrigation Manuals |
|---|---|
| Tags | Toro Groundsmaster 10177SL, Toro Groundsmaster 30447, Toro Groundsmaster 30449, Toro Groundsmaster 4100, Toro Groundsmaster 4110 D |
| Download File |
|
| Document Type | Service Manual |
| Language | English |
| Product Brand | Toro. Customer Service Representatives are available by phone:
Monday - Friday 7:30 a.m. to 9:00 p.m. (CDT) - Saturday 8:00 a.m. to 8:00 p.m. (CDT) - Sunday 10:00 a.m. to 8:00 p.m. (CDT)
Canada 1-888-225-4886 USA 1-888-384-9939, Lawn Mower |
| Document File Type | |
| Publisher | toro.com |
| Wikipedia's Page | Toro Company |
| Copyright | Attribution Non-commercial |
(0 votes, average: 0 out of 5)