

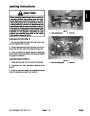

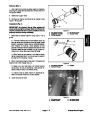


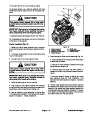
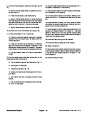


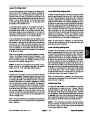

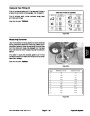


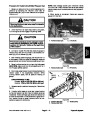
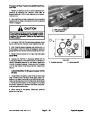
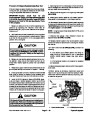
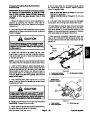


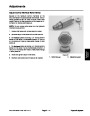

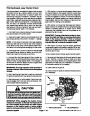

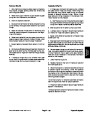
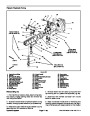
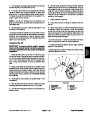


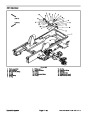
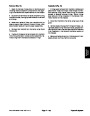


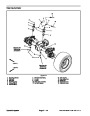

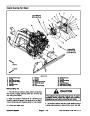


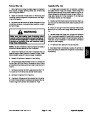


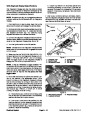


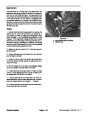
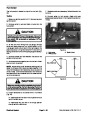
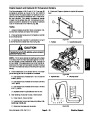


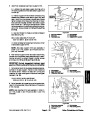

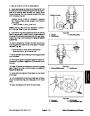


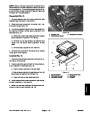
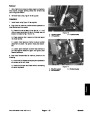


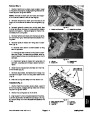

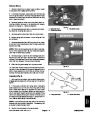
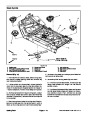
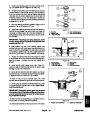


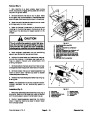


Removal (Fig. 7)
Park machine on a level surface, lower cutting
4
1.
decks, stop engine, engage parking brake and remove
key from the ignition switch.
2.
and support roof to allow access to heater/evaporator
assembly (see Roof Assembly Removal in this section).
Remove fasteners that secure roof in place. Raise
5
6
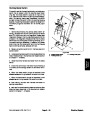
3.
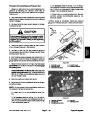
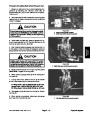
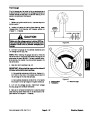
and binary switch on drier--receiver.
Disconnect wire harness connectors from fan motor
1
11
7
4.
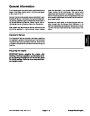
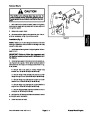
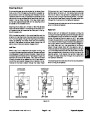
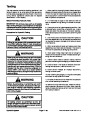
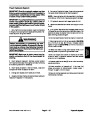
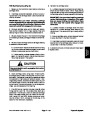
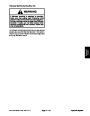
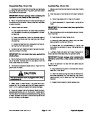
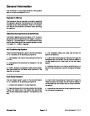
Read the General Precautions for Removing and
Installing Air Conditioning System Components at the
beginning of the Service and Repairs section of this
chapter.
2
9
8
7
5
10
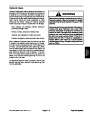
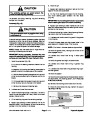
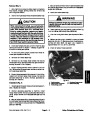
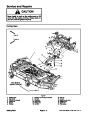
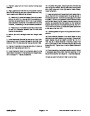
CAUTION
3
The air conditioning system is under high pres-
sure. Do not loosen any system fitting or compo-
nent until after the system has been completely
discharged by a certified A/C service technician.
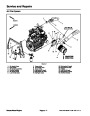
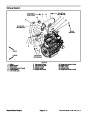
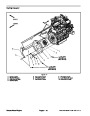
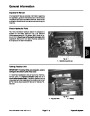
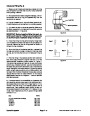
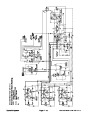
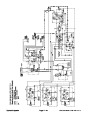
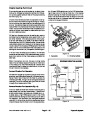
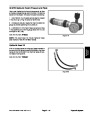
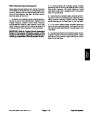
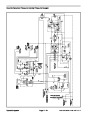
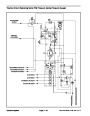
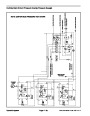
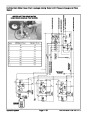
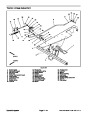
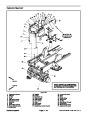
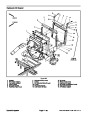
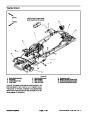
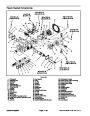
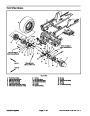
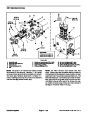
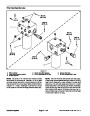
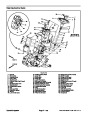
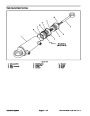
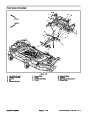
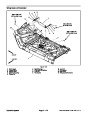
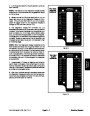
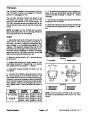
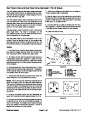
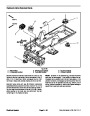
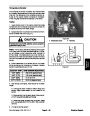
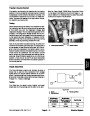
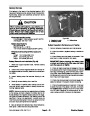
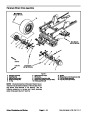
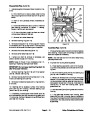
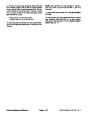
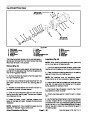
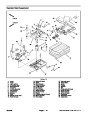
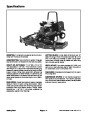
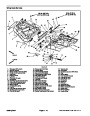
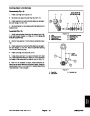
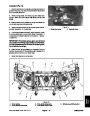
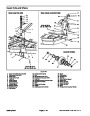
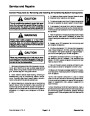
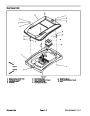
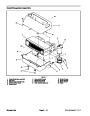
Figure 8
Heater/evaporator assembly
Heater valve
A/C hose: evaporator to compressor
Air duct hose
1.
2.
3.
4.
5.
A/C hose: compressor to condenser coil
A/C hose: condenser coil to drier
Heater hose: thermostat to heater valve
Heater hose: heater core to water pump
Heater hose: heater valve to heater core
Headliner
6.
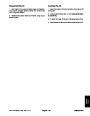
5.
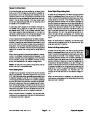
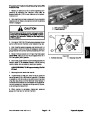
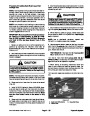
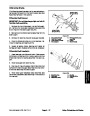
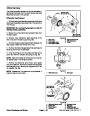
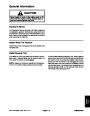
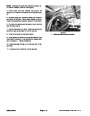
system by a certified A/C service technician.
Have refrigerant evacuated from air conditioning
7.
8.
9.
10.
11.
6.
Label and remove hoses from heater core, evapora-
A/C hose: drier to evaporator
tor and drier--receiver. Immediately cap hoses and fit-
tings to prevent moisture and contaminants from
entering the system.
8
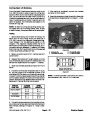
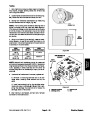
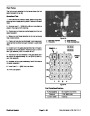
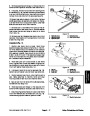
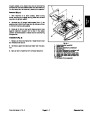
7.
er/evaporatorassemblycovers.Slidehosefromcovers.
Remove cable tie that secures air duct hose to heat-
2
1
9
2
8.
cover to bottom cover. Remove top cover to access
heater/evaporator assembly.
Remove screws that secure heater/evaporator top
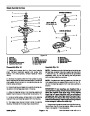
9.
9
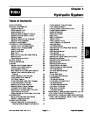
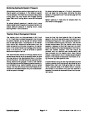
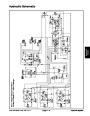
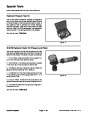
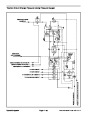
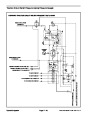
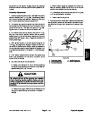
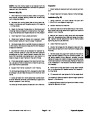
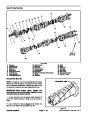
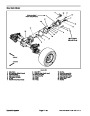
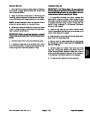
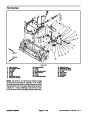
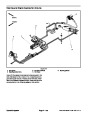
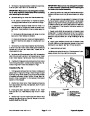
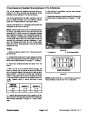
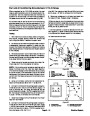
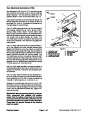
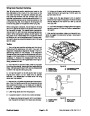
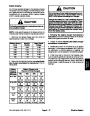
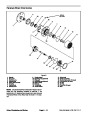
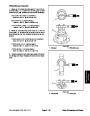
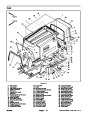
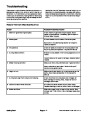
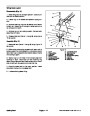
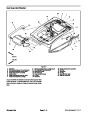
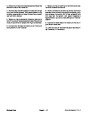
Disassembleheater/evaporatorassemblyusingFig.
as a guide.
4
6
NOTE: Thereplacementofthedrier--receiverisrecom-
mended whenever the air conditioning system is
opened.
3
5
7
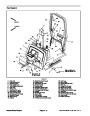
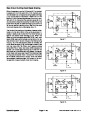
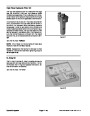
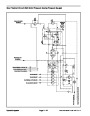
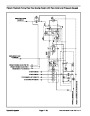
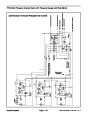
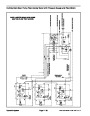
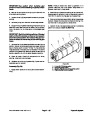
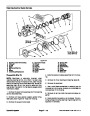
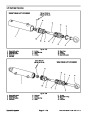
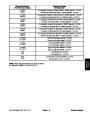
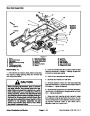
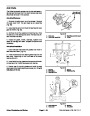
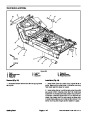
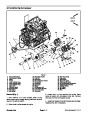
Figure 9
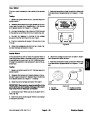
Installation (Fig. 7)
1.
Fan motor
6.
7.
8.
9.
Resistor guard
Bottom housing
Top housing
Resistor
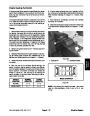
1.
as a guide. Make sure that expansion valve is covered
with insulating tape to prevent condensation issues.
Assemble heater/evaporator assembly using Fig. 9
2.
3.
4.
5.
Blower wheel
Heater/evaporator core
Expansion valve
Freeze switch
2.
cover in headliner. Secure top cover to bottom cover
with removed screws.
Position heater/evaporator assembly into bottom
Groundsmaster 4110--D
Page 9 -- 13
Operator Cab
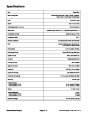
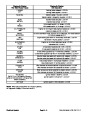
| Categories | Lawn Mower Manual, Sprinkler and Irrigation Manuals, Toro Sprinkler and Irrigation Manuals |
|---|---|
| Tags | Toro Groundsmaster 10177SL, Toro Groundsmaster 30447, Toro Groundsmaster 30449, Toro Groundsmaster 4100, Toro Groundsmaster 4110 D |
| Download File |
|
| Document Type | Service Manual |
| Language | English |
| Product Brand | Toro. Customer Service Representatives are available by phone:
Monday - Friday 7:30 a.m. to 9:00 p.m. (CDT) - Saturday 8:00 a.m. to 8:00 p.m. (CDT) - Sunday 10:00 a.m. to 8:00 p.m. (CDT)
Canada 1-888-225-4886 USA 1-888-384-9939, Lawn Mower |
| Document File Type | |
| Publisher | toro.com |
| Wikipedia's Page | Toro Company |
| Copyright | Attribution Non-commercial |
(0 votes, average: 0 out of 5)