


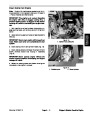


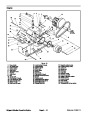

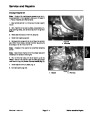


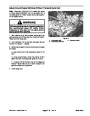

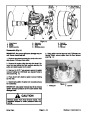
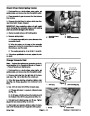

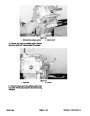
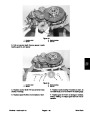


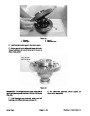


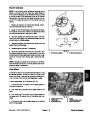


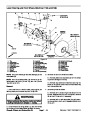
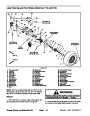


Armature and Field Coil Service (Fig. 22)
6. Clean and inspect commutator.
IMPORTANT: When removing the commutator end
cover, make sure brushes do not contact the com-
mutator. Damage to the brushes may result.
A. Remove carbon dust, dirt, and oil from the com-
mutator.
B. Lightly remove slight roughness, burning, or glaz-
ing of the commutator with 400 grit (or finer) sandpa-
per. Clean commutator after sanding.
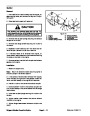
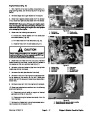
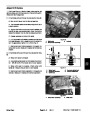
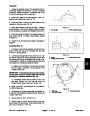
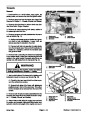
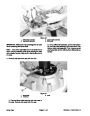
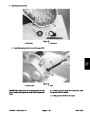
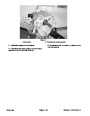
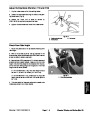
1.
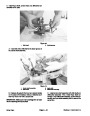
Remove brush covers from the commutator end cov-
er. Lift brush springs from the notch at the end of the
brushes while pulling the brushes out. Allow springs to
hold brushes out from the center (Fig. 23).
C. Replace armature and bearings if commutator
bars are loose. Raised bars may be reworked (see
Rework Starter/Generator).
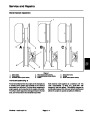
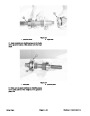
2.
Remove both through bolts and flat washers secur-
ing the commutator end cover to the yoke. Separate end
cover from the commutator and yoke.
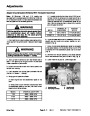
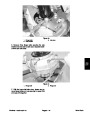
7.
crometer.
Measure diameter of the commutator using a mi-
3.
Separate front end cover from the armature shaft.
A. Measure diameter at two points along the axis of
A. Remove hex nut, spring washer, pulley, spacer
and woodruff key from the armature shaft.
the commutator and shaft. Measurements must also
be 90o apart along the circumference of the commu-
tator.
B. Remove screws, lock washers, and flat washers
securing the retainer to the end cover.
B. If diameter is less than 1.575 inches (40 mm), re-
place armature and bearings.
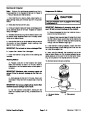
IMPORTANT: Use clean, dry, lint–free rags when
cleaning the starter/generator. When using com-
pressed air, air should be filtered and not exceed 15
PSI (1 Bar).
8. Clean armature completely with clean cloth and/or
air. Do not use solvent. Make sure slots between com-
mutator bars are free of dust and metal particles.
IMPORTANT: Remove bearings only if they are to be
replaced. Use proper removal and installation tools.
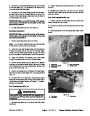
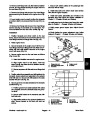
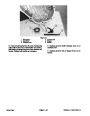
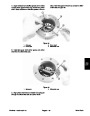
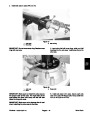
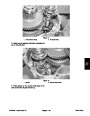
9. Inspect field coils (Fig. 27).
A. Replace field coils if insulation is blackened,
charred, flaking, or cracked.
4.
Clean bearings using a clean cloth. Inspect bearings
for damage. Replace both bearings if either bearing
meets any of the following conditions:
B. Make sure poles are tight.
A. Bearings do not spin smoothly, are noisy when
spinning, or have excessive end or axial play.
B. The balls or rolling surfaces are pitted or worn.
C. Bearings are rusted, worn, cracked, or show ab-
normal color due to overheating.
2
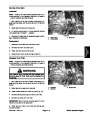
5.
Clean and inspect armature. Replace armature if in-
sulation is burned or charred, wires are broken, shaft is
damaged or bent, armature core lamination is dam-
aged, or solder is thrown.
1
IMPORTANT: Never use emery cloth on the commu-
tator; short circuiting of the commutator bars may
result. Never use oil or lubricants on the commuta-
tor or brushes.
3
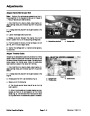
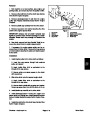
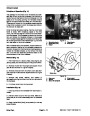
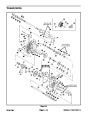
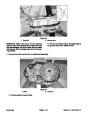
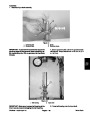
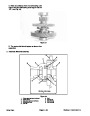
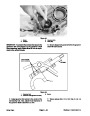
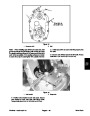
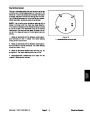
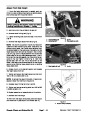
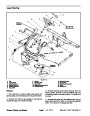
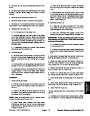
Figure 26
1.
2.
Armature
Commutator
3. Armature shaft
Electrical System
Page 6 – 20
Workman 1100/1110/2100/2110
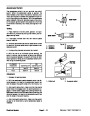
| Categories | Lawn Mower Manual, Sprinkler and Irrigation Manuals, Toro Sprinkler and Irrigation Manuals |
|---|---|
| Tags | Toro Workman 1100, Toro Workman 1110, Toro Workman 2100, Toro Workman 2110 |
| Download File |
|
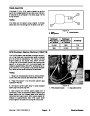
| Document Type | Catalog |
| Language | English |
| Product Brand | Toro. Customer Service Representatives are available by phone:
Monday - Friday 7:30 a.m. to 9:00 p.m. (CDT) - Saturday 8:00 a.m. to 8:00 p.m. (CDT) - Sunday 10:00 a.m. to 8:00 p.m. (CDT)
Canada 1-888-225-4886 USA 1-888-384-9939, Lawn Mower |
| Document File Type | |
| Publisher | toro.com |
| Wikipedia's Page | Toro Company |
| Copyright | Attribution Non-commercial |
(0 votes, average: 0 out of 5)