


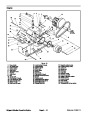
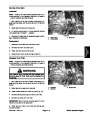


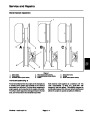

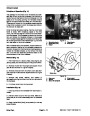
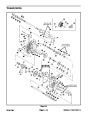


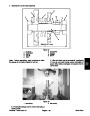


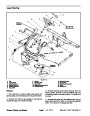
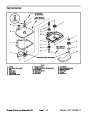
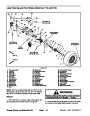


Disassembly
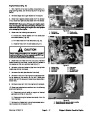
2. If seals were removed, press new seals into housing.
Seal lips should be facing up.
IMPORTANT:Do not reuse flange head screw with
patch lock after it has been removed.
3. Place flat washer onto shaft of the Pitman arm. Insert
shaft into steering housing.
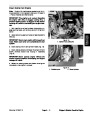
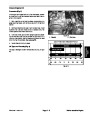
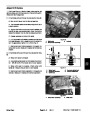
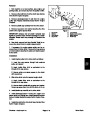
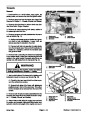
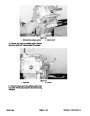
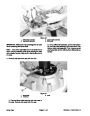
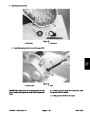
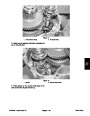
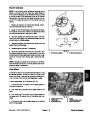
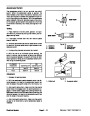
1.
Remove flange head screw with patch lock and
stepped washer from Pitman arm. Discard flange head
screw.
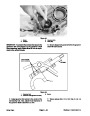
IMPORTANT:The position of the Pitman arm and
sector gear is critical during reassembly. If either or
both of these parts is replaced, make sure their
alignment matches the matchmark position of the
original gear and arm.
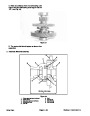
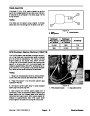
2.
Remove cap screw and flat washer from pinion gear
shaft.
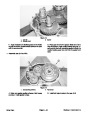
3.
Remove hex washer head screws securing the
4.
arm shaft.
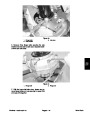
Position sector gear onto the spline of the Pitman
housing cover and gasket to the steering housing. Re-
move cover and gasket from the housing. Replace gas-
ket if damaged.
IMPORTANT:Make sure sector gear is centered to
the pinion gear.
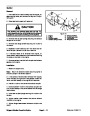
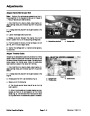
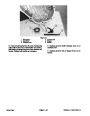
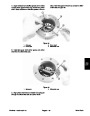
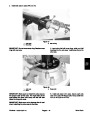
4.
Inspect gears. Sector and pinion gear teeth must be
free of damage that prevents them of free movement.
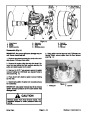
5. Insert pinion gear into the small bearing in the steer-
ing housing.
5.
Remove pinion gear from the housing.
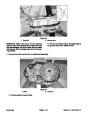
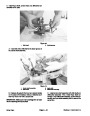
6.
grease. Make sure all gear teeth on the sector and pin-
ion gears are covered.
Fill steering housing with number 2 general purpose
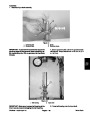
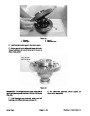
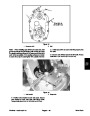
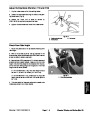
IMPORTANT:Matchmark pitman arm shaft and sec-
tor gear. Their position is critical during reassembly.
6.
ing housing and remove from the housing.
Separate Pitman arm from the sector gear and steer-
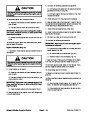
7.
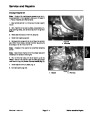
Place gasket and steering housing cover onto the
housing. Secure cover to housing with four hex washer
head screws. Torque screws from 90 to 110 in–lb (10.2
to 12.4 N–m).
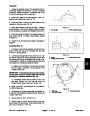
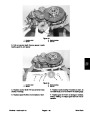
7.
be free of damage. Press bearings and spacer out of
housing if necessary.
Inspect bearings. Bearings must spin smoothly and
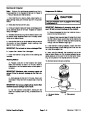
IMPORTANT:Flange head screw with patch lock
should be replaced whenever it is removed.
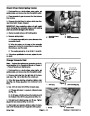
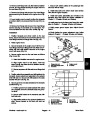
8.
Inspect seals. Seals must be free of rips and tears.
Replace seals if necessary.
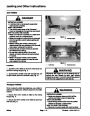
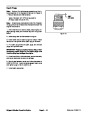
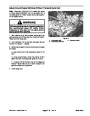
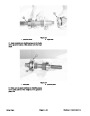
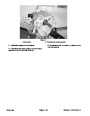
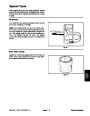
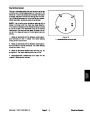
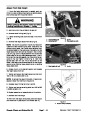
8.
Secure flange head screw with patch lock and step
washer to the Pitman arm. Make sure to position step
washer as in Figure 11. Torque screw from 27 to 33 ft–lb
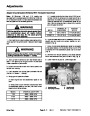
Assembly
(37
to 44 N–m).
IMPORTANT:Always replace ball bearings as a set.
9.
shaft. Torque screw from 175 to 225 in–lb (20 to 25
N–m).
Secure cap screw and flat washer to the pinion gear
1.
If ball bearings were removed:
A. Press new bearing into housing from the inside
first.
B. Turn housing over. Insert spacer and press new
bearing into housing.
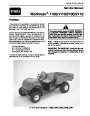
Workman 1100/1110/2100/2110
Page 7 – 17
Chassis, Wheels, and Brakes (Rev. B)
| Categories | Lawn Mower Manual, Sprinkler and Irrigation Manuals, Toro Sprinkler and Irrigation Manuals |
|---|---|
| Tags | Toro Workman 1100, Toro Workman 1110, Toro Workman 2100, Toro Workman 2110 |
| Download File |
|
| Document Type | Catalog |
| Language | English |
| Product Brand | Toro. Customer Service Representatives are available by phone:
Monday - Friday 7:30 a.m. to 9:00 p.m. (CDT) - Saturday 8:00 a.m. to 8:00 p.m. (CDT) - Sunday 10:00 a.m. to 8:00 p.m. (CDT)
Canada 1-888-225-4886 USA 1-888-384-9939, Lawn Mower |
| Document File Type | |
| Publisher | toro.com |
| Wikipedia's Page | Toro Company |
| Copyright | Attribution Non-commercial |
(0 votes, average: 0 out of 5)