


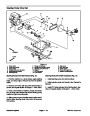


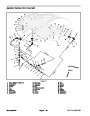

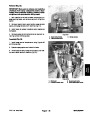


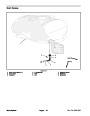


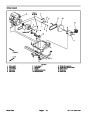
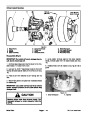


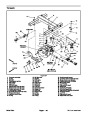
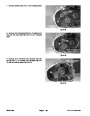
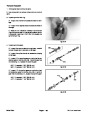


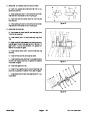
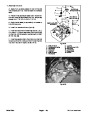


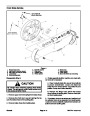


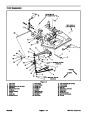
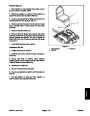


7.
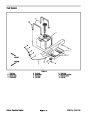
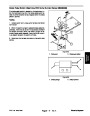
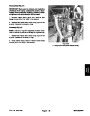
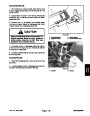
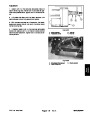
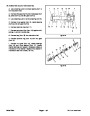
Remove seals from open caps taking care not to
damage seal bores. Clean seal bore in caps. Remove
and discard o–rings from caps.
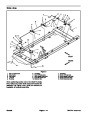
1
8.
If required, press bearings from input shaft (item 26).
3
2
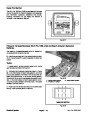
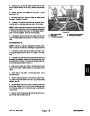
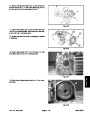
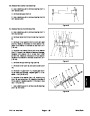
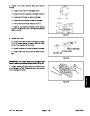
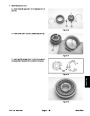
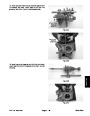
9.
Make sure to remove bearing cups evenly to prevent
damage to output caps.
If necessary, remove bearing cups from output caps.
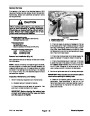
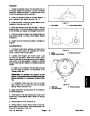
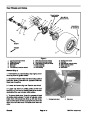
IMPORTANT: Do not attempt to remove both bear-
ing cones and gear from output shaft at the same
time. The key (item 4) will cause severe damage to
gear, shaft, and bearings.
4
3
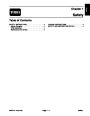
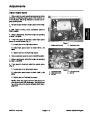
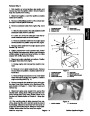
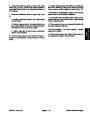
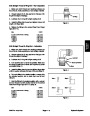
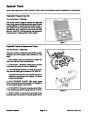
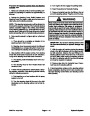
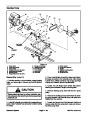
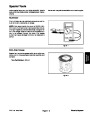
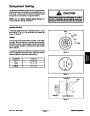
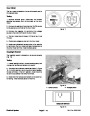
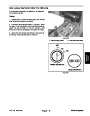
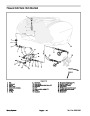
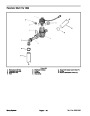
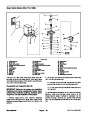
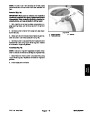
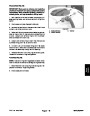
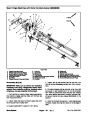
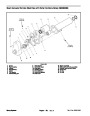
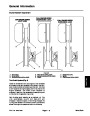
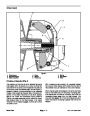
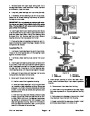
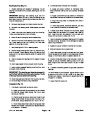
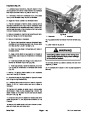
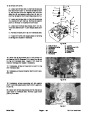
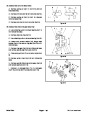
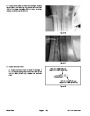
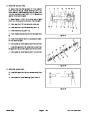
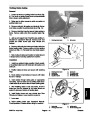
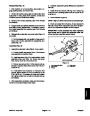
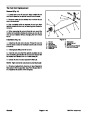
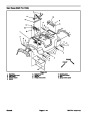
10.If
worm gear (item 3) and bearing cones (item 2) are
to be removed from output shaft, support bottom side of
gear and press shaft down through one bearing cone
and gear (Fig. 18). Remove key from shaft. Second
bearing cone can then be pressed from shaft.
Figure 18
1.
2.
Press
Output shaft
3.
4.
Bearing cone
Worm gear
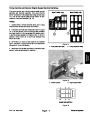
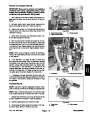
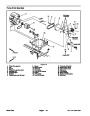
11.
Thoroughly clean all gearbox components and in-
spect for evidence of wear or damage. Replace internal
components as needed.
1
2
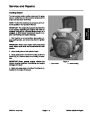
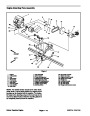
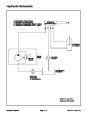
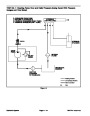
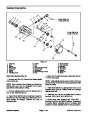
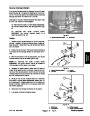
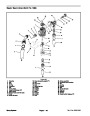
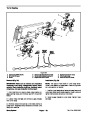
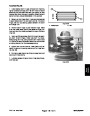
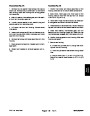
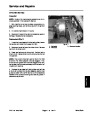
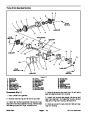
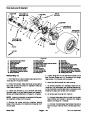
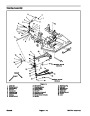
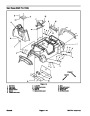
Assembly (Fig. 17)
1.
Press on the inner bearing race until the bearing is tight
against the shaft shoulder.
If removed, install bearings onto worm (input) shaft.
3
2.
If removed, press bearing cups evenly into output
caps.
4
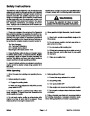
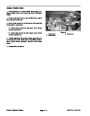
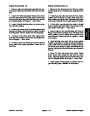
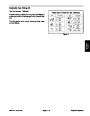
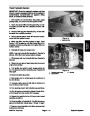
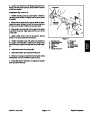
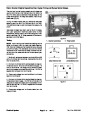
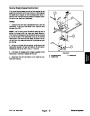
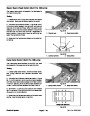
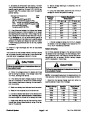
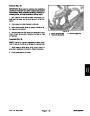
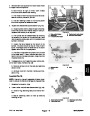
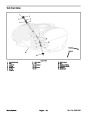
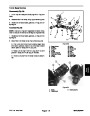
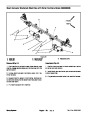
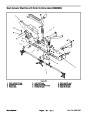
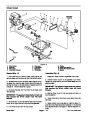
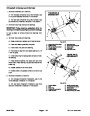
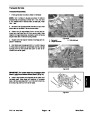
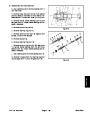
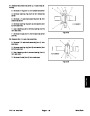
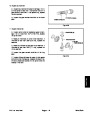
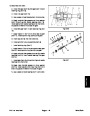
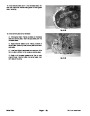
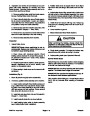
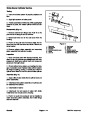
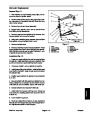
3.
If worm gear and bearing cones were removed from
output shaft, fit key into output shaft and position gear to
shaft. Press gear onto shaft until the gear is centered on
the key (Fig. 19). Pressing on the inner bearing race,
install bearing cones until they are tight against the gear.
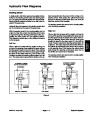
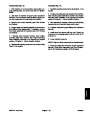
4.
Slide worm (input) shaft with bearings into housing
Figure 19
noting correct orientation of shaft ends.
1.
2.
Press
Output shaft
3.
4.
Worm gear
Bearing cone
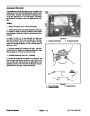
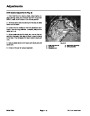
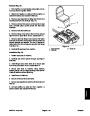
5.
Adjust worm (input) shaft end play.
6.
Once correct quantity of shims has been deter-
A. Position new shims to gearbox housing.
mined, make final assembly of input caps to gearbox
housing.
B. Install both open caps (item 14) (o–ring and seal
not installed on cap) to gearbox housing. Torque cap
screws 8 ft–lb (10.8 N–m) while checking for binding
of shaft. If shaft binds as screws are tightened, add
additional shims.
A. Remove open input caps from housing.
B. Install new o–ring into groove of input cap. Apply
light coat of grease on o–ring and gearbox housing
bore.
C. After both input caps are installed, check end play
of worm (input) shaft. Shaft end play should be .001”
to .003” (.025 to .076 mm). End play can be adjusted
by adding or removing shims from between input
caps and gearbox housing. Total shim thickness at
one input cap should be within .005” (.13 mm) of the
total shim thickness of the other cap.
C. Taking care not to damage o–ring or shims, install
input cap over input shaft and into housing.
D. Apply Loctite #242 to cap screw threads. Install
and torque cap screws 8 ft–lb (10.8 N–m).
Multi Pro 1200/1250
Page 7 – 19
Drive Train
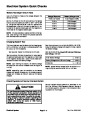
| Categories | Lawn Mower Manual, Sprinkler and Irrigation Manuals, Toro Sprinkler and Irrigation Manuals |
|---|---|
| Tags | Toro Multi Pro 1200, Toro Multi Pro 1250 |
| Download File |
|
| Document Type | Service Manual |
| Language | English |
| Product Brand | Toro. Customer Service Representatives are available by phone:
Monday - Friday 7:30 a.m. to 9:00 p.m. (CDT) - Saturday 8:00 a.m. to 8:00 p.m. (CDT) - Sunday 10:00 a.m. to 8:00 p.m. (CDT)
Canada 1-888-225-4886 USA 1-888-384-9939, Lawn Mower |
| Document File Type | |
| Publisher | toro.com |
| Wikipedia's Page | Toro Company |
| Copyright | Attribution Non-commercial |
(0 votes, average: 0 out of 5)