


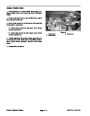


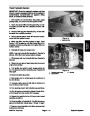


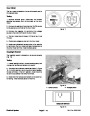


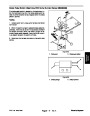


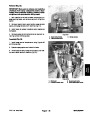
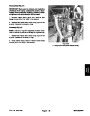


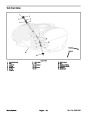
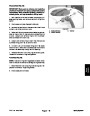
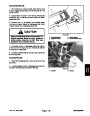


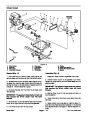


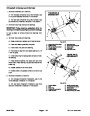

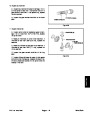


A. Clean hydraulic brake line area of brake assem-
bly to prevent contamination. Loosen and discon-
nect brake line from wheel cylinder. Cap brake line
and position it away from brake assembly.
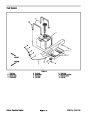
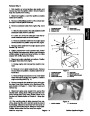
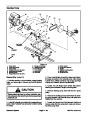
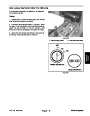
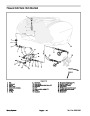
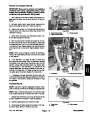
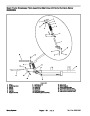
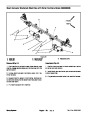
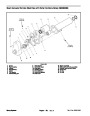
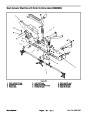
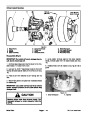
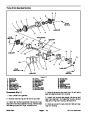
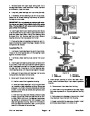
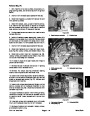
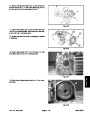
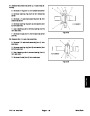
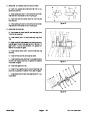
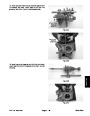
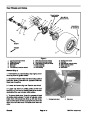
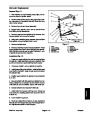
4. Install the wheel hub/drum onto the spindle shaft tak-
ing care to not damage seal.
5.
Install greased outer bearing cone, washer, and
slotted hex nut onto spindle shaft.
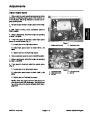
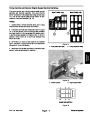
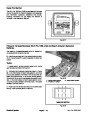
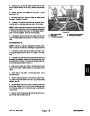
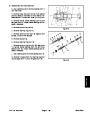
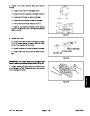
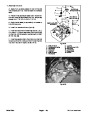
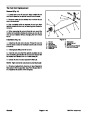
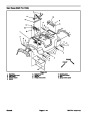
B. Remove four flange head screws and lock nuts
that secure the brake assembly to the front spindle.
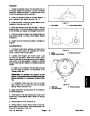
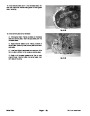
6.
Rotate the wheel hub/drum by hand and tighten the
slotted hex nut from 75 to 100 in-lb (8.5 to 11.3 N–m) to
set the bearings. Then, loosen the nut until the wheel
hub has end play.
C. Remove brake assembly from spindle.
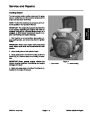
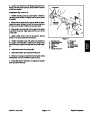
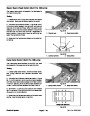
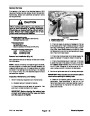
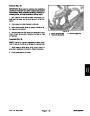
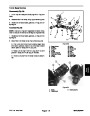
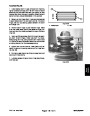
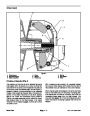
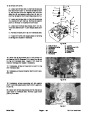
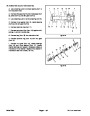
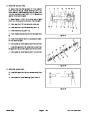
Inspection
7.
Rotate the wheel hub/drum by hand and re-tighten
1.
Inspect brake drums.
the slotted hex nut from 15 to 20 in-lb (1.7 to 2.3 N–m).
If necessary, nut can be tightened slightly to align cotter
pin position in spindle and nut.
IMPORTANT:Brake drum machining is not re-
commended. Replace front brake drums as a set
to maintain equal braking forces.
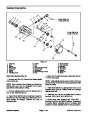
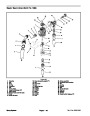
8.
Install cotter pin through spindle shaft hole. Install
dust cap to hub.
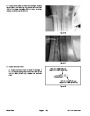
A. Clean drums with denatured alcohol.
9.
and secure with lug nuts. Torque lug nuts evenly in a
crossing pattern from 55 to 65 ft–lb (75 to 88 N–m).
Install wheel assembly with valve stem facing out
B. Replace drums that are cracked, deeply grooved,
tapered, significantly out–of–round, scored, heat
spotted, or excessively rusted. Minor scoring in
brake drum can be removed with sandpaper.
10.Lower
machine to ground.
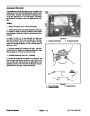
2.
If removed, inspect wheel bearings. Make sure bear-
11.
Bleed brakes (see Bleed Brake System).
ing cones are in good operating condition. Check the
bearing cups for wear, pitting, or other noticeable dam-
age. Replace worn or damaged parts.
12.Align steering, adjust toe–in (see Operator’s Manu-
al), and check front suspension (see Front Suspension
in the Adjustments section of this Chapter).
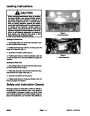
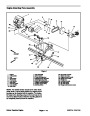
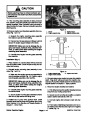
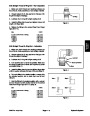
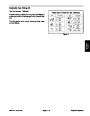
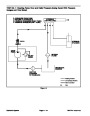
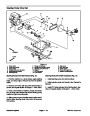
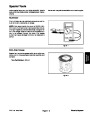
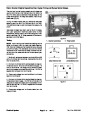
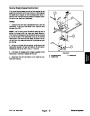
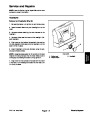
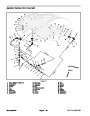
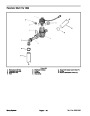
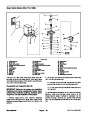
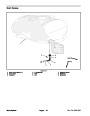
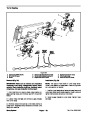
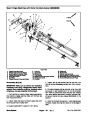
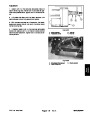
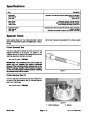
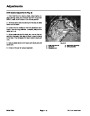
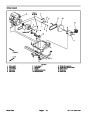
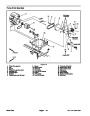
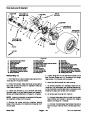
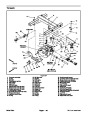
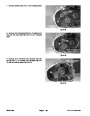
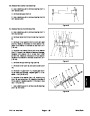
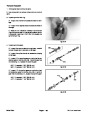
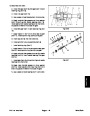
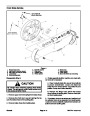
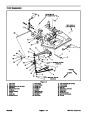
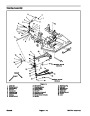
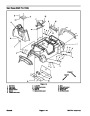
Installation (Fig. 3)
13.Lubricate
tie rod ball joints (see Operator’s Manual).
1.
Clean all parts thoroughly before reassembly.
2.
spindle.
If removed, position brake assembly to the front
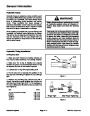
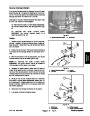
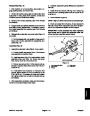
CAUTION
A. Secure backing plate of the brake assembly to
After servicing the brakes, always check the
brakes in a wide open, level area that is free of
other persons and obstructions.
the spindle with four flange head screws and lock
nuts. Torque screws from 17 to 19 ft–lb (23 to 25
N–m).
14.Check
brake operation.
B. Install brake line to wheel cylinder.
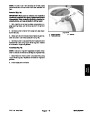
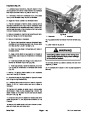
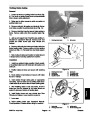
Burnish Brake Shoes
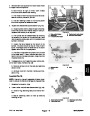
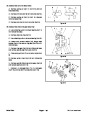
3.
If wheel bearings were removed from wheel hub/
drum, assemble wheel hub:
Sintered metal linings may not provide maximum brake
stopping distance after brake shoes are replaced. It may
be necessary to burnish new brake shoe linings.
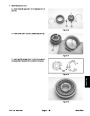
A. If bearing cups were removed from the wheel
hub, press inner and outer cups into the hub until
they seat against the hub shoulder.
IMPORTANT:Do not drive machine with the brakes
applied. The brake shoe linings will overheat.
B. Pack both bearings with grease. Install greased
inner bearing into the cup on inboard side of the
wheel hub.
IMPORTANT:Do not allow the brakes to lock up. Al-
low brakes to cool between applications.
IMPORTANT: The lip seal must be pressed in so
it is flush with the end of the hub. The lip of the
seal must be toward the bearing.
Drive machine while making 6 to 7 normal stops at about
200
ft (60 m) intervals while traveling at moderate
speed.
C. Lubricate the inside of the new lip seal and press
it into the wheel hub.
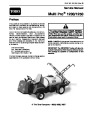
Multi Pro 1200/1250
Page 8 – 5
Chassis
| Categories | Lawn Mower Manual, Sprinkler and Irrigation Manuals, Toro Sprinkler and Irrigation Manuals |
|---|---|
| Tags | Toro Multi Pro 1200, Toro Multi Pro 1250 |
| Download File |
|
| Document Type | Service Manual |
| Language | English |
| Product Brand | Toro. Customer Service Representatives are available by phone:
Monday - Friday 7:30 a.m. to 9:00 p.m. (CDT) - Saturday 8:00 a.m. to 8:00 p.m. (CDT) - Sunday 10:00 a.m. to 8:00 p.m. (CDT)
Canada 1-888-225-4886 USA 1-888-384-9939, Lawn Mower |
| Document File Type | |
| Publisher | toro.com |
| Wikipedia's Page | Toro Company |
| Copyright | Attribution Non-commercial |
(0 votes, average: 0 out of 5)