


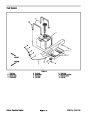

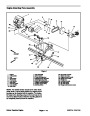
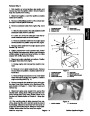

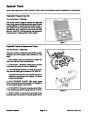
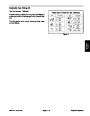
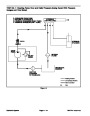


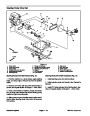


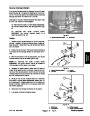


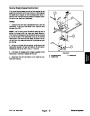
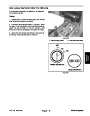


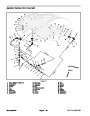
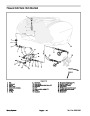

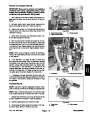


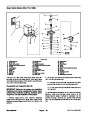


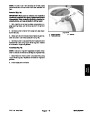
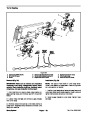
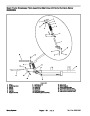
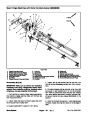
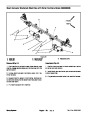
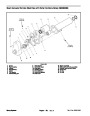

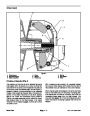


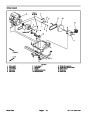
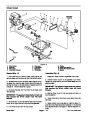

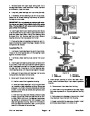

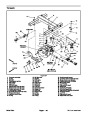
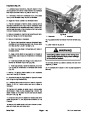
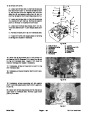
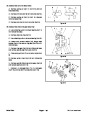
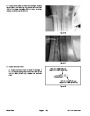


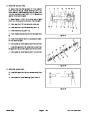
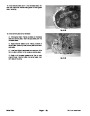


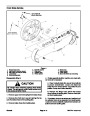


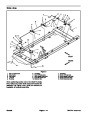
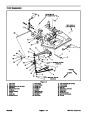
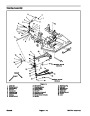
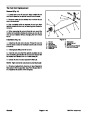
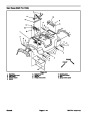


Disassembly (Fig. 7)
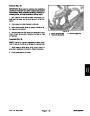
If brake assembly is still on machine, remove parking
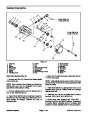
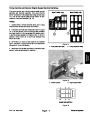
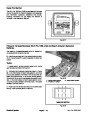
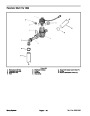
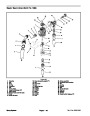
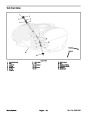
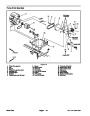
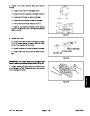
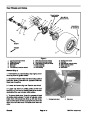
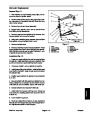
Assembly (Fig. 7)
1.
IMPORTANT:Brake shoe lining surfaces must be
free of grease, oil, and other foreign matter.
brake cable (see Parking Brake Cable Removal).
1.
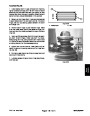
Apply a light film of lubricant to the following:
A. Ledges on which the brake shoes rest.
B. Hold down pins.
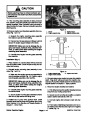
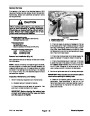
CAUTION
Be careful when removing springs from brake
shoes. The springs are under heavy tension and
may cause personal injury.
C. Anchor block surfaces that contact shoe webs.
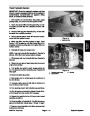
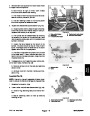
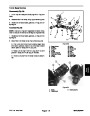
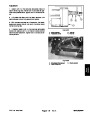
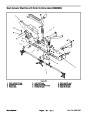
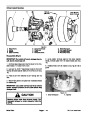
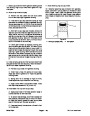
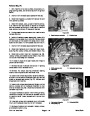
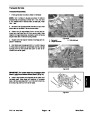
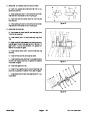
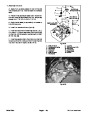
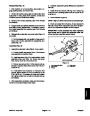
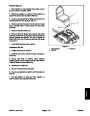
If removed, install wheel cylinder:
2.
2.
3.
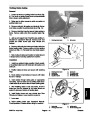
Remove upper and lower springs from brake shoes.
Remove shoe hold down washers and springs that
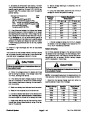
A. Secure wheel cylinder to backing plate with two
bolts and washers. Torque bolts from 49 to 97 in–lb
secure the brake shoes to the backing plate.
(5.5
to 11 N–m).
4.
Remove brake shoes from backing plate.
B. If brake assembly is still on machine, connect
brake line to wheel cylinder.
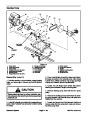
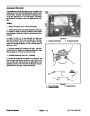
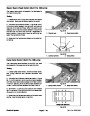
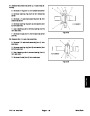
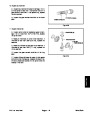
5.
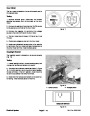
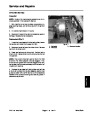
If brake assembly is still on machine and wheel cylin-
der removal is necessary:
3.
If removed from backing plate, install dust covers in
A. Clean hydraulic brake line area of wheel cylinder
to prevent contamination. Loosen and disconnect
brake line from wheel cylinder. Cap brake line and
position it away from brake assembly.
backing plate.
4.
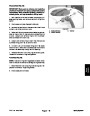
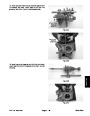
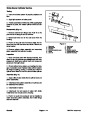
Position brake shoes to backing plate. Make sure
that each shoe is properly positioned at anchor block,
wheel cylinder, and hold down pin. Secure shoes to pins
with hold down springs and washers.
B. Remove two bolts and washers that secure
wheel cylinder to backing plate. Remove wheel cylin-
der from backing plate.
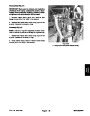
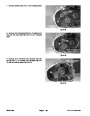
CAUTION
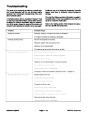
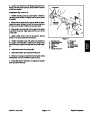
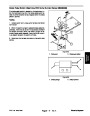
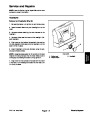
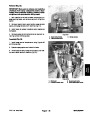
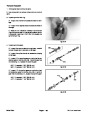
Inspection
Be careful when installing springs to brake
shoes. The springs are under heavy tension and
may cause personal injury.
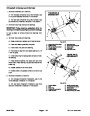
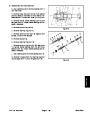
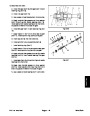
1.
Inspect brake shoe linings.
IMPORTANT:Replace rear brake shoes as a set
(all four shoes) to maintain equal braking forces.
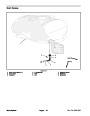
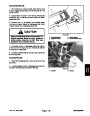
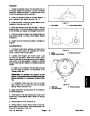
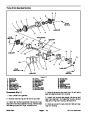
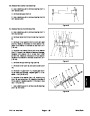
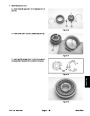
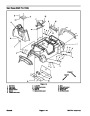
5.
6.
Install lower spring to brake shoes.
A. Replace brake shoes if damaged or if lining is
worn to 1/16” (1.6 mm). Replace if lining is contami-
nated by oil, grease, or other fluids.
Install brake adjuster assembly to slots on brake
shoes, then the parking brake pawl with pin. Install ad-
juster spring.
NOTE: Overheated springs lose their tension, and
can cause brake linings to wear out prematurely.
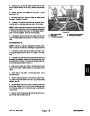
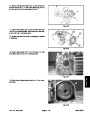
7.
Install upper spring.
8.
brake cable (see Parking Brake Cable Installation).
If brake assembly is still on machine, install parking
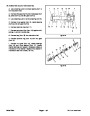
B. Inspect brake shoe webbing, upper and lower
springs, and shoe hold down springs for overheat-
ing. Overheating is indicated by a slight blue color. In-
spect brake shoe webbing for deformation. Replace
parts as necessary.
9.
Brakes Installation).
Reassemble rear wheel (see Rear Wheels and
C. Inspect hold down pins for damage. Replace as
necessary.
2.
Inspect brake adjuster, parking brake lever, and
parking brake pawl for damage or wear. Replace com-
ponents as necessary.
Multi Pro 1200/1250
Page 8 – 11
Chassis
| Categories | Lawn Mower Manual, Sprinkler and Irrigation Manuals, Toro Sprinkler and Irrigation Manuals |
|---|---|
| Tags | Toro Multi Pro 1200, Toro Multi Pro 1250 |
| Download File |
|
| Document Type | Service Manual |
| Language | English |
| Product Brand | Toro. Customer Service Representatives are available by phone:
Monday - Friday 7:30 a.m. to 9:00 p.m. (CDT) - Saturday 8:00 a.m. to 8:00 p.m. (CDT) - Sunday 10:00 a.m. to 8:00 p.m. (CDT)
Canada 1-888-225-4886 USA 1-888-384-9939, Lawn Mower |
| Document File Type | |
| Publisher | toro.com |
| Wikipedia's Page | Toro Company |
| Copyright | Attribution Non-commercial |
(0 votes, average: 0 out of 5)