


Ball Joint Replacement
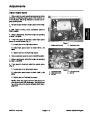
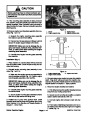
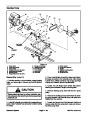
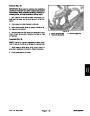
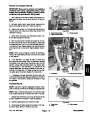
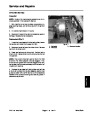
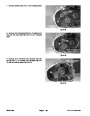
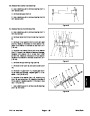
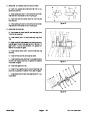
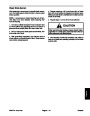
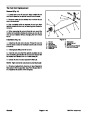
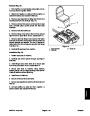
Removal (Fig. 17)
2
3
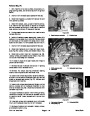
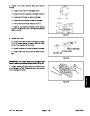
1.
move key from the ignition switch.
Park machine on a level surface, stop engine, and re-
1
2.
ing Instructions in Operator’s Manual). Block front and
rear of other wheels.
Lift front wheel off the ground using a jack (see Jack-
4
5
9
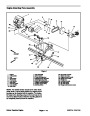
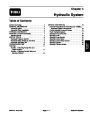
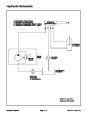
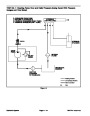
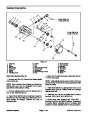
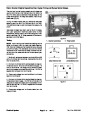
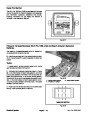
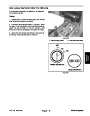
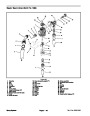
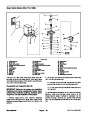
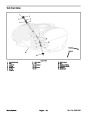
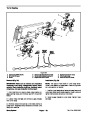
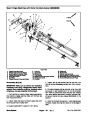
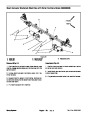
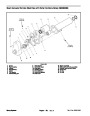
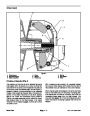
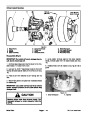
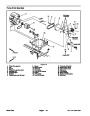
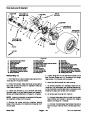
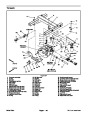
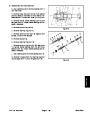
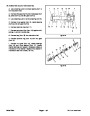
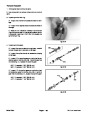
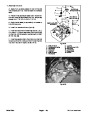
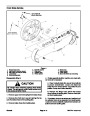
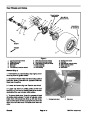
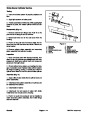
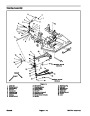
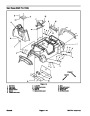
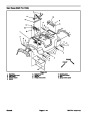
Minimum 140 ft–lb
(189
N–m)
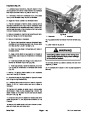
3.
4.
Remove lug nuts and wheel assembly.
8
7
2
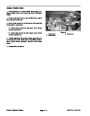
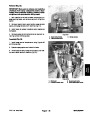
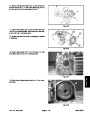
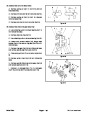
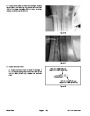
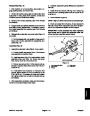
Support axle, spindle, and a–arm to prevent them
from falling during disassembly.
6
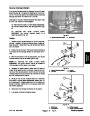
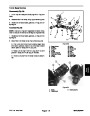
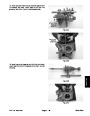
5.
remove slotted hex nut and flat washer.
Remove cotter pin from ball joint to be removed, then
3
10
9
4
8
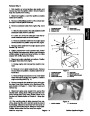
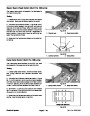
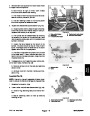
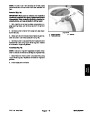
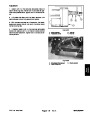
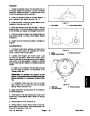
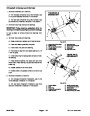
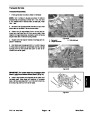
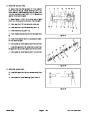
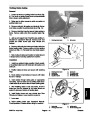
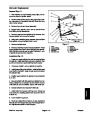
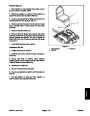
6.
from spindle or lower ball joint from A–arm.
Using fork or suitable press, separate upper ball joint
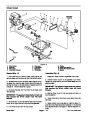
Minimum 140 ft–lb
(189 N–m)
5
7
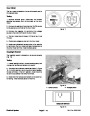
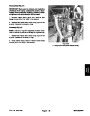
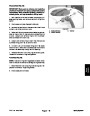
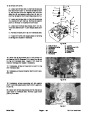
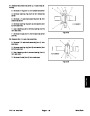
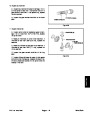
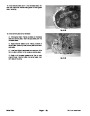
7.
8.
upper ball joint from axle or lower ball joint from spindle.
Note: Ball joint removal may be easier if affected A–arm
or spindle is removed from machine.
Remove ball joint seal.
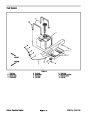
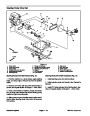
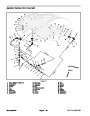
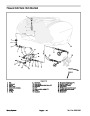
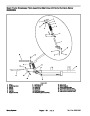
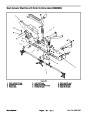
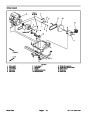
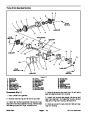
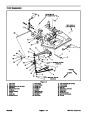
Figure 17
1.
Axle
6.
7.
8.
9.
Spindle
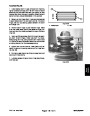
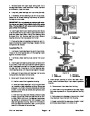
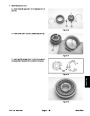
Remove retaining ring that secures ball joint. Press
2.
3.
4.
5.
Grease fitting
Retaining ring
Ball joint
Cotter pin
Slotted hex nut
Flat washer
Ball joint seal
10. A–arm
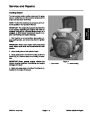
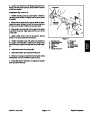
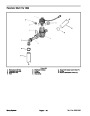
Installation (Fig. 17)
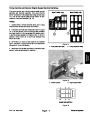
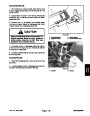
1.
Press new upper ball joint into axle or lower ball joint
into spindle. Install retaining ring to secure ball joint. Use
punch and hammer to seat retaining ring if needed.
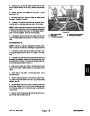
2.
If removed, install A–arm or spindle to machine.
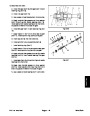
3.
Install grease fitting into ball joint. Install ball joint seal
over shaft on ball joint. Edge of seal must be inserted
into ball joint slot.
4.
Position upper ball joint to spindle or lower ball joint
to A–arm.
5.
Secure ball joint with flat washer and slotted hex nut.
Torque slotted hex nut at least 140 ft–lb (189 N–m) and
until cotter pin can be installed. Secure with cotter pin.
6.
Grease ball joint (see Operator’s Manual).
7.
Install wheel and secure with lug nuts. Torque lug
nuts evenly in a crossing pattern from 55 to 65 ft–lb (75
to 88 N–m).
8.
Lower machine to ground.
9.
Check and adjust front wheel toe–in (see Operator’s
Manual) and front suspension (see Front Suspension in
the Adjustments section of this Chapter).
Multi Pro 1200/1250
Page 8 – 21
Chassis
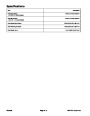
| Categories | Lawn Mower Manual, Sprinkler and Irrigation Manuals, Toro Sprinkler and Irrigation Manuals |
|---|---|
| Tags | Toro Multi Pro 1200, Toro Multi Pro 1250 |
| Download File |
|
| Document Type | Service Manual |
| Language | English |
| Product Brand | Toro. Customer Service Representatives are available by phone:
Monday - Friday 7:30 a.m. to 9:00 p.m. (CDT) - Saturday 8:00 a.m. to 8:00 p.m. (CDT) - Sunday 10:00 a.m. to 8:00 p.m. (CDT)
Canada 1-888-225-4886 USA 1-888-384-9939, Lawn Mower |
| Document File Type | |
| Publisher | toro.com |
| Wikipedia's Page | Toro Company |
| Copyright | Attribution Non-commercial |
(0 votes, average: 0 out of 5)