

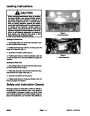


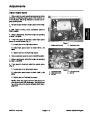


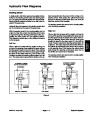
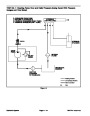


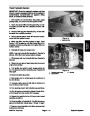

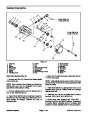


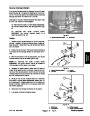


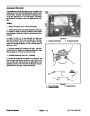
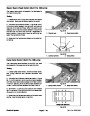


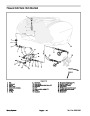
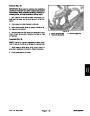

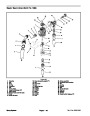


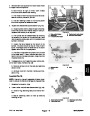


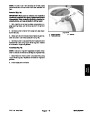
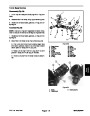
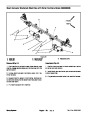
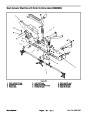


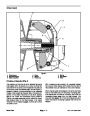


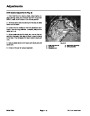
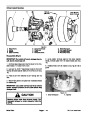

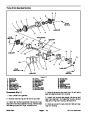

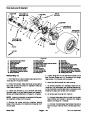

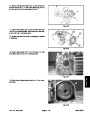
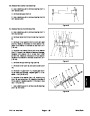
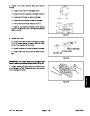


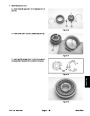
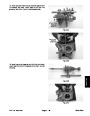


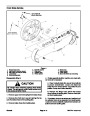


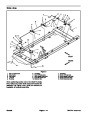
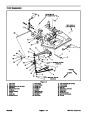
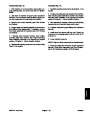
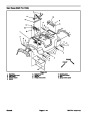


Installation (Fig. 24)
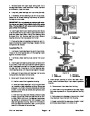
Lubricate new oil strainer o–ring with Dexron III ATF
1.
oil and position on strainer. Install strainer into transaxle
and torque from 80 to 90 ft–lb (108 to 122 N–m).
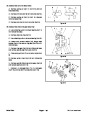
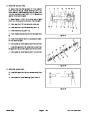
2.
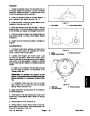
If removed, install front transaxle mount, shift cable
mount, and transaxle strap mounts to transaxle.
1
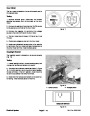
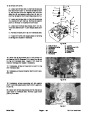
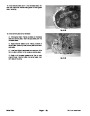
3.
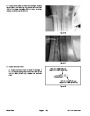
4.
Apply anti–seize lubricant to transaxle shafts.
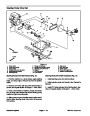
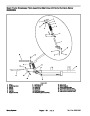
2
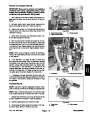
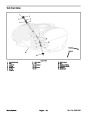
Position transaxle to machine. Slide universal joint of
transaxle driveshaft onto input shaft of transaxle. Slide
both driveshafts onto transaxle axle shafts. Position dri-
veshaft bearing cross to the end yoke at both rear wheel
hubs and loosely install straps.
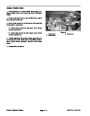
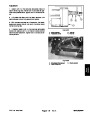
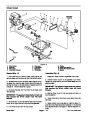
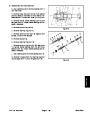
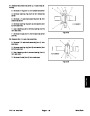
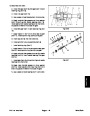
5.
ening four flange nuts onto cap screws.
Secure transaxle to machine by installing and tight-
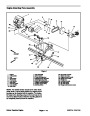
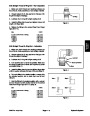
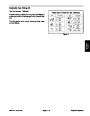
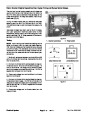
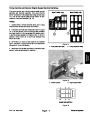
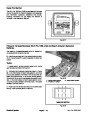
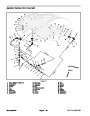
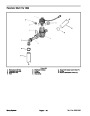
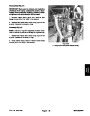
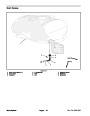
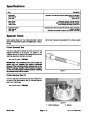
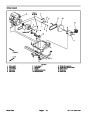
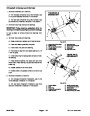
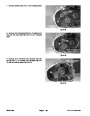
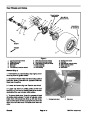
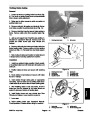
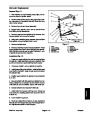
Figure 28
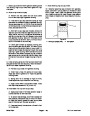
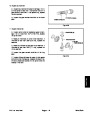
2.
1.
Cap screw
Driveshaft
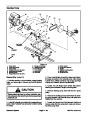
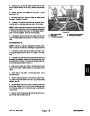
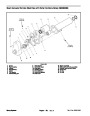
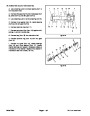
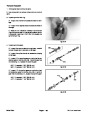
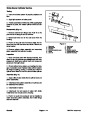
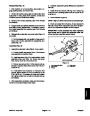
6.
Secure driveshafts to transaxle:
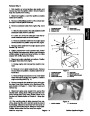
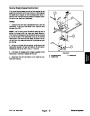
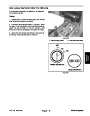
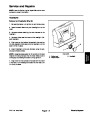
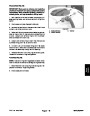
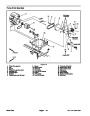
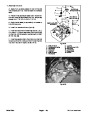
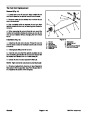
13.Plug
25).
speed sensor connector into wire harness (Fig.
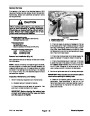
A. Tighten the strap bolts to secure driveshaft bear-
ing cross to the end yoke at wheel hubs. Torque bolts
from 200 to 250 ft–lb (271 to 339 N–m).
14.Lower
machine to ground.
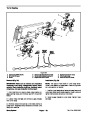
B. Align mounting holes in driveshafts with reliefs in
transaxle shafts.
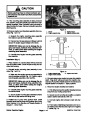
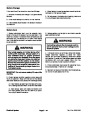
WARNING
C. Apply Loctite #242 (or equivalent) to threads of
cap screws used to secure driveshafts to transaxle
shafts.
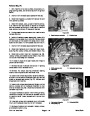
Connecting battery cables to the wrong post
could result in personal injury and/or damage
to the electrical system.
D. Install cap screws and flange nuts to secure dri-
veshaft to transaxle input shaft (Fig. 28).
15.Connect positive (+) cable to battery first and then
negative (–) cable.
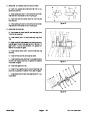
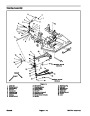
E. Install cap screws, hardened washers, and lock
nuts to secure driveshafts to transaxle axle shafts
(Fig. 27).
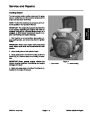
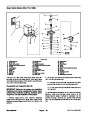
16.Fill transaxle with Dexron III ATF oil (see Operator’s
Manual).
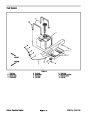
7.
Secure LH parking brake cable to front transaxle
mount with two (2) R–clamps.
8.
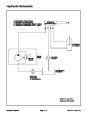
Remove all caps or plugs placed on hydraulic hoses
and fittings during disassembly.
9.
Lubricate new suction and return hose o–rings with
Dexron III ATF oil. Install suction and return hoses to
transaxle.
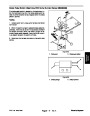
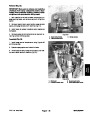
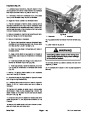
10.Position
shift cables to cable mount noting cable
identification made during disassembly. Center the
cable threads to the cable mounts and secure cables
with jam nuts (Fig. 26).
11.
Check and adjust shift cables as needed (see Shift
Cable Adjustment in the Adjustments section of this
Chapter).
12.Secure
shift cable ends to shift arm levers of trans-
axle with clevis pins and cotter pins.
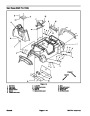
Drive Train
Page 7 – 28
Multi Pro 1200/1250
| Categories | Lawn Mower Manual, Sprinkler and Irrigation Manuals, Toro Sprinkler and Irrigation Manuals |
|---|---|
| Tags | Toro Multi Pro 1200, Toro Multi Pro 1250 |
| Download File |
|
| Document Type | Service Manual |
| Language | English |
| Product Brand | Toro. Customer Service Representatives are available by phone:
Monday - Friday 7:30 a.m. to 9:00 p.m. (CDT) - Saturday 8:00 a.m. to 8:00 p.m. (CDT) - Sunday 10:00 a.m. to 8:00 p.m. (CDT)
Canada 1-888-225-4886 USA 1-888-384-9939, Lawn Mower |
| Document File Type | |
| Publisher | toro.com |
| Wikipedia's Page | Toro Company |
| Copyright | Attribution Non-commercial |
(0 votes, average: 0 out of 5)