


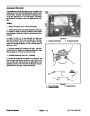


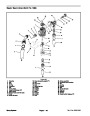


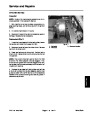


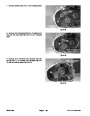
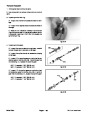


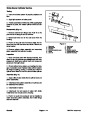


7.
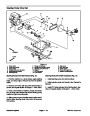
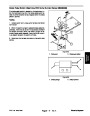
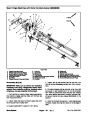
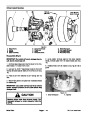
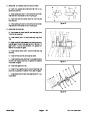
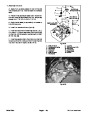
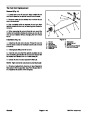
into housing. Align output shaft worm gear with input
shaft gear.
Slide output shaft with worm gear and bearing cones
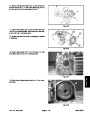
11.Install retaining ring to output shaft.
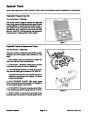
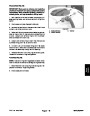
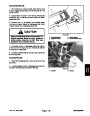
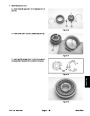
breather assembly was removed from gearbox,
12.If
apply Loctite #271 (or equivalent) to threads on each
end of nipple. Install nipple into gearbox housing and
then thread coupling onto nipple. Apply thread sealant
onto threads of breather and install breather onto cou-
pling.
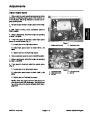
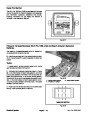
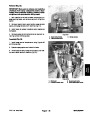
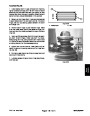
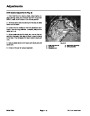
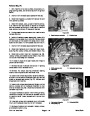
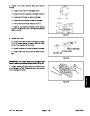
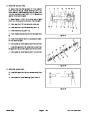
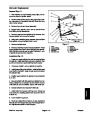
8.
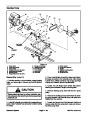
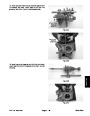
Adjust output shaft end play.
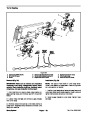
A. Position one red (.002”) and one blue (.005”)
shim to both openings of gearbox housing.
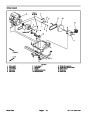
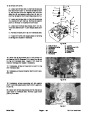
B. Install both output caps (items 6 and 25) (o–rings
and seals not installed on caps) to gearbox housing.
Torque cap screws 8 ft–lb (10.8 N–m) while checking
for binding of shaft. If shaft binds as screws are tight-
ened, add additional shims.
2
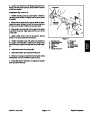
C. After both output caps are installed, check end
play of output shaft. Shaft end play should be .001” to
.003”
(.025 to .076 mm). End play can be adjusted by
adding or removing shims from between output caps
and gearbox housing. Total shim thickness at one
output cap should be within .005” (.13 mm) of the to-
tal shim thickness of the other cap.
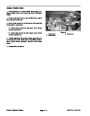
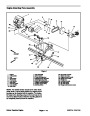
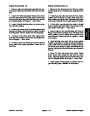
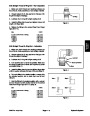
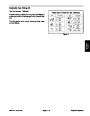
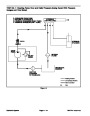
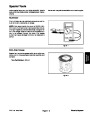
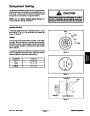
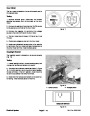
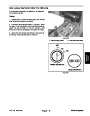
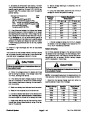
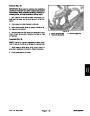
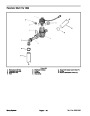
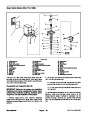
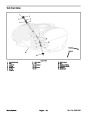
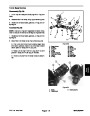
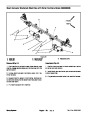
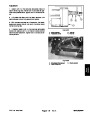
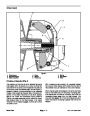
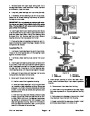
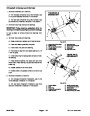
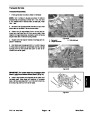
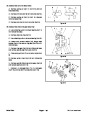
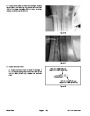
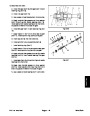
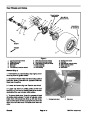
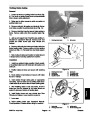
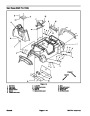
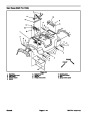
1
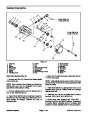
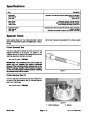
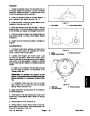
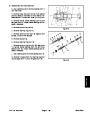
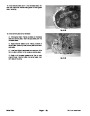
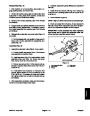
Figure 20
1.
Worm gear (output shaft)
2.
Gear pattern
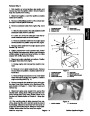
D. Check gear contact by applying blueing com-
pound to worm gear (item 3) teeth. Turn worm (input)
shaft while putting a slight load on output shaft. In-
spect contact on gear by viewing through drain plug
opening in gear housing. Worm contact should be
centered on both sides of the gear (Fig. 20). To adjust
gear contact while maintaining shaft end play, move
shim(s) from one side of the gear housing to the oth-
er.
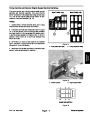
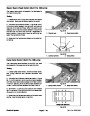
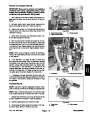
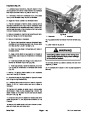
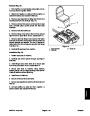
9.
Once correct quantity of shims has been determined
and gear contact has been adjusted, make final assem-
bly of output caps to gearbox housing.
A. Remove output caps from gearbox housing.
B. Install new o–rings into groove of output caps.
Apply light coat of grease on o–rings and gearbox
housing bores.
C. Taking care not to damage o–rings or shims,
install caps over output shaft and into housing.
D. Apply Loctite #242 to cap screw threads. Install
and torque cap screws 8 ft–lb (10.8 N–m).
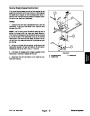
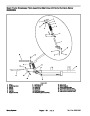
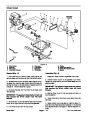
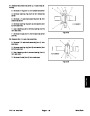
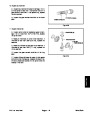
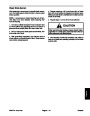
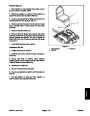
10.Install
seals into input and output caps.
A. Apply a light coat of Permatex (aviation type) to
outside diameter of new shaft seal.
B. To prevent seal damage, cover shaft keyway with
seal protector, cellophane tape, or other thin materi-
al. Apply light coat of grease on seal lip and place
seal on the shaft with the seal lip facing in.
C. Press seal evenly into cap bore until seal is flush
to the cap face.
Drive Train
Page 7 – 20
Multi Pro 1200/1250
| Categories | Lawn Mower Manual, Sprinkler and Irrigation Manuals, Toro Sprinkler and Irrigation Manuals |
|---|---|
| Tags | Toro Multi Pro 1200, Toro Multi Pro 1250 |
| Download File |
|
| Document Type | Service Manual |
| Language | English |
| Product Brand | Toro. Customer Service Representatives are available by phone:
Monday - Friday 7:30 a.m. to 9:00 p.m. (CDT) - Saturday 8:00 a.m. to 8:00 p.m. (CDT) - Sunday 10:00 a.m. to 8:00 p.m. (CDT)
Canada 1-888-225-4886 USA 1-888-384-9939, Lawn Mower |
| Document File Type | |
| Publisher | toro.com |
| Wikipedia's Page | Toro Company |
| Copyright | Attribution Non-commercial |
(0 votes, average: 0 out of 5)