


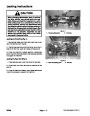


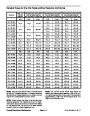


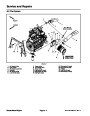
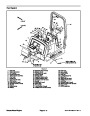
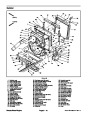
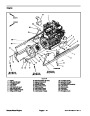
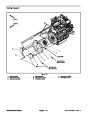


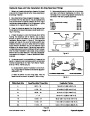


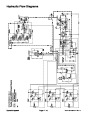
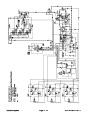
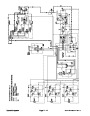
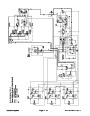
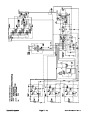

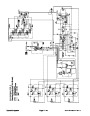
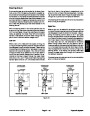

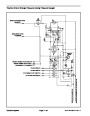
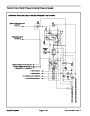

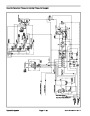
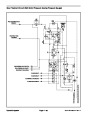

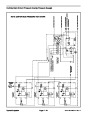
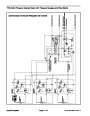
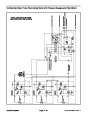
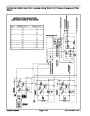

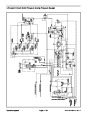

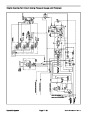

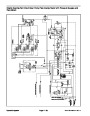
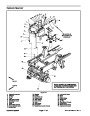
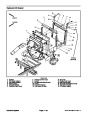
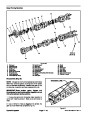

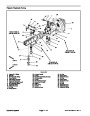
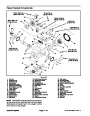


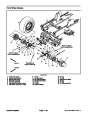


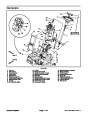
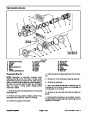

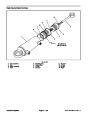
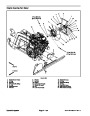


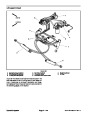

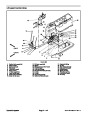
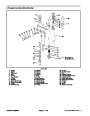
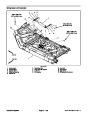
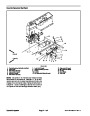


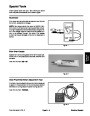
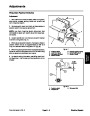
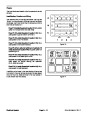


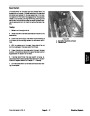
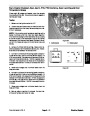

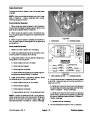

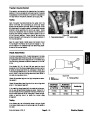

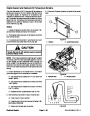


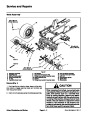

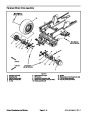


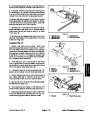
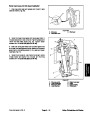


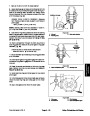
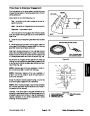


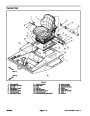

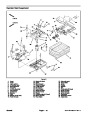
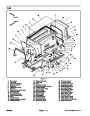


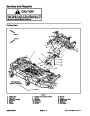
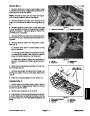

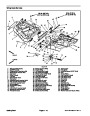
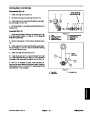

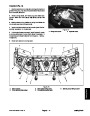
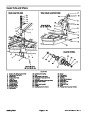


4WD Manifold Service (Fig. 60)
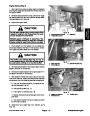
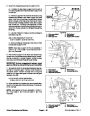
Make sure the manifold is clean before removing the
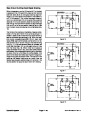
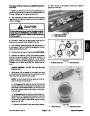
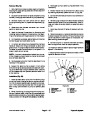
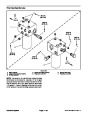
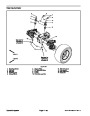
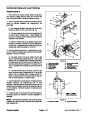
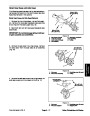
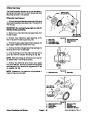
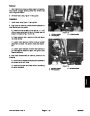
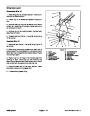
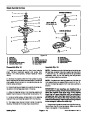
8. Reinstall the cartridge valve:
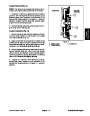
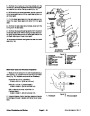
1.
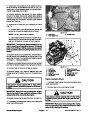
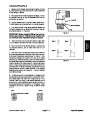
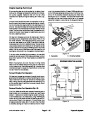
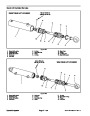
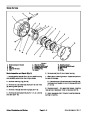
A. Lubricate new seal kit components with clean hy-
draulic oil and install on valve. The O--rings, sealing
ringsandbackupringsmustbearrangedproperlyon
the cartridge valve for proper operation and sealing.
valve.
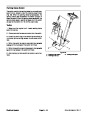
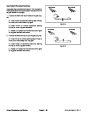
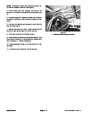
2.
ing solenoid to the cartridge valve. Carefully slide sole-
noid off the valve.
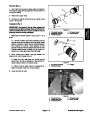
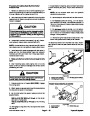
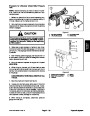
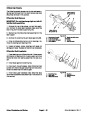
If cartridge is solenoid operated, remove nut secur-
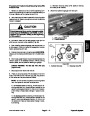
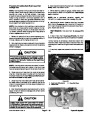
IMPORTANT: Use care when handling the valve
cartridge. Slight bending or distortion of the
stem tube can cause binding and malfunction.
IMPORTANT: Use care when handling the valvecar-
tridge. Slight bending or distortion of the stem tube
can cause binding and malfunction.
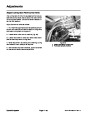
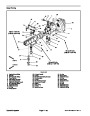
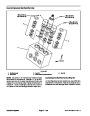
B. Thread cartridge valve carefully into manifold
port. The valve should go in easily without binding.
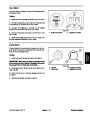
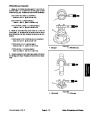
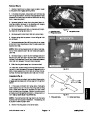
3.
Remove cartridge valve with a deep socket wrench.
Note correct location for O--rings, sealing rings and
backup rings. Remove and discard seal kit.
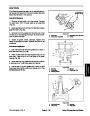
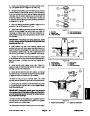
C. Torquecartridgevalveusingadeepsockettoval-
ue identified in manifold illustration.
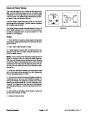
4.
tothesealingsurfaces,damagedthreads orcontamina-
tion.
Visually inspect the port in the manifold for damage
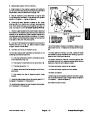
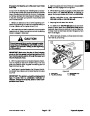
D. If cartridge is solenoid operated, carefully install
solenoid coil to the cartridge valve. Torque nut to val-
ue identified in manifold illustration.
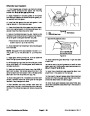
5.
surfaces and contamination.
Visually inspect cartridge valve for damaged sealing
9. If problems still exist, remove valve and clean again
or replace valve.
A. Contamination may cause valves to stick or hang
up.Contaminationcanbecomelodgedinsmallvalve
orifices or seal areas causing malfunction.
B. If valve sealing surfaces appear pitted or dam-
aged, the hydraulic system may be overheating or
there may be water in the system.
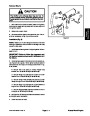
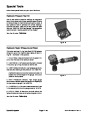
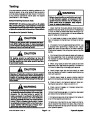
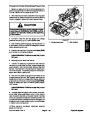
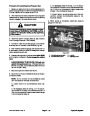
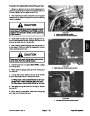
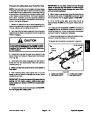
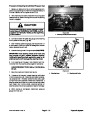
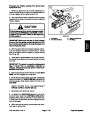
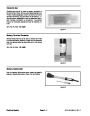
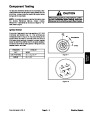
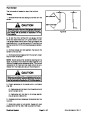
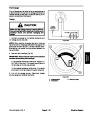
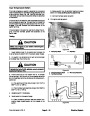
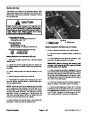
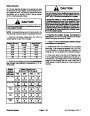
CAUTION
Use eye protection such as goggles when using
compressed air.
6.
Clean cartridge valve using clean mineral spirits.
Submerge valve in clean mineral spirits to flush out con-
tamination.Particlesasfineastalcumpowdercanaffect
the operation of high pressure hydraulic valves. If car-
tridgedesignallows,useawoodorplasticprobetopush
the internal spool in and out 20 to 30 times to flush out
contamination. Be extremely careful not to damage car-
tridge. Use compressed air for cleaning.
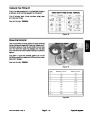
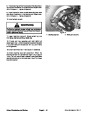
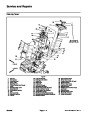
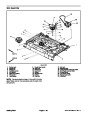
7.
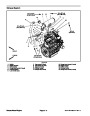
The 4WD control manifold includes three (3) orifice
fittings (items 9 and 13). The 0.030 orifice (item 9) is
positioned in the SV port under the solenoid cartridge
valve. The 0.050 orifices (item 13) thread into the man-
ifold in ports OR1 and OR2. Before removing or instal-
ling the orifice in OR1, removal of the #6 plug in the
bottom of the manifold is necessary.
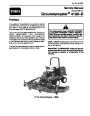
Groundsmaster 4100--D
Page 4 -- 87
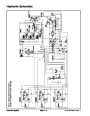
Hydraulic System
| Categories | Lawn Mower Manual, Sprinkler and Irrigation Manuals, Toro Sprinkler and Irrigation Manuals |
|---|---|
| Tags | Toro Groundsmaster 30413, Toro Groundsmaster Groundsmaster 4100 D |
| Download File |
|
| Document Type | Service Manual |
| Language | English |
| Product Brand | Toro. Customer Service Representatives are available by phone:
Monday - Friday 7:30 a.m. to 9:00 p.m. (CDT) - Saturday 8:00 a.m. to 8:00 p.m. (CDT) - Sunday 10:00 a.m. to 8:00 p.m. (CDT)
Canada 1-888-225-4886 USA 1-888-384-9939, Lawn Mower |
| Document File Type | |
| Publisher | toro.com |
| Wikipedia's Page | Toro Company |
| Copyright | Attribution Non-commercial |
(0 votes, average: 0 out of 5)
At only 700mm wide the Mini Dumper is even at home on tight access
sites. No need to grunt, groan, and force the
mower about the yard. The US will be getting a revised 2011 Jeep Wrangler but the diesel option will not be offered in the United States.