


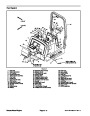
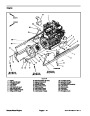
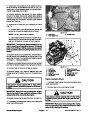
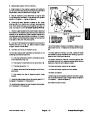


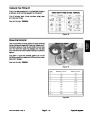
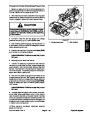

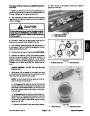

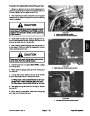
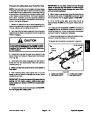

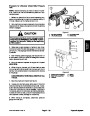


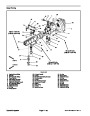
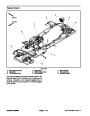

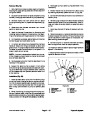


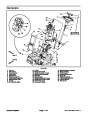
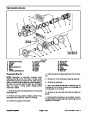


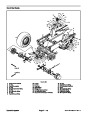


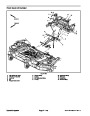

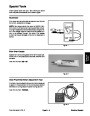
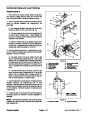


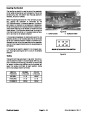
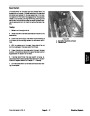
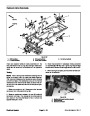
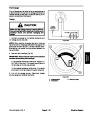


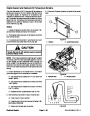

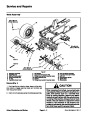
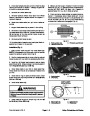


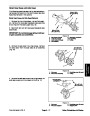
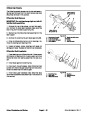

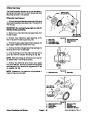
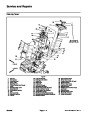

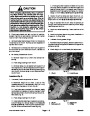

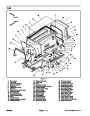


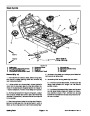
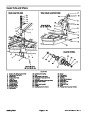


Removal (Fig. 6)
Park machine on a level surface, lower cutting deck,
stop engine, engage parking brake and remove key
from the ignition switch.
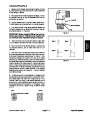
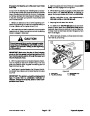
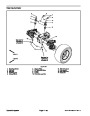
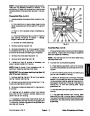
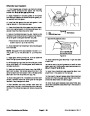
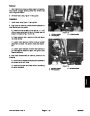
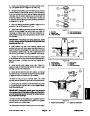
4. Securehydraulic wheelmotortoplanetary assembly
withtwo(2)capscrews. Torquescrews from 75to85ft--
lb (101 to 115 N--m).
1.
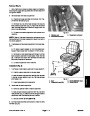
5. Install wheel assembly.
2.
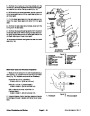
Drainoilfromplanetary wheeldrive/brake assembly.
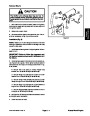
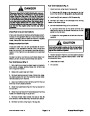
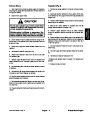
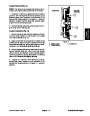
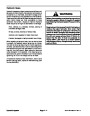
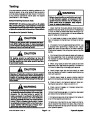
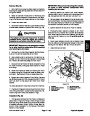
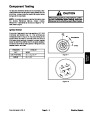
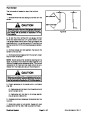
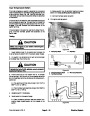
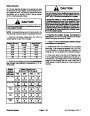
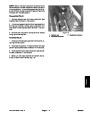
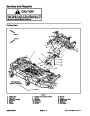
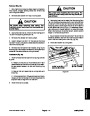
WARNING
CAUTION
Failure to maintain proper torque could result in
failure orloss of wheel and mayresult inperson-
al injury.
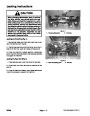
When removing front wheel, use correct jacks
and supports. Make sure machine isparked on a
solid, level surface such as a concrete floor.
Prior to raising machine, remove any attach-
ments that may interfere with the safe and prop-
erraisingof themachine. Alwayschock orblock
wheels. Use jack stands to support the raised
machine. If the machine is not properly sup-
ported by jack stands, the machine may move or
fall, which may result in personal injury.
6. Lower machine from jack stands. Torque lug nuts
from 85 to 100 ft--lb (115 to 135 N--m).
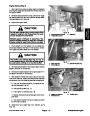
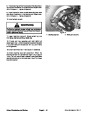
7.
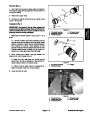
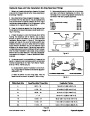
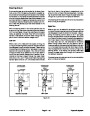
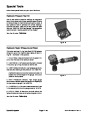
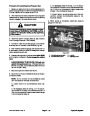
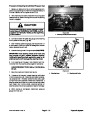
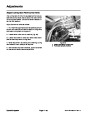
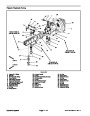
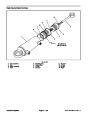
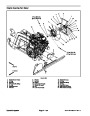
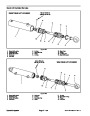
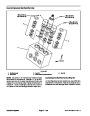
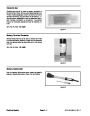
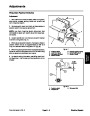
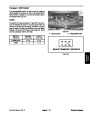
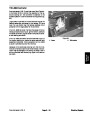
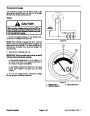
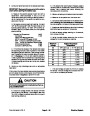
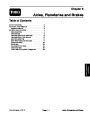
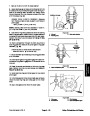
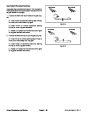
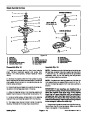
Make sure drain plug is installed in bottom of brake
assembly (Fig. 7). Fill planetary wheel drive/brake as-
sembly with SAE 85W--140 gear lube. Capacity is
approximately 16 fl. oz. (0.47 l) per wheel.
8.
Check for proper brake operation.
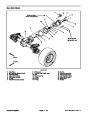
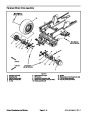
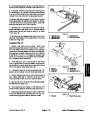
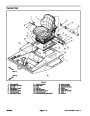
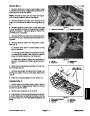
3.
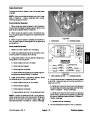
Chock rear wheels and jack up front of machine (see
JackingInstructions inChapter1 -- Safety).Supportma-
chine with suitable jack stands.
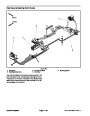
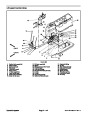
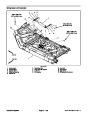
2
1
4.
5.
brake assembly to planetary assembly (see Brake As-
sembly Removal in this Chapter).
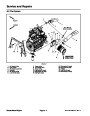
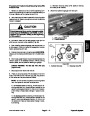
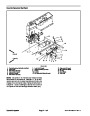
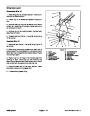
Remove front wheel assembly.
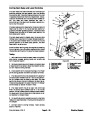
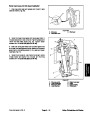
Remove four (4) flange head screws that secure
4
3
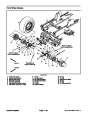
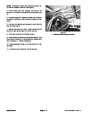
6.
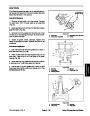
Support hydraulic wheel motor to prevent it from fal-
ling. Remove two (2) cap screws that secure wheel mo-
tor to planetary assembly.
5
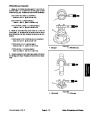
7.
Supportplanetaryassemblytopreventitfromfalling.
4
Loosen and remove flange head screws that secure
planetary assembly to frame. Remove planetary as-
sembly from machine.
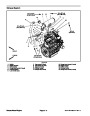
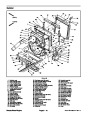
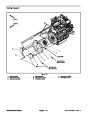
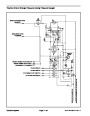
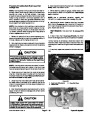
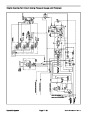
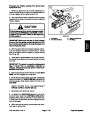
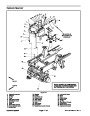
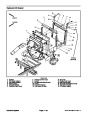
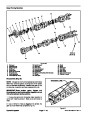
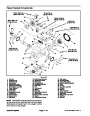
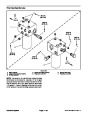
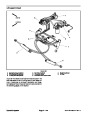
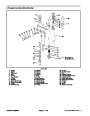
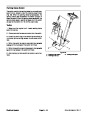
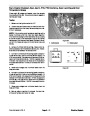
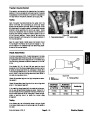
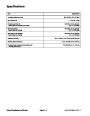
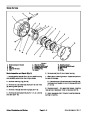
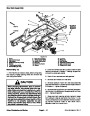
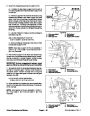
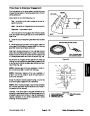
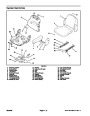
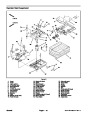
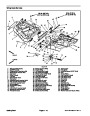
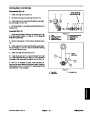
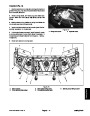
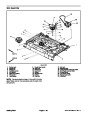
Figure 7
1.
2.
3.
Brake housing
Wheel motor cap screw
Brake flange screw
4.
5.
Planetary flange screw
Brake drain plug
Installation (Fig. 6)
1.
Inspectgasketbetweenbrakeandplanetary assem-
blies. Replace as needed.
2.
Position planetary assembly to machine. Install
flange head screws that secure planetary assembly to
frame. Torque screws from 75 to 85 ft--lb (101 to 115
N--m).
3.
four(4)flangeheadscrews(seeBrakeAssembly Instal-
Secure brake assembly to planetary assembly with
lationinthisChapter).Torquescrewsfrom75to85ft--lb
(101
to 115 N--m).
Groundsmaster 4100--D
Page 6 -- 9
Axles, Planetaries and Brakes
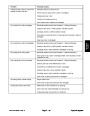
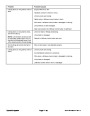
| Categories | Lawn Mower Manual, Sprinkler and Irrigation Manuals, Toro Sprinkler and Irrigation Manuals |
|---|---|
| Tags | Toro Groundsmaster 30413, Toro Groundsmaster Groundsmaster 4100 D |
| Download File |
|
| Document Type | Service Manual |
| Language | English |
| Product Brand | Toro. Customer Service Representatives are available by phone:
Monday - Friday 7:30 a.m. to 9:00 p.m. (CDT) - Saturday 8:00 a.m. to 8:00 p.m. (CDT) - Sunday 10:00 a.m. to 8:00 p.m. (CDT)
Canada 1-888-225-4886 USA 1-888-384-9939, Lawn Mower |
| Document File Type | |
| Publisher | toro.com |
| Wikipedia's Page | Toro Company |
| Copyright | Attribution Non-commercial |
(0 votes, average: 0 out of 5)
At only 700mm wide the Mini Dumper is even at home on tight access
sites. No need to grunt, groan, and force the
mower about the yard. The US will be getting a revised 2011 Jeep Wrangler but the diesel option will not be offered in the United States.