


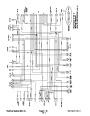


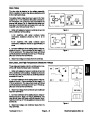


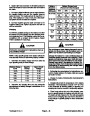


D. Gears should be free of excessive scoring and
wear.
2
E. Make sure drive and idler gears have their snap
rings in the grooves on each side.
F. Break sharp edges of gear teeth with emery cloth.
G. Gear width on the drive gear and front idler gear
should not be less than 0.384 inch (9.75 mm). Gear
width on the back gear and back idler gear should not
be less than 0.244 inch (6.20 mm).
2
1
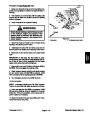
4.
5.
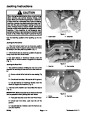
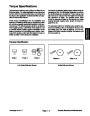
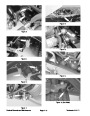
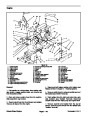
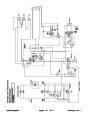
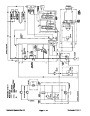
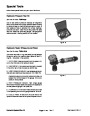
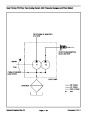
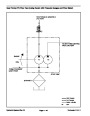
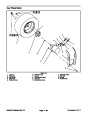
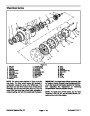
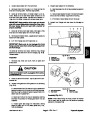
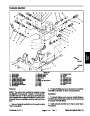
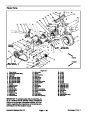
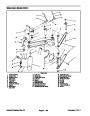
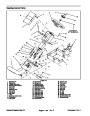
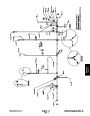
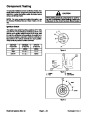
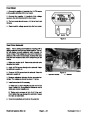
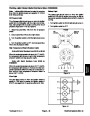
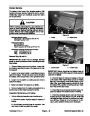
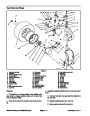
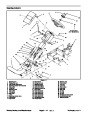
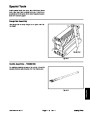
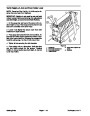
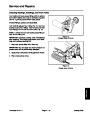
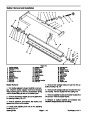
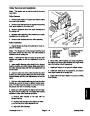
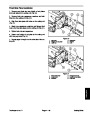
Inspect body for the following:
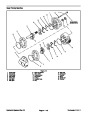
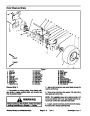
Figure 78
A. Gear pockets should be free of excessive scoring
and wear.
1.
Front plate
2.
Oil groove
B. Inside diameter of gear pockets should not ex-
ceed 1.719 inches (43.7mm).
2
2
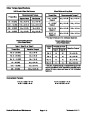
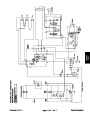
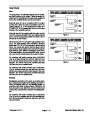
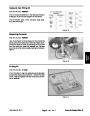
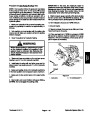
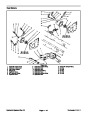
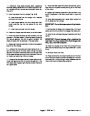
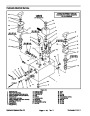
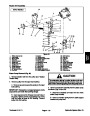
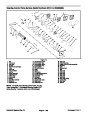
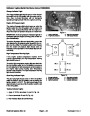
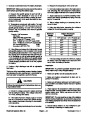
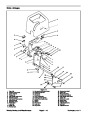
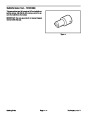
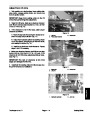
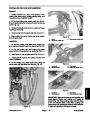
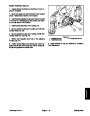
Inspect front plate, back plate, and adapter plate as
follows:
A. Inside diameter of all bushings should not exceed
0.755 inch (19.2 mm).
B. Bushings in the front plate should extend 0.126
inch (3.20 mm) from the plate surface.
1
C. Bushings on the wear plate side of the adapter
plate should extend 0.126 inch (3.20 mm) from the
plate surface.
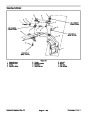
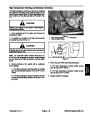
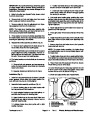
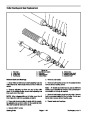
Figure 79
1.
Back plate
2.
Oil groove
D. Scoring on the face of the back plate or the back
plate side of the adapter plate should not exceed
4. Install new pressure seal and back−up gasket into
both new wear plates. The flat section in the middle of
the back−up gasket must face away from the wear plate
inside the seal.
0.0015
inch (0.038 mm).
E. The oil groove in the bushings of the front plate
should be opposite each other and in line with with
the dowel pin holes. The oil groove in the bushings of
the back plate should be about 37o to the pressure
5. Install wear plate into the gear pocket with the pres-
sure seal and back−up gasket against the front plate.
Make sure mid section cut−away of the wear plate is on
the suction side of the pump.
port (Fig. 78 and 79).
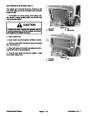
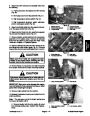
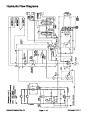
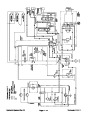
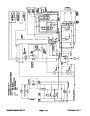
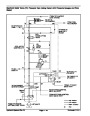
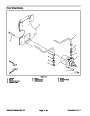
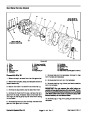
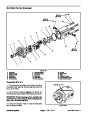
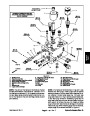
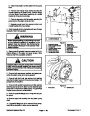
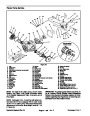
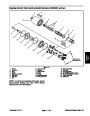
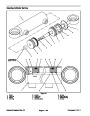
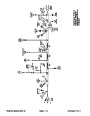
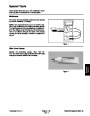
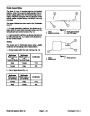
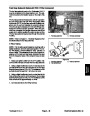
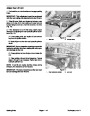
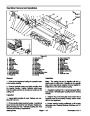
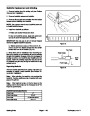
Reassembly (Fig. 76)
6. Dip drive gear and front idler gear into clean hydrau-
lic oil. Install gear shafts into the front plate bushings so
that the gears set inside the gear pockets.
NOTE: When reassembling the pump, check the mark-
er line on each part to make sure the parts are properly
aligned during reassembly.
7. Install new O−ring into the groove of the adapter
plate on the side with the bushings below the surface.
1.
Lubricate new O−rings, pressure seals, back−up
gaskets, and wear plates with a thin coat of petroleum
jelly. Lubricate all other internal parts freely with clean
hydraulic oil.
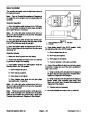
8. Align marker line on the body and adapter plate.
Install adapter plate onto the body and gear shafts.
9.
Install second new O−ring to the other side of the
2.
Install O−ring into the groove of the front plate.
adapter plate.
3.
of petroleum jelly. Place front body onto front plate so the
half moon port cavities face away from the front plate.
Lubricate gear pockets of front body with a thin coat
10.Coat key lightly with petroleum jelly to hold it in place.
Install key into the slot in the drive gear shaft.
11.
Align marker line on back body and adapter plate.
Install body onto adapter plate and drive gear shaft.
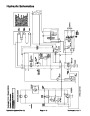
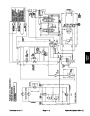
Hydraulic System (Rev. C)
Reelmaster 3100−D
Page 4 − 112
| Categories | Lawn Mower Manual, Sprinkler and Irrigation Manuals, Toro Sprinkler and Irrigation Manuals |
|---|---|
| Tags | Toro Reelmaster 3100-D |
| Download File |
|
| Document Type | Service Manual |
| Language | English |
| Product Brand | Toro. Customer Service Representatives are available by phone:
Monday - Friday 7:30 a.m. to 9:00 p.m. (CDT) - Saturday 8:00 a.m. to 8:00 p.m. (CDT) - Sunday 10:00 a.m. to 8:00 p.m. (CDT)
Canada 1-888-225-4886 USA 1-888-384-9939, Lawn Mower |
| Document File Type | |
| Publisher | toro.com |
| Wikipedia's Page | Toro Company |
| Copyright | Attribution Non-commercial |
(0 votes, average: 0 out of 5)