

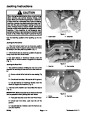

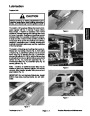


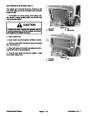


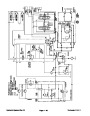
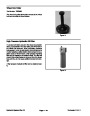


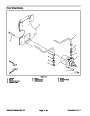

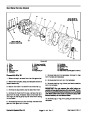

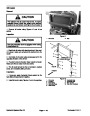
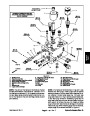


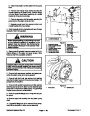


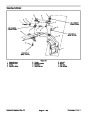


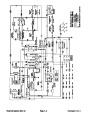

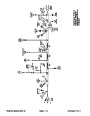
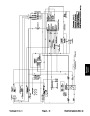


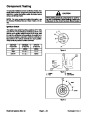


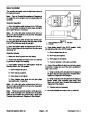
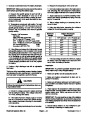
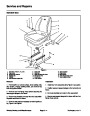
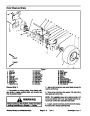

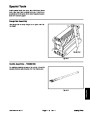


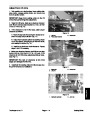
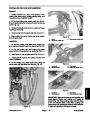
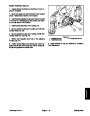


Fixed Side Plate Installation
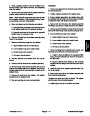
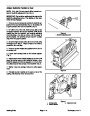
1.
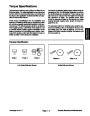
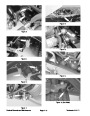
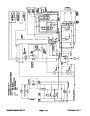
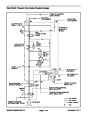
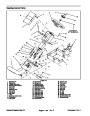
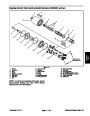
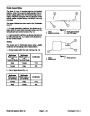
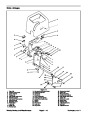
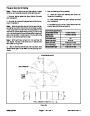
Remove pop rivets and rear height−of−cut plates
from both sides of the cutting unit (Fig. 30).
2
6
4
2.
Remove lock nuts, capscrews, washers, and both
links from the cutting unit (Fig. 30).
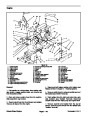
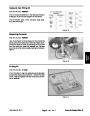
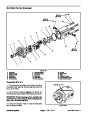
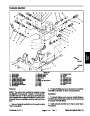
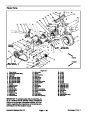
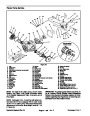
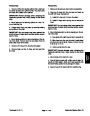
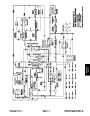
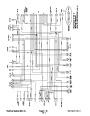
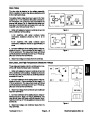
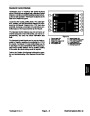
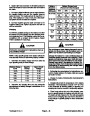
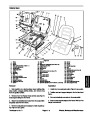
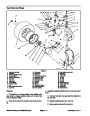
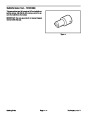
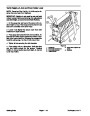
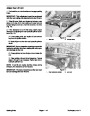
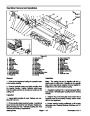
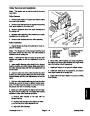
3.
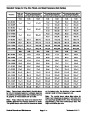
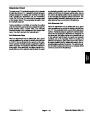
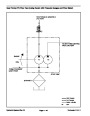
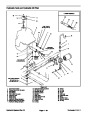
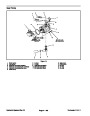
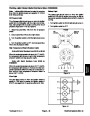
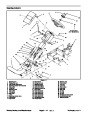
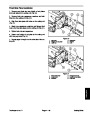
Align fixed side plate with holes on the cutting unit
(Fig. 31).
1
4.
Attach new capscrews, washers, and flanged lock
nuts to the fixed side plate and the cutting unit (Fig. 31).
5.
Tighten lock nuts and capscrews.
3
6.
with new pop rivets (Fig. 31).
Fasten new height−of−cut plate to the cutting unit
5
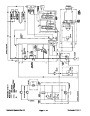
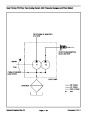
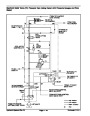
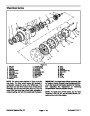
Figure 30
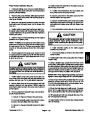
7.
ting unit.
Repeat steps 1 through 6 on the other side of the cut-
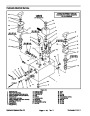
1.
2.
3.
Pop rivet
Height−of−cut plate
Lock nut
4.
5.
6.
Capscrew
Washer
Link
5
1
6
3
4
2
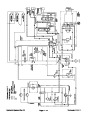
Figure 31
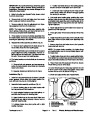
1.
2.
3.
Fixed side plate
Capscrews
Washers
4.
5.
6.
Flanged lock nut
Height−of−cut plate
Pop rivet
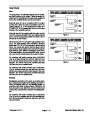
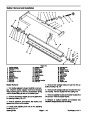
Reelmaster 3100−D
Page 7 − 25
Cutting Units
| Categories | Lawn Mower Manual, Sprinkler and Irrigation Manuals, Toro Sprinkler and Irrigation Manuals |
|---|---|
| Tags | Toro Reelmaster 3100-D |
| Download File |
|
| Document Type | Service Manual |
| Language | English |
| Product Brand | Toro. Customer Service Representatives are available by phone:
Monday - Friday 7:30 a.m. to 9:00 p.m. (CDT) - Saturday 8:00 a.m. to 8:00 p.m. (CDT) - Sunday 10:00 a.m. to 8:00 p.m. (CDT)
Canada 1-888-225-4886 USA 1-888-384-9939, Lawn Mower |
| Document File Type | |
| Publisher | toro.com |
| Wikipedia's Page | Toro Company |
| Copyright | Attribution Non-commercial |
(0 votes, average: 0 out of 5)