


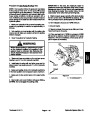
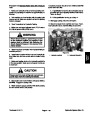


3.
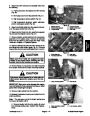
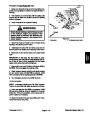
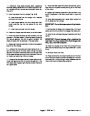
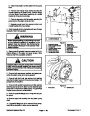
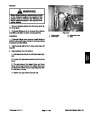
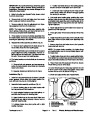
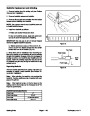
Place a suitable container under the radiator to col-
Installation
lect the coolant. Open drain cock valve, and completely
drain the radiator.
1.
removal procedures.
Remove any plugs from the oil cooler used during the
4.
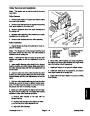
position relay away from the radiator.
Remove glow plug relay from the radiator assembly.
2.
3.
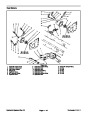
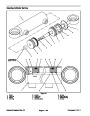
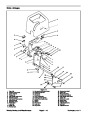
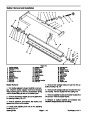
Position radiator carefully to the radiator frame.
Secure radiator assembly to the radiator frame with
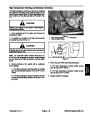
Note:
Allow hydraulic components and hoses to drain
four carriage bolts and lock nuts. Secure top and bottom
of radiator to frame with flange head screws.
into a suitable container. Plug all hydraulic tubes, hoses,
and openings to prevent contamination.
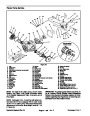
4.
with flange head screws. Install oil cooler to the radiator.
Secure both fan shrouds to the radiator assembly
5.
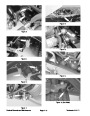
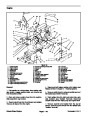
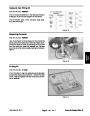
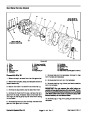
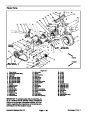
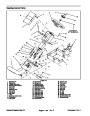
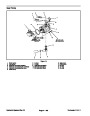
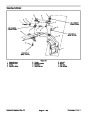
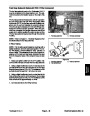
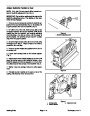
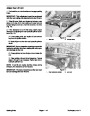
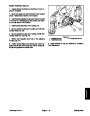
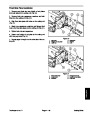
Clean and disconnect the following connections:
A. Hydraulic hose and clamp on the lower left corner
of the radiator leading to the hydraulic manifold.
5.
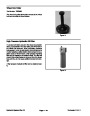
shroud with both flange head screws and flange nuts.
Secure reservoir bracket and reservoir to the top fan
B. Hydraulic tube from the oil cooler at the hydraulic
oil filter head. Do not lose O−ring.
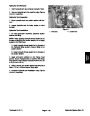
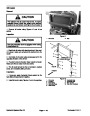
6.
Connect following hoses to the radiator:
A. Upper radiator hose to the water pump.
B. Lower radiator hose to the engine block.
C. Coolant hose to the reservoir.
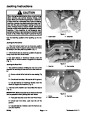
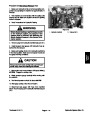
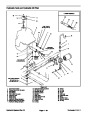
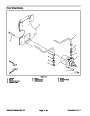
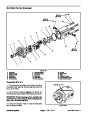
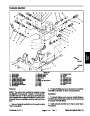
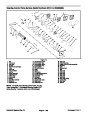
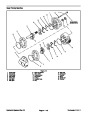
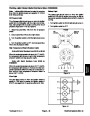
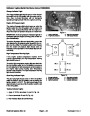
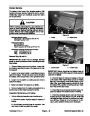
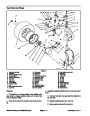
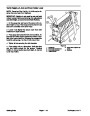
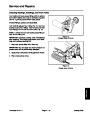
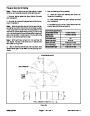
6.
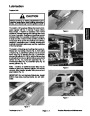
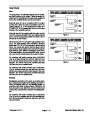
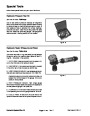
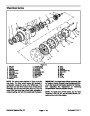
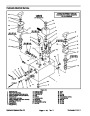
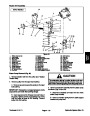
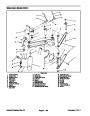
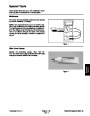
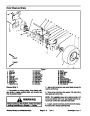
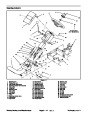
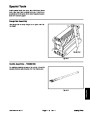
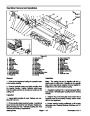
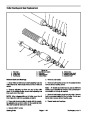
Remove oil cooler from the radiator assembly using
Figure 26 as a guide.
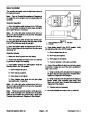
7.
Disconnect following hoses from the radiator:
A. Upper radiator hose to the water pump.
B. Lower radiator hose to the engine block.
C. Coolant hose to the reservoir.
D. Air hose to the air cleaner.
7.
openings used during the removal procedures.
Remove all plugs from hydraulic tubes, hoses, and
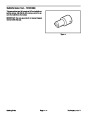
A. Install O−ring to the fitting on the hydraulic oil filter
head. Connect hydraulic tube from the oil cooler to
the filter head.
D. Air hose to the air cleaner.
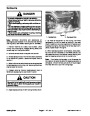
8.
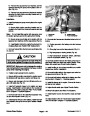
Remove reservoir and bracket from the top fan
shroud.
B. Secure hydraulic hose leading to the hydraulic
manifold with the clamp to the lower left corner of the
radiator.
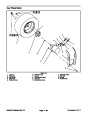
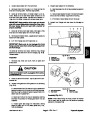
9.
Remove both fan shrouds from radiator assembly.
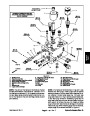
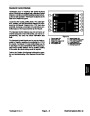
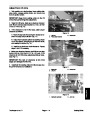
10.Remove
flange head screws securing the top and
bottom of the radiator frame to the radiator. Remove four
carriage bolts and lock nuts securing the radiator to the
radiator frame.
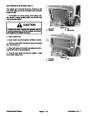
8. Install oil cooler to the radiator assembly using Fig-
ure 26 as a guide.
9.
Secure glow plug relay to the radiator assembly with
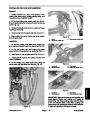
11.
Remove oil cooler from the radiator. Pull radiator
both thread forming screws.
carefully from the radiator frame.
10.Make
sure drain cock valve is closed. Fill radiator
12.Plug
any openings to prevent contamination.
with fluid (see Check Cooling System).
11.
Install engine hood to the machine and close.
Reelmaster 3100−D
Page 3 − 17
Kubota Diesel Engine
| Categories | Lawn Mower Manual, Sprinkler and Irrigation Manuals, Toro Sprinkler and Irrigation Manuals |
|---|---|
| Tags | Toro Reelmaster 3100-D |
| Download File |
|
| Document Type | Service Manual |
| Language | English |
| Product Brand | Toro. Customer Service Representatives are available by phone:
Monday - Friday 7:30 a.m. to 9:00 p.m. (CDT) - Saturday 8:00 a.m. to 8:00 p.m. (CDT) - Sunday 10:00 a.m. to 8:00 p.m. (CDT)
Canada 1-888-225-4886 USA 1-888-384-9939, Lawn Mower |
| Document File Type | |
| Publisher | toro.com |
| Wikipedia's Page | Toro Company |
| Copyright | Attribution Non-commercial |
(0 votes, average: 0 out of 5)