


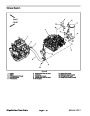


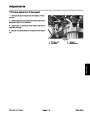


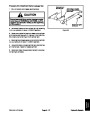


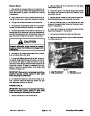


5.
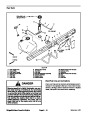
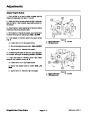
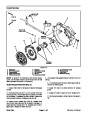
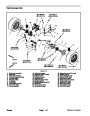
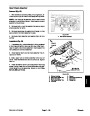
brake rotor:
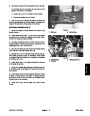
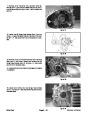
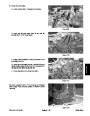
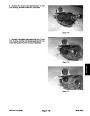
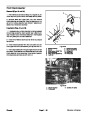
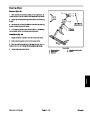
On rear axle, remove parking brake assembly from
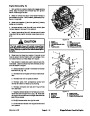
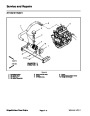
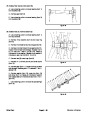
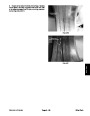
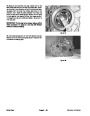
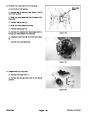
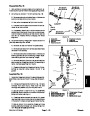
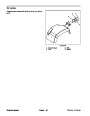
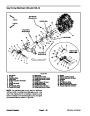
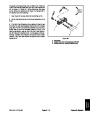
4. Slide brake caliper onto brake rotor. Make sure that
rotor is between brake pads.
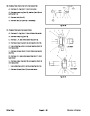
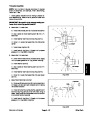
A. Remove two (2) flange head screws that secure
parking brake bracket to rear axle.
5. Align caliper with mounting holes. Secure caliper
with two (2) flange head screws. Torque screws from 35
to 40 ft--lb (48 to 55 N--m).
B. Raise parking brake bracket assembly (bracket,
cable and parking brake caliper) from brake rotor.
Position bracket assembly away from rotor.
6. If brake line was removed from brake caliper, thread
brake line fitting into caliper. Torque brake line fitting
from 120 to 150 in--lb (13.6 to 16.9 N--m).
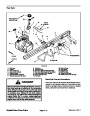
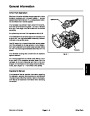
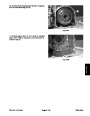
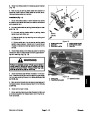
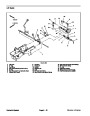
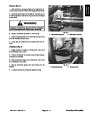
6.
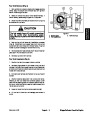
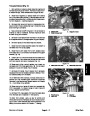
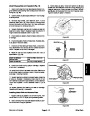
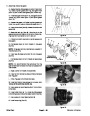
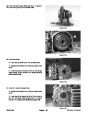
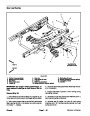
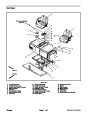
If parking brake caliper removal is needed:
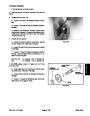
A. Loosen cable jam nuts that secure parking brake
cable to brake bracket.
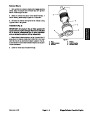
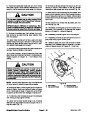
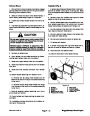
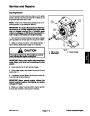
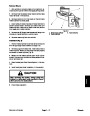
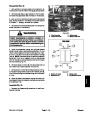
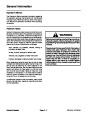
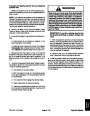
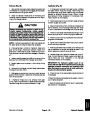
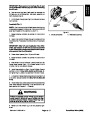
WARNING
B. Remove return spring end from clevis pin on
parking brake lever.
Failure to maintain proper wheel lug nut torque
could result in failure or loss of wheel and may
result in personal injury. Torque wheel lug nuts
from 80 to 90 ft--lb (109 to 122 N--m).
C. Disconnect parking brake cable from parking
brake bracket and caliper lever.
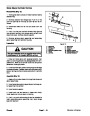
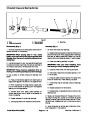
7.
Make sure that wheel lug nuts are properly torqued from
80 to 90 ft--lb (109 to 122 N--m).
Install wheel (see Wheel Installation in this section).
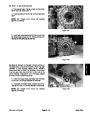
D. Slide parking brake caliper from brake bracket.
Remove brake rotor from wheel hub.
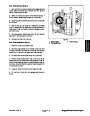
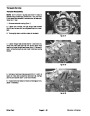
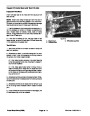
7.
8.
Inspect brake rotor for wear or damage. Minimum
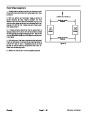
8. If brake line was removed from caliper, bleed brakes
(see Bleed Brake System in this section).
brake rotor thickness is 0.154” (3.9 mm).
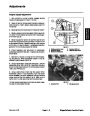
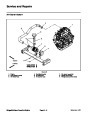
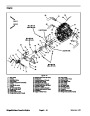
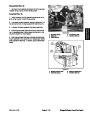
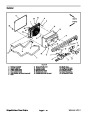
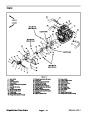
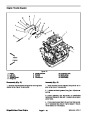
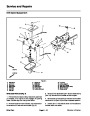
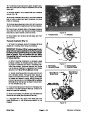
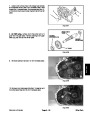
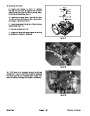
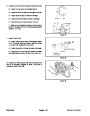
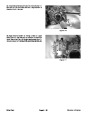
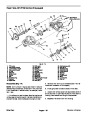
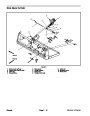
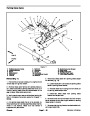
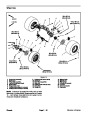
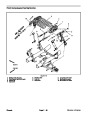
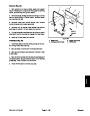
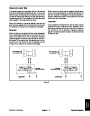
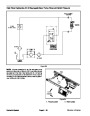
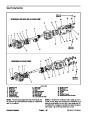
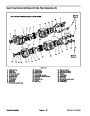
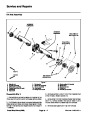
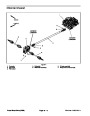
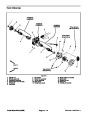
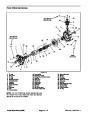
Assembly (Fig. 4)
9. Check parking brake operation and adjust if neces-
sary.
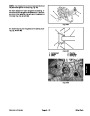
1.
Place brake rotor onto studs in wheel hub.
2.
brake bracket:
If parking brake caliper was removed from parking
CAUTION
A. Slide parking brake caliper onto brake bracket.
After servicing the brakes, always check the
brakes in a wide open, level area that is free of
other persons and obstructions.
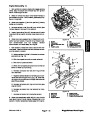
B. Connect parking brake cable to parking brake le-
ver with clevis pin.
10.After
assembly iscompleted,check brakeoperation.
C. Secure clevis pin by inserting return spring end
into clevis pin.
D. Tighten cable jam nuts to secure parking brake
cable to brake bracket. Position jam nuts so that all
threads on cable are showing towards the rear of the
vehicle.
3.
Onrearaxle, installparking brake assembly tobrake
rotor:
A. Slide parking brake bracket assembly (bracket,
cable and parking brake caliper) onto brake rotor.
Make sure that rotor is between brake pads.
B. Secure parking brake bracket to rear axle with
two (2) flange head screws.
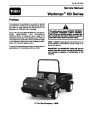
Workman HD Series
Page 7 -- 11
Chassis
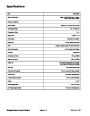
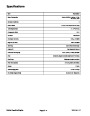
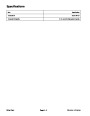
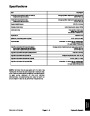
| Categories | Lawn Mower Manual, Sprinkler and Irrigation Manuals, Toro Sprinkler and Irrigation Manuals |
|---|---|
| Tags | Toro 09173SL |
| Download File |
|
| Document Type | Service Manual |
| Language | English |
| Product Brand | Toro. Customer Service Representatives are available by phone:
Monday - Friday 7:30 a.m. to 9:00 p.m. (CDT) - Saturday 8:00 a.m. to 8:00 p.m. (CDT) - Sunday 10:00 a.m. to 8:00 p.m. (CDT)
Canada 1-888-225-4886 USA 1-888-384-9939, Lawn Mower |
| Document File Type | |
| Publisher | toro.com |
| Wikipedia's Page | Toro Company |
| Copyright | Attribution Non-commercial |
(0 votes, average: 0 out of 5)