


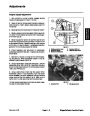


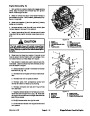


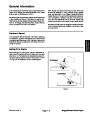
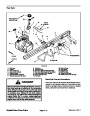
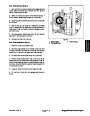
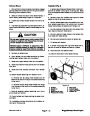
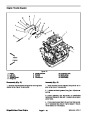
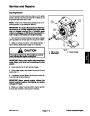


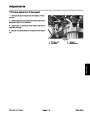
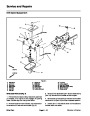


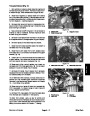
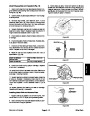


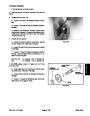

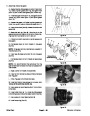


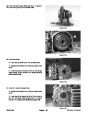
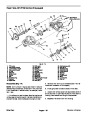


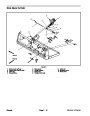
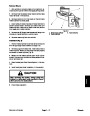
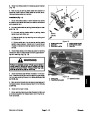
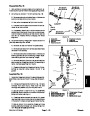


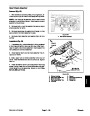
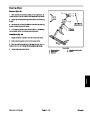


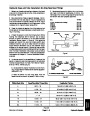
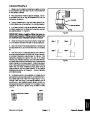

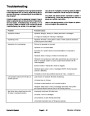


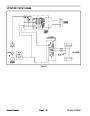
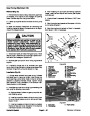

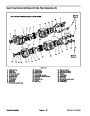


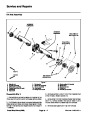

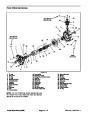


Disassembly (Fig. 15)
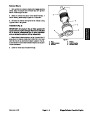
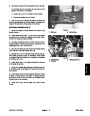
Park vehicle on a level surface, shut engine off, re-
45
(61
to 55 ft--lb
to 74 N--m)
70
to 80 ft--lb
1
1.
(94
to 109 N--m)
move key from ignition switch and apply parking brake.
2
2.
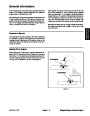
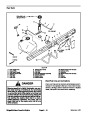
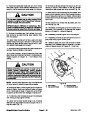
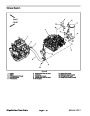
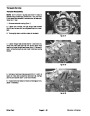
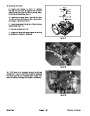
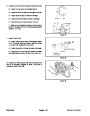
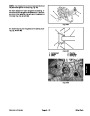
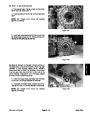
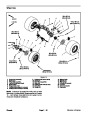
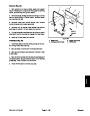
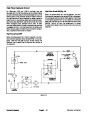
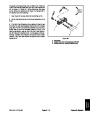
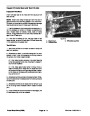
To remove tie rod (item 11) from vehicle (Fig. 16):
3
4
A. Removecotterpinandslottedhexnutthatsecure
outer tie rod ball joint stud to knuckle.
5
B. Use puller to separate ball joint from knuckle.
Loctite #271
C. Unscrew inner tie rod end from center link and re-
move tie rod from vehicle.
RIGHT
FRONT
D. If necessary, loosen jam nut and remove outer tie
rod end from inner tie rod. Count the number of revo-
lutions it takes to remove outer rod end so new rod
end can be installed without changing the wheel
alignment.
7
35
48 to 55 N--m)
to 40 ft--lb
(
6
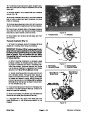
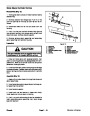
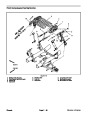
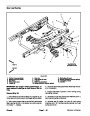
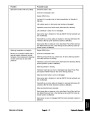
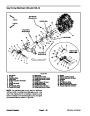
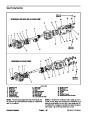
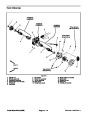
Figure 16
1.
2.
3.
4.
Center link
5.
6.
7.
Knuckle (LH shown)
Cotter pin
Slotted hex nut
Inner tie rod end
Jam nut
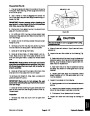
3.
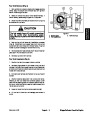
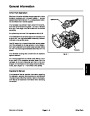
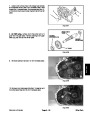
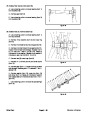
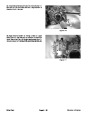
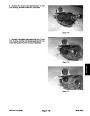
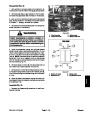
To remove steering linkage (item 19) and center link
(item 20) assembly from vehicle:
Outer tie rod end
A. Remove tie rods from center link (see above).
B. Remove seat base from vehicle (see Seat Base
Removal in this section).
8
C. Removecotterpinandslottedhexnutthatsecure
steering cylinder ball joint to steering linkage. Sepa-
rate steering cylinder from steering linkage.
1
2
85
(115
ft--lb
N--m)
D. Remove fasteners (items 27, 28, 32 and 33) that
secure steering linkage and center link assembly to
frame. Remove assembly from frame.
3
4
E. Disassemble steering linkage and center link as-
sembly as required using Figures 15 and 17 as
guides.
7
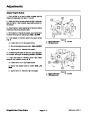
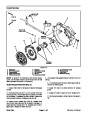
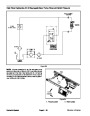
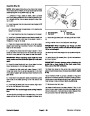
Assembly (Fig. 15)
5
6
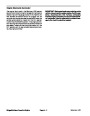
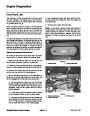
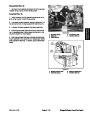
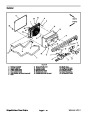
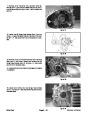
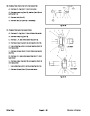
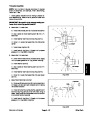
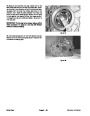
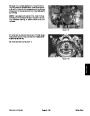
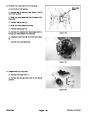
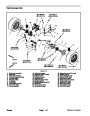
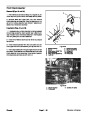
1.
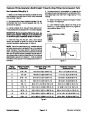
If steering linkage and center link assembly was dis-
assembled, useFigures 15and17asguides forassem-
bly.
RIGHT
FRONT
A. If flange bushings (items 2 and 3 in Fig. 17) were
removed from pivot mount, make sure that new
bushings are pressed fully into the pivot mount.
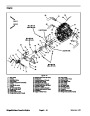
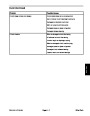
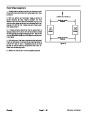
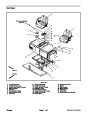
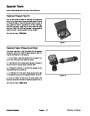
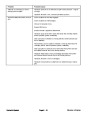
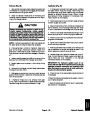
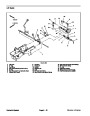
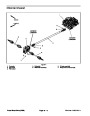
Figure 17
B. Torque spindle nut (item 8 in Fig. 17) to 85 ft--lb
(115
N--m).Deformspindlenutintoslotinidlerarmor
1.
2.
3.
4.
Pivot mount
5.
Thrust washer (2 used)
Pitman arm
Idler arm
Flange bushing (2 used)
Flange bushing (2 used)
Wave washer (2 used)
6.
7.
8.
pitman arm after torquing nut.
Spindle nut (2 used)
C. If bearings were removed from center link, press
newbearingsfullytotheshoulderofthebearingbore
inthecenterlink.Securebearingswithretainingring.
D. Secure center link to steering linkage with cap
screws,washers andflange nuts.Torqueflangenuts
from 40 to 50 ft--lb (55 to 67 N--m).
Workman HD Series
Page 7 -- 25
Chassis
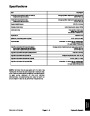
| Categories | Lawn Mower Manual, Sprinkler and Irrigation Manuals, Toro Sprinkler and Irrigation Manuals |
|---|---|
| Tags | Toro 09173SL |
| Download File |
|
| Document Type | Service Manual |
| Language | English |
| Product Brand | Toro. Customer Service Representatives are available by phone:
Monday - Friday 7:30 a.m. to 9:00 p.m. (CDT) - Saturday 8:00 a.m. to 8:00 p.m. (CDT) - Sunday 10:00 a.m. to 8:00 p.m. (CDT)
Canada 1-888-225-4886 USA 1-888-384-9939, Lawn Mower |
| Document File Type | |
| Publisher | toro.com |
| Wikipedia's Page | Toro Company |
| Copyright | Attribution Non-commercial |
(0 votes, average: 0 out of 5)