


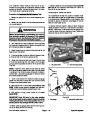


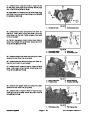


7.
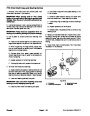
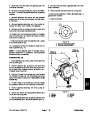
lower bearing cone from frame.
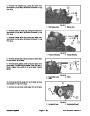
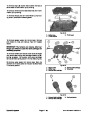
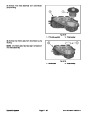
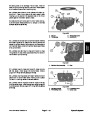
Pry seal from carrier frame. Discard seal. Remove
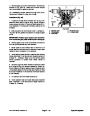
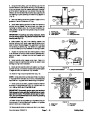
NOTE: Periodic greasing of castor fork bearing area is
not necessary. Do not replace plug (item 12) with grease
fitting. Grease cap (item 1) will loosen if castor fork has
excessive grease installed.
8.
damage. If bearing cups are damaged, remove bearing
cups from frame and replace.
Inspect bearing cups in carrier frame for wear or
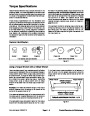
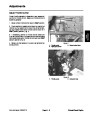
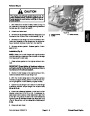
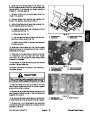
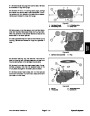
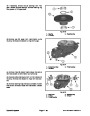
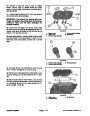
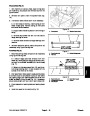
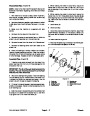
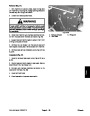
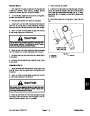
7. Install new grease cap (item 1) so cap shoulder is
flush with top of carrier frame. There should be no evi-
dence that the cap is indented by top of castor fork.
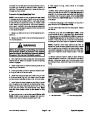
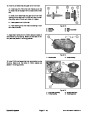
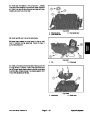
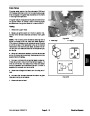
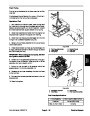
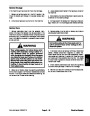
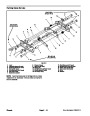
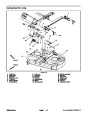
9.
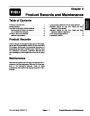
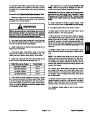
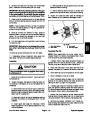
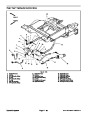
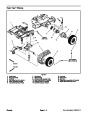
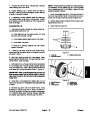
If necessary, remove spacers, seals and bearings
from castor wheel using Figure 15 as a guide. Inspect
and replace all wheel components that show signs of
wear or damage.
8. Position castor wheel to castor fork and secure with
cap screw and lock nut.
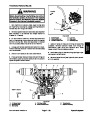
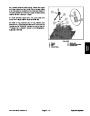
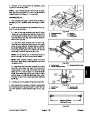
Assembly (Fig. 13)
9. Lower machine to ground.
1.
If components were removed from castor wheel, as-
semble castor wheel (Fig. 15):
1
A. Press bearing cups into castor wheel until they
are flush with shoulder in wheel.
B. Install grease packed bearing cone into wheel.
C. Install seals into wheel.
2
D. Carefully fit bearing spacers and then castor
spacer into wheel.
3
2.
press new cups into carrier frame until they are flush with
shoulder in frame.
If bearing cups were removed from carrier frame,
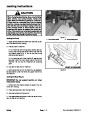
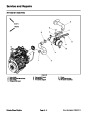
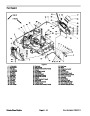
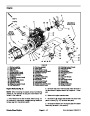
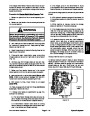
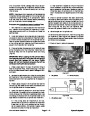
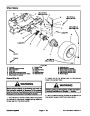
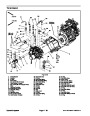
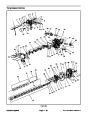
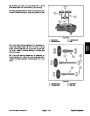
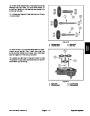
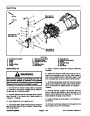
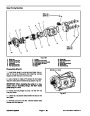
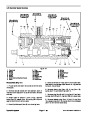
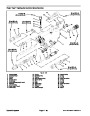
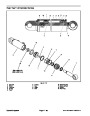
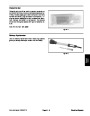
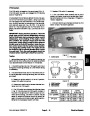
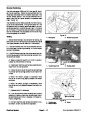
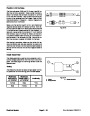
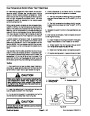
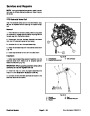
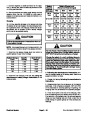
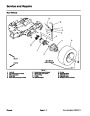
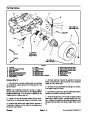
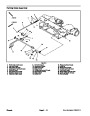
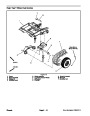
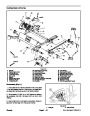
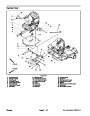
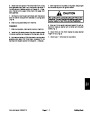
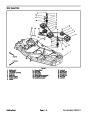
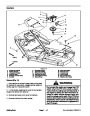
Figure 14
1.
2.
Lock nut
Belleville washer
3.
Upper bearing cone
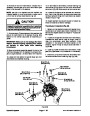
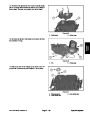
3.
Pack both bearing cones with new grease. Place
grease packed bearing cone into lower bearing cup of
carrier frame. Install new seal.
2
3
5
4.
Slide castor fork up through carrier frame taking care
to not damage seal. Position grease packed bearing
cone onto castor fork. Place three (3) belleville washers
onto castor fork noting orientation shown in Figure 14.
3
2
1
6
1
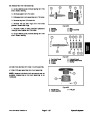
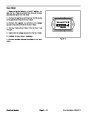
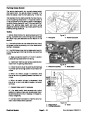
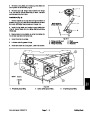
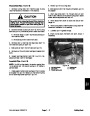
IMPORTANT: After correctly tightening the lock nut
that secures castor fork to carrier frame, it should
take from 70 to 80 in–lb (7.9 to 9.0 N–m) to rotate the
castor fork.
4
4
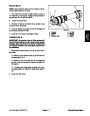
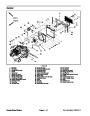
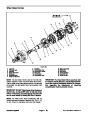
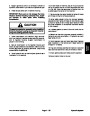
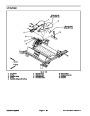
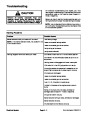
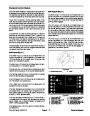
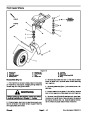
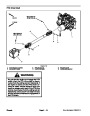
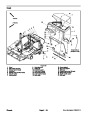
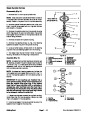
Figure 15
4.
5.
6.
5.
castor fork requires from 70 to 80 in–lb (7.9 to 9.0 N–m)
to rotate.
Install lock nut onto castor fork. Tighten lock nut until
1.
2.
3.
Bearing spacer
Seal
Bearing cone
Bearing cup
Castor wheel
Castor spacer
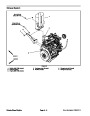
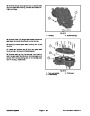
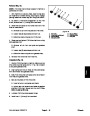
6.
Remove plug (item 12) from carrier frame. Using
grease gun through plug hole in frame, fill area sur-
rounding the castor fork shaft with grease. Allow grease
to fill cavities below lower bearing, between bearings
and above upper bearing. Reinstall plug into frame.
Groundsmaster 7200/7210
Page 6 – 15
Chassis
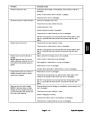
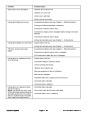
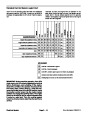
| Categories | Lawn Mower Manual, Sprinkler and Irrigation Manuals, Toro Sprinkler and Irrigation Manuals |
|---|---|
| Tags | Toro Groundsmaster 7200, Toro Groundsmaster 7210 |
| Download File |
|
| Document Type | Service Manual |
| Language | English |
| Product Brand | Toro. Customer Service Representatives are available by phone:
Monday - Friday 7:30 a.m. to 9:00 p.m. (CDT) - Saturday 8:00 a.m. to 8:00 p.m. (CDT) - Sunday 10:00 a.m. to 8:00 p.m. (CDT)
Canada 1-888-225-4886 USA 1-888-384-9939, Lawn Mower |
| Document File Type | |
| Publisher | toro.com |
| Wikipedia's Page | Toro Company |
| Copyright | Attribution Non-commercial |
(0 votes, average: 0 out of 5)
My mower is a TORO 7210.
Start fuse defection. Why ?