
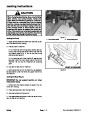


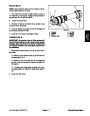
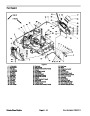
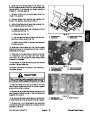


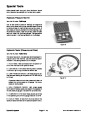

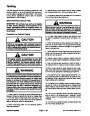


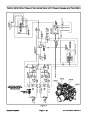
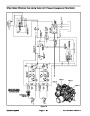
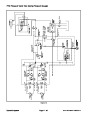

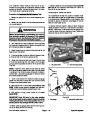
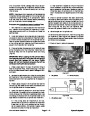


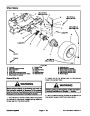

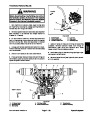
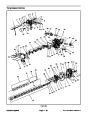
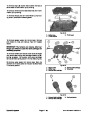
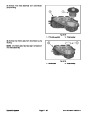


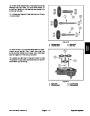

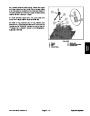

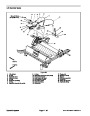
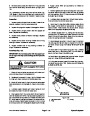
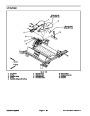


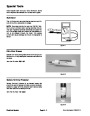
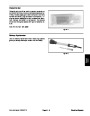
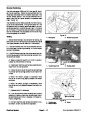
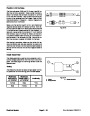
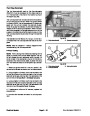
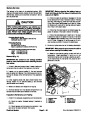


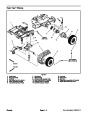
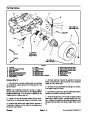

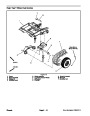
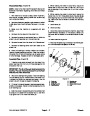


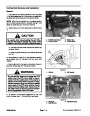

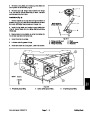
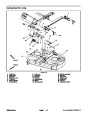


Disassembly (Figs. 16 and 17)
NOTE: Refer to the Polar Trac
additional information regarding drive track and wheel
removal.
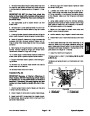
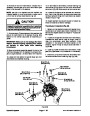
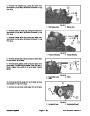
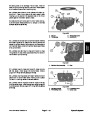
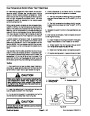
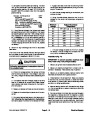
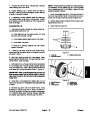
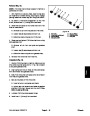
5. While rotating the wheel hub by hand, torque the
slotted hex nut from 75 to 100 in–lb (8.5 to 11.3 N–m) to
set the bearings. Then, loosen the nut until the hub has
endplay.
TM
Operator’s Manual for
6.
While rotating the wheel hub by hand, torque the
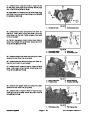
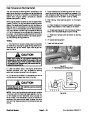
1.
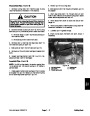
stop engine, engage parking brake and remove key
from the ignition switch.
Park machine on a level surface, lower implement,
slotted hex nut from 15 to 20 in–lb (1.7 to 2.3 N–m)
while aligning hex nut slot with shaft hole. After tighten-
ing, make sure that the wheel hub does not have any
free play.
2.
hub(s) (see Polar Trac
tion).
Remove wheels as needed to gain access to wheel
Wheels Removal in this sec-
TM
7.
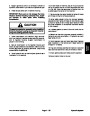
8.
Install cotter pin.
Install dust cap.
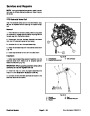
3.
Make sure that machine is supported with jack
stands.
9. Install drive track and wheels to machine. (see Polar
Wheels Installation in this section). Make sure
that drive track is installed in the correct direction of rota-
tion.
Trac
TM
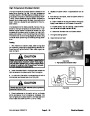
4.
5.
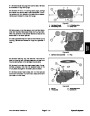
Remove the dust cap from the wheel hub.
Remove the cotter pin and slotted hex nut. Slide the
wheel hub with bearings from the spindle shaft.
10.Lower
machine to ground.
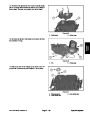
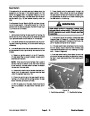
6.
7.
Remove the seal from the wheel hub. Discard seal.
Remove the bearing cones from both sides of the
11.
tern from 65 to 85 ft–lb (88 to 115 N–m).
Torque all removed lug nuts evenly in a crossing pat-
wheel hub.
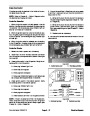
8
8.
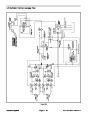
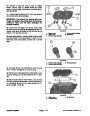
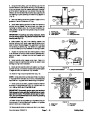
Clean the bearings in solvent. Make sure the bear-
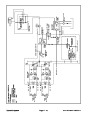
See text
for tightening
procedure
4
ings are in good operating condition. Clean the inside of
the wheel hub. Check the bearing cups for wear, pitting
or other damage. Replace all worn or damaged parts.
5
5
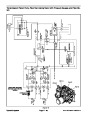
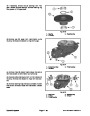
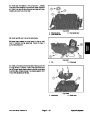
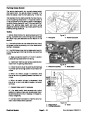
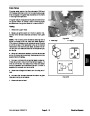
Assembly (Figs. 16 and 17)
3
2
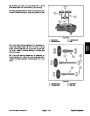
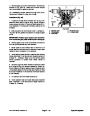
1.
If bearing cups were removed from the wheel hub,
press new cups into the hub until they seat against the
shoulder of the hub.
7
IMPORTANT: The lip of the seal must be toward the
bearing. The seal should be pressed in so it is flush
with the end of the wheel hub.
6
4
1
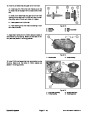
2.
Pack both bearings with grease. Install one bearing
into the bearing cup on inboard side of the wheel hub.
Lubricate the inside of a new seal and press it into the
wheel hub with the seal lip toward the bearing.
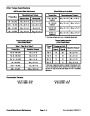
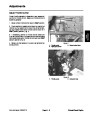
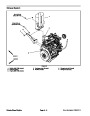
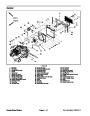
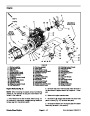
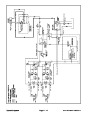
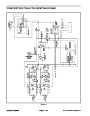
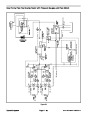
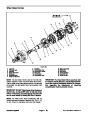
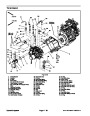
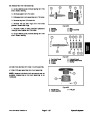
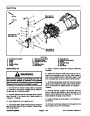
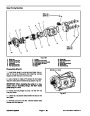
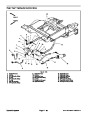
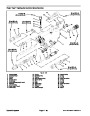
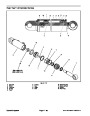
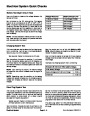
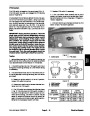
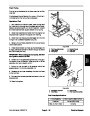
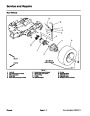
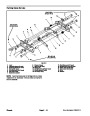
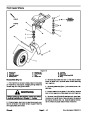
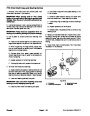
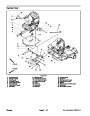
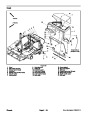
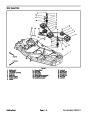
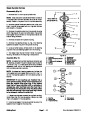
Figure 17
1.
2.
3.
4.
Dust cap
5.
6.
7.
8.
Bearing cup
Wheel hub
Wheel stud (5 used)
Seal
Cotter pin
Slotted hex nut
Bearing cone
3.
Fill wheel hub cavity between bearings approximate-
ly 50% full of grease. Position remaining bearing into the
outer bearing cup.
4.
and secure it in place with the slotted hex nut. DO NOT
fully tighten the nut or install the cotter pin.
Slide the wheel hub assembly onto the spindle shaft
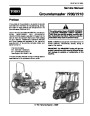
Groundsmaster 7200/7210
Page 6 – 17
Chassis
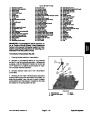
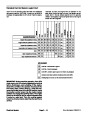
| Categories | Lawn Mower Manual, Sprinkler and Irrigation Manuals, Toro Sprinkler and Irrigation Manuals |
|---|---|
| Tags | Toro Groundsmaster 7200, Toro Groundsmaster 7210 |
| Download File |
|
| Document Type | Service Manual |
| Language | English |
| Product Brand | Toro. Customer Service Representatives are available by phone:
Monday - Friday 7:30 a.m. to 9:00 p.m. (CDT) - Saturday 8:00 a.m. to 8:00 p.m. (CDT) - Sunday 10:00 a.m. to 8:00 p.m. (CDT)
Canada 1-888-225-4886 USA 1-888-384-9939, Lawn Mower |
| Document File Type | |
| Publisher | toro.com |
| Wikipedia's Page | Toro Company |
| Copyright | Attribution Non-commercial |
(0 votes, average: 0 out of 5)
My mower is a TORO 7210.
Start fuse defection. Why ?