


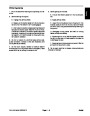

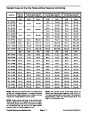


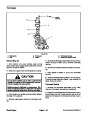


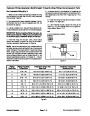


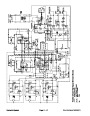
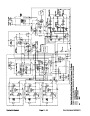


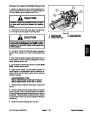

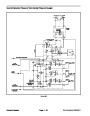

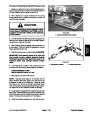
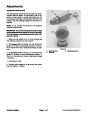


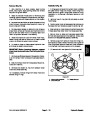


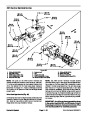


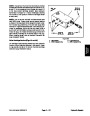


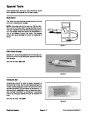


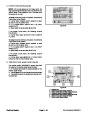


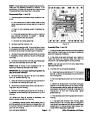
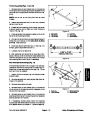


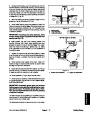

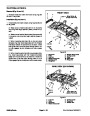

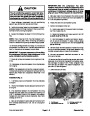


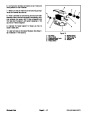


IMPORTANT: An orifice is placed beneath the hy-
draulic fitting in the control manifold LS port. If this
fitting is removed from manifold, make sure to re-
move orifice and labelits position for assembly pur-
poses.
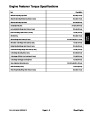
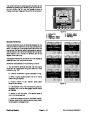
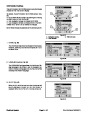
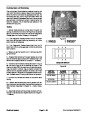
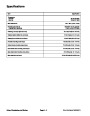
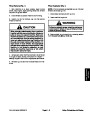
20 ft--lb
(27 N--m)
UP
75
(101
ft--lb
N--m)
2
3
7.
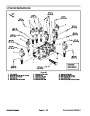
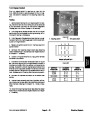
If hydraulic fittings are to be removed from manifold,
50
ft--lb
mark fitting orientation to allow correct assembly. Re-
move fittings from manifold and discard O--rings.
(67
N--m)
4
1
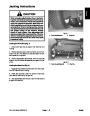
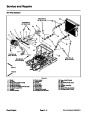
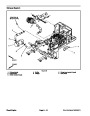
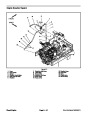
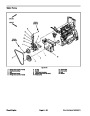
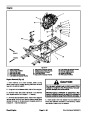
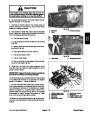
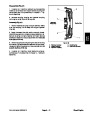
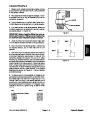
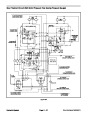
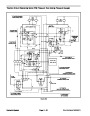
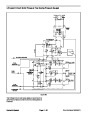
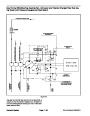
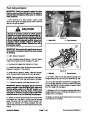
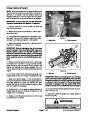
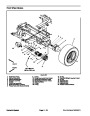
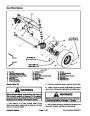
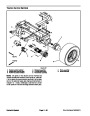
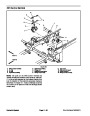
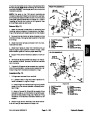
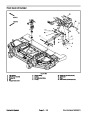
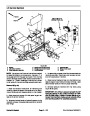
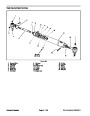
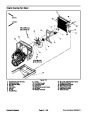
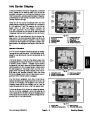
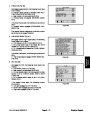
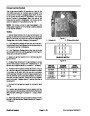
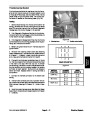
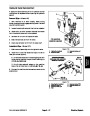
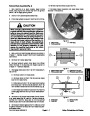
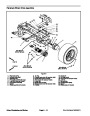
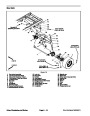
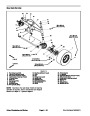
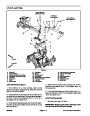
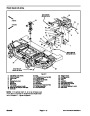
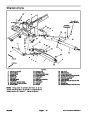
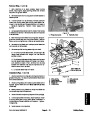
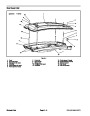
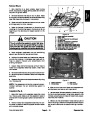
Installation (Fig. 103)
5
13
7
6
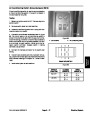
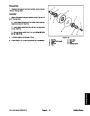
1.
If fittings were removed from manifold:
14
8
9
A. Lubricate new O--rings with clean hydraulic oil.
Install lubricated O--rings on fittings.
10
16
IMPORTANT: When installing the orifice in man-
ifold port LS, make sure that orifice is flat in the
base of the port cavity. Manifold damage is pos-
sible if the orifice is cocked in the cavity.
15
12
7
2
5 ft--lb
11
10
12
(33
N--m)
10
B. If fitting was removed from manifold port LS,
install orifice in port.
11
14
75
ft--lb
101 N--m)
25
ft--lb
(33 N--m)
(
13
1
C. Installfittingsintomanifold openings usingmarks
made during the removal process to properly orien-
tate fittings.
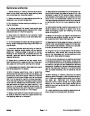
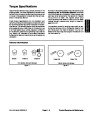
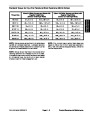
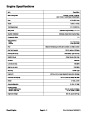
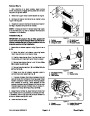
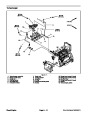
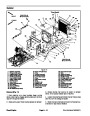
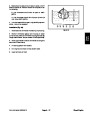
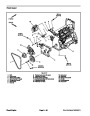
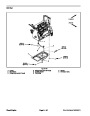
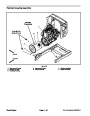
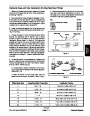
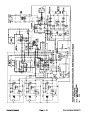
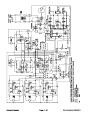
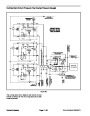
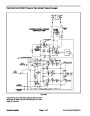
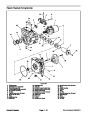
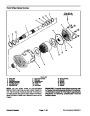
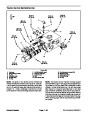
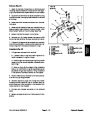
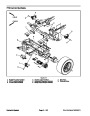
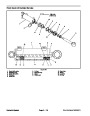
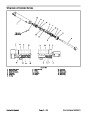
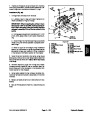
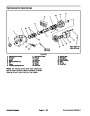
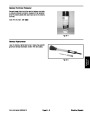
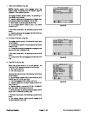
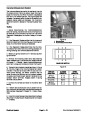
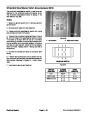
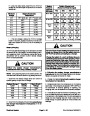
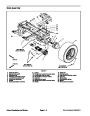
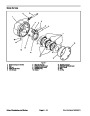
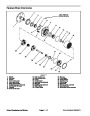
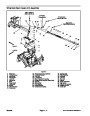
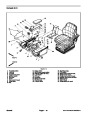
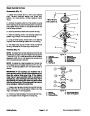
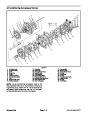
Figure 104
1.
2.
3.
4.
5.
6.
7.
8.
Straight fitting (P & CH)
Dust cap
Quick fitting (G)
O--ring
Manifold assembly
O--ring
9. Straight fitting (M2)
10. O--ring
11. Straight fitting (CF & LS)
12. O--ring
13. O--ring
14. O--ring
15. Orifice (LS)
16. Tee fitting (CD)
D. Refer to Figure 104 for straight fitting installation
torque. For information on tightening procedures for
adjustable fittings, see Hydraulic Fitting Installation
in the General Information section of this chapter.
O--ring
90o fitting (M1)
2.
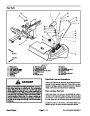
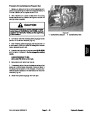
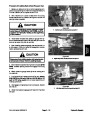
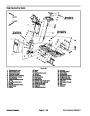
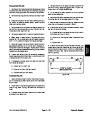
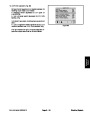
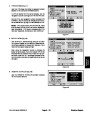
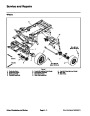
Install steering/cooling fan manifold to the frame us-
ing Figure 103 as guide. Torque the flange head screws
that secure manifold to mount plates from 106 to 159
in--lb (12.0 to 17.9 N--m).
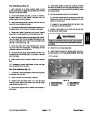
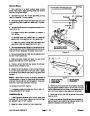
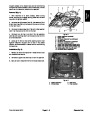
3.
Remove caps and plugs from fittings and hoses.
Properly connect hydraulic lines to manifold (see Hy-
draulic Hose and Tube Installation in the General Infor-
mation section of this chapter).
4.
nect wire harness connectors to solenoids on manifold.
Using labels placed during removal, correctly con-
5.
Makesurehydraulic tankisfull.Addcorrectoilifnec-
essary.
6.
Lower and secure hood.
Groundsmaster 5900/5910
Page 4 -- 143
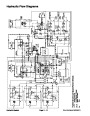
Hydraulic System
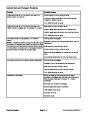
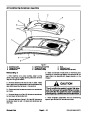
| Categories | Lawn Mower Manual, Sprinkler and Irrigation Manuals, Toro Sprinkler and Irrigation Manuals |
|---|---|
| Tags | Toro Groundsmaster 5900, Toro Groundsmaster 5910 |
| Download File |
|
| Document Type | Service Manual |
| Language | English |
| Product Brand | Toro. Customer Service Representatives are available by phone:
Monday - Friday 7:30 a.m. to 9:00 p.m. (CDT) - Saturday 8:00 a.m. to 8:00 p.m. (CDT) - Sunday 10:00 a.m. to 8:00 p.m. (CDT)
Canada 1-888-225-4886 USA 1-888-384-9939, Lawn Mower |
| Document File Type | |
| Publisher | toro.com |
| Wikipedia's Page | Toro Company |
| Copyright | Attribution Non-commercial |
(0 votes, average: 0 out of 5)