


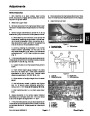
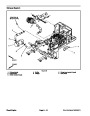


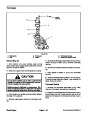
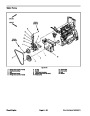

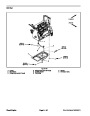
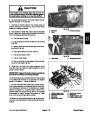
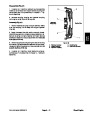

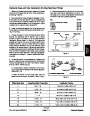
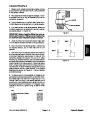


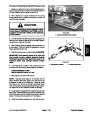
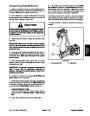
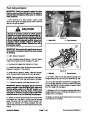


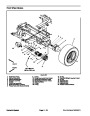

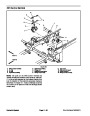
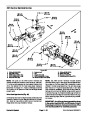


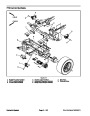

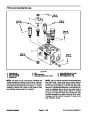


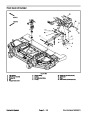
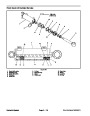

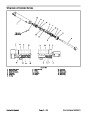
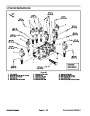


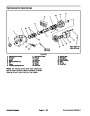

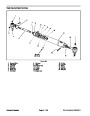
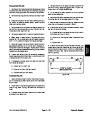


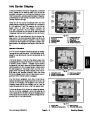


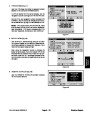


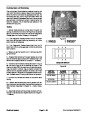
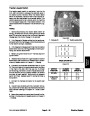
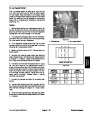


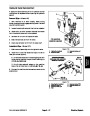

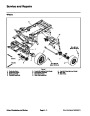
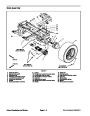

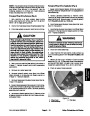
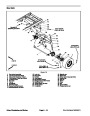
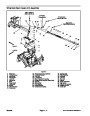


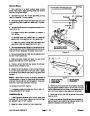

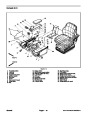


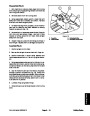


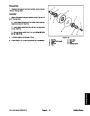


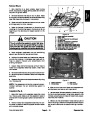


Tie Rod Assembly (Figs. 14 and 15)
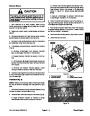
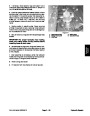
Remove cotter pin and slotted hex nut that secure
2
1.
4
thetierodendstothesteering spindles.Separatethetie
rod ends from the spindle and remove tie rod from ma-
chine.
3
6
NOTE: One of the tie rod ball joints has left hand
threads.
4
1
5
2.
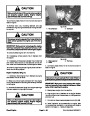
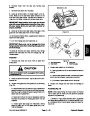
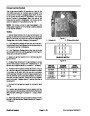
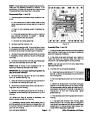
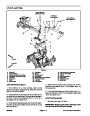
Loosen cap screw and lock nut and then unscrew
ball joint from tie rod.
1
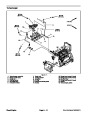
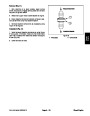
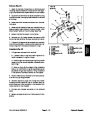
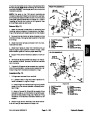
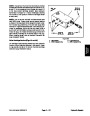
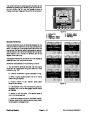
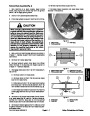
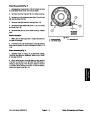
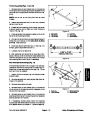
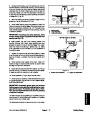
3.
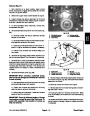
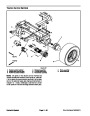
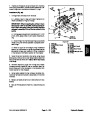
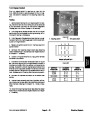
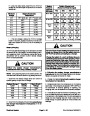
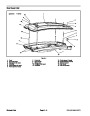
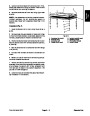
Thread ball joints equally into tie rod so that center
to center length is from 41.080” to 41.200” (1043.5 to
mm) (Fig. 16).
6
1046.4
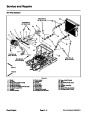
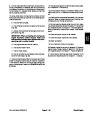
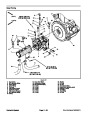
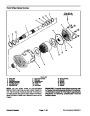
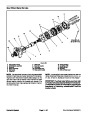
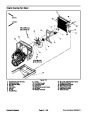
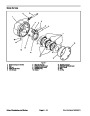
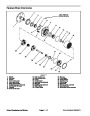
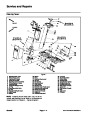
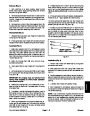
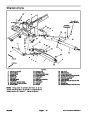
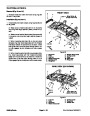
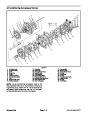
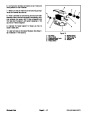
Figure 15
1.
2.
3.
Cap screw
Tie rod end
Tie rod tube
4.
5.
6.
Lock nut
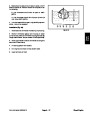
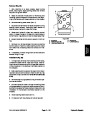
4.
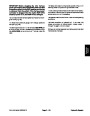
ball joints and steering spindles.
Thoroughly clean the tapered surfaces of the tie rod
Tie rod end
Grease fitting
5.
slotted hex nuts. Torque nut from 35 to 50 ft--lb (48 to
Connectthetierodendstothesteering spindleswith
67
N--m). Install cotter pin.
6.
correct, tighten cap screw and lock nut.
Check and adjust rear wheel toe--in. After toe--in is
7.
Lubricate the tie rod ball joints.
41.080”
to 41.200”
(1043.5
to 1046.4 mm)
8.
After assembly and adjustments have been com-
pleted, make sure that no contact is made between any
machine components as the rear wheels are moved
from steering lock to lock. Adjust if necessary.
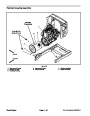
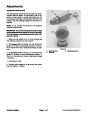
Figure 16
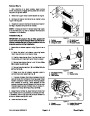
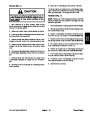
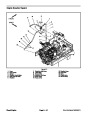
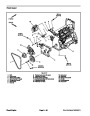
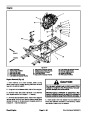
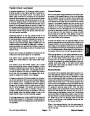
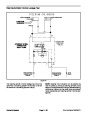
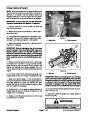
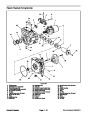
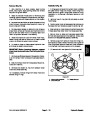
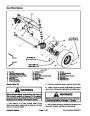
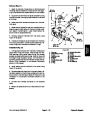
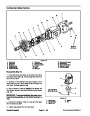
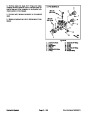
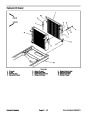
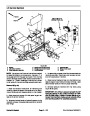
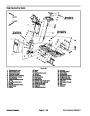
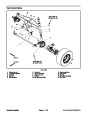
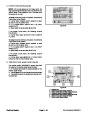
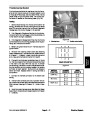
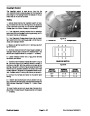
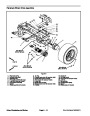
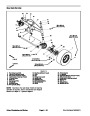
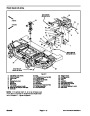
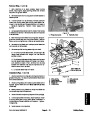
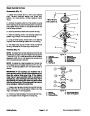
Rear Axle Spindle Bushings (Fig. 14)
1
2
The rear wheel spindles must fit snugly in the rear axle.
Excessive movement of the spindle in the axle might in-
dicate that the rear axle spindle bushings (Fig. 17) are
worn and must be replaced.
3
3
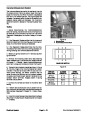
1.
Loosen, but do not remove, lug nuts that secure rear
wheels to axle.
2.
Remove rear axle from machine (see Rear Axle Re-
moval in this section).
3.
4.
Remove rear wheels from axle.
2
4
Remove cotter pin and slotted hex nut that secure
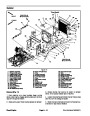
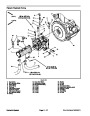
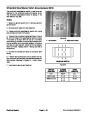
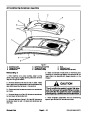
Figure 17
the tie rod end to the steering spindle. Separate the tie
rod end from the spindle.
1.
2.
Rear axle
Pivot bushing
3.
4.
Spindle bushing
Grease fitting
5.
steering cylinder ball joint to steering spindle. Separate
steering cylinder from spindle.
Remove cotter pin and slotted hex nut that secure
6.
spindle (see Rear Wheel Motor Removal in the Service
and Repairs section of Chapter 4 -- Hydraulic System).
If necessary, remove wheel motor from steering
Groundsmaster 5900/5910
Page 6 -- 21
Axles, Planetaries and Brakes
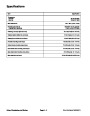
| Categories | Lawn Mower Manual, Sprinkler and Irrigation Manuals, Toro Sprinkler and Irrigation Manuals |
|---|---|
| Tags | Toro Groundsmaster 5900, Toro Groundsmaster 5910 |
| Download File |
|
| Document Type | Service Manual |
| Language | English |
| Product Brand | Toro. Customer Service Representatives are available by phone:
Monday - Friday 7:30 a.m. to 9:00 p.m. (CDT) - Saturday 8:00 a.m. to 8:00 p.m. (CDT) - Sunday 10:00 a.m. to 8:00 p.m. (CDT)
Canada 1-888-225-4886 USA 1-888-384-9939, Lawn Mower |
| Document File Type | |
| Publisher | toro.com |
| Wikipedia's Page | Toro Company |
| Copyright | Attribution Non-commercial |
(0 votes, average: 0 out of 5)