


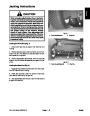


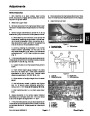
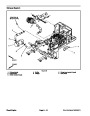
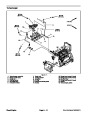
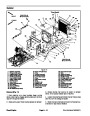


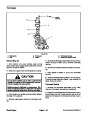
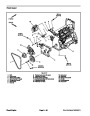

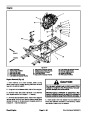

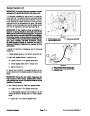
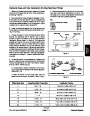


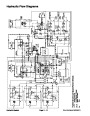
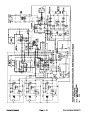
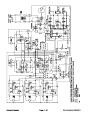


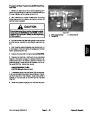

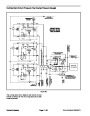

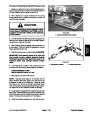
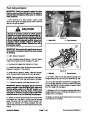
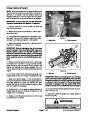

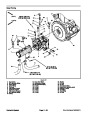


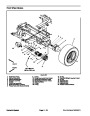


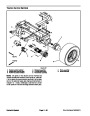
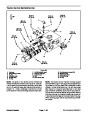
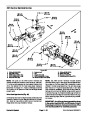


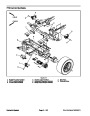

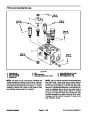


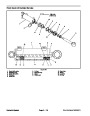

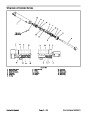
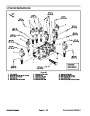


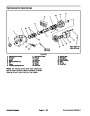

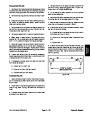


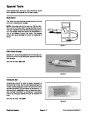

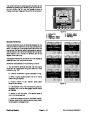


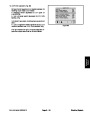
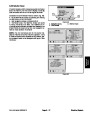


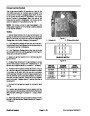
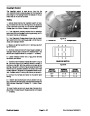


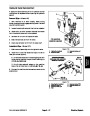

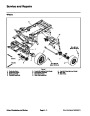
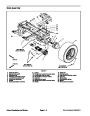


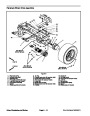

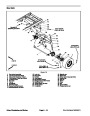
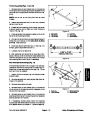
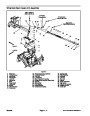


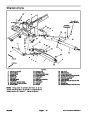
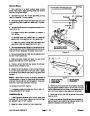


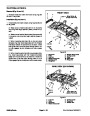

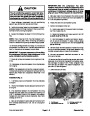
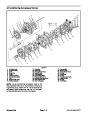

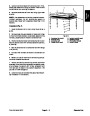


Installation (Fig. 27)
Make sure that mounting surfaces on engine, front
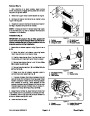
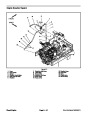
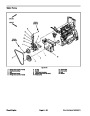
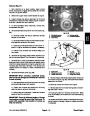
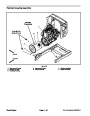
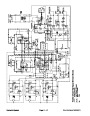
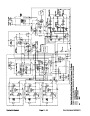
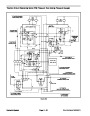
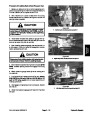
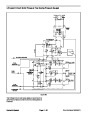
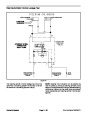
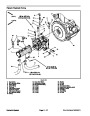
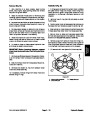
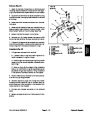
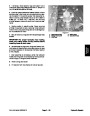
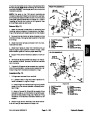
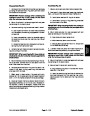
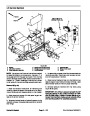
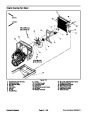
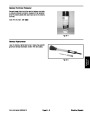
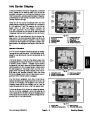
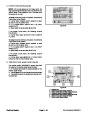
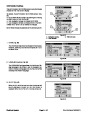
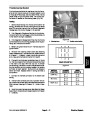
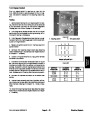
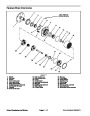
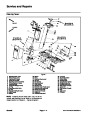
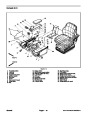
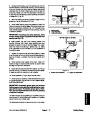
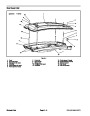
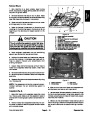
9. Secure electrical components to front cover (Fig.
28):
1.
cover and oil pan are thoroughly cleaned.
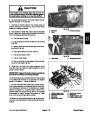
A. Position wire harness and sensors to front cover.
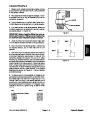
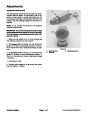
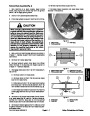
2.
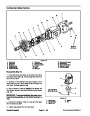
mins seal installer tool #3164900 (or equivalent) to
install new oil seal into front cover.
Fill 50% of the seal lip space with grease. Use Cum-
B. Apply a light film of clean oil to crankshaft and
camshaft position sensors O--rings. Carefully install
sensors into front cover and secure with screws.
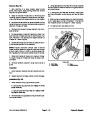
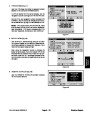
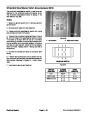
3.
the front cover mounting surfaces. Make sure to apply
sealant to all engine and oil pan mating surfaces.
ApplyCumminssealant#3164067(orequivalent),to
C. Secure electrical harness clamps to front cover.
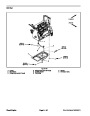
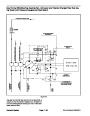
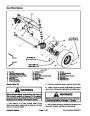
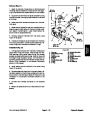
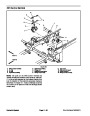
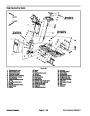
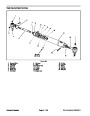
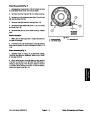
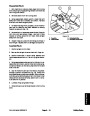
10.Secure
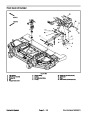
rear axle pivot shaft to frame (see Rear Axle
Removal in the Service and Repairs section of Chapter
6-- Axles, Planetaries and Brakes).
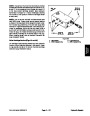
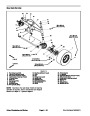
4.
Carefully install front cover to engine taking care to
not damage the oil seal during assembly.
A. Slide axle pivot shaft toward front of machine.
Make sure that that roll pin on pivot shaft is posi-
tioned in frame reliefs.
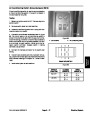
5.
6.
Rotate alternator bracket to front cover.
Usingnotestakenduringfrontcoverremovaltoiden-
tify correct screw location, secure front cover to engine
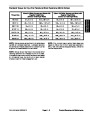
with sixteen (16) flange head screws. Torque screws 14
ft--lb (19 N--m).
B. Install thrustwasher and lock nutonto pivot shaft.
C. Tighten lock nut to eliminate any axial movement
of rear axle. Make sure that axle can still pivot freely
after lock nut is tightened.
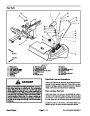
7.
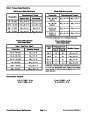
Secure oil pan to front cover with five (5) flange head
screws. Torque screws 14 ft--lb (19 N--m).
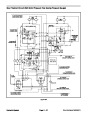
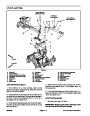
11.
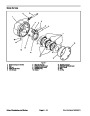
Position drive belt to crankshaft, water pump and al-
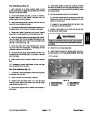
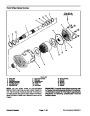
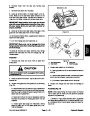
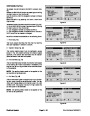
8.
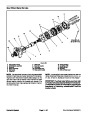
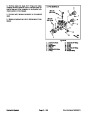
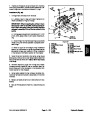
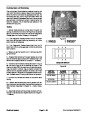
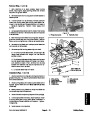
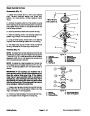
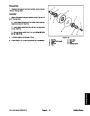
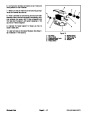
Install crankshaft pulley:
ternator pulleys. Tension belt and tighten alternator
mounting screws (see Alternator Installation in this sec-
tion).
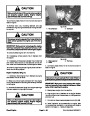
IMPORTANT: When installing crankshaft pulley,
take care to not damage tone wheel that is secured
to back of pulley.
12.On Groundsmaster 5910 machines, install and ad-
just A/C compressor drive belt.
A. Place woodruff key into crankshaft slot.
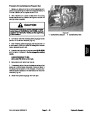
13.Check
engine oil level and adjust if necessary.
14.Start engine and check for any oil leakage.
and secure hood.
B. Carefully slide pulley onto crankshaft making
sure to not damage oil seal in front cover. Also, make
sure to align keyslot in pulley with woodruff key in
crankshaft.
15.Lower
C. Install mounting plate (item 18) and cap screw
(item 19) to pulley and crankshaft.
D. Using an appropriate holding tool to prevent the
pulley and engine crankshaft from rotating, torque
cap screw 274 ft--lb (372 N--m).
Diesel Engine
Page 3 -- 32
Groundsmaster 5900/5910
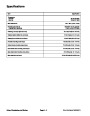
| Categories | Lawn Mower Manual, Sprinkler and Irrigation Manuals, Toro Sprinkler and Irrigation Manuals |
|---|---|
| Tags | Toro Groundsmaster 5900, Toro Groundsmaster 5910 |
| Download File |
|
| Document Type | Service Manual |
| Language | English |
| Product Brand | Toro. Customer Service Representatives are available by phone:
Monday - Friday 7:30 a.m. to 9:00 p.m. (CDT) - Saturday 8:00 a.m. to 8:00 p.m. (CDT) - Sunday 10:00 a.m. to 8:00 p.m. (CDT)
Canada 1-888-225-4886 USA 1-888-384-9939, Lawn Mower |
| Document File Type | |
| Publisher | toro.com |
| Wikipedia's Page | Toro Company |
| Copyright | Attribution Non-commercial |
(0 votes, average: 0 out of 5)