


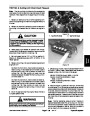
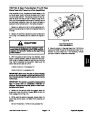


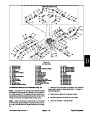


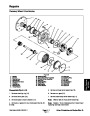

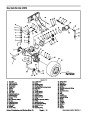

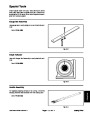


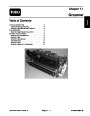


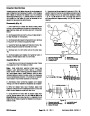


Steering Valve
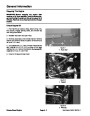
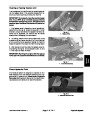
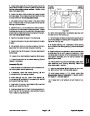
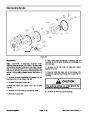
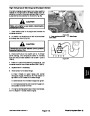
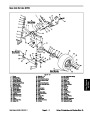
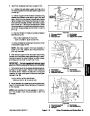
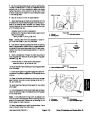
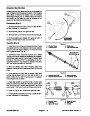
Removal (Figs. 57 and 58)
3
1.
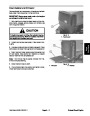
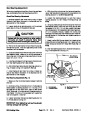
Engage the parking brakes, lower the cutting units to
the ground, turn the engine OFF and remove the key
from the ignition switch.
4
2.
Remove the front center cutting unit (see Chap-
1
ter 7-Cutting Units in this manual).
2
3.
4.
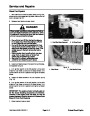
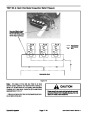
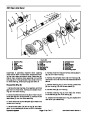
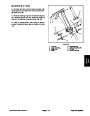
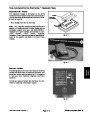
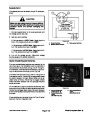
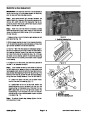
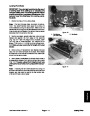
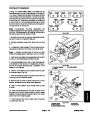
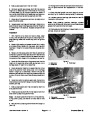
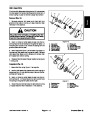
Remove cap screws and cover from steering tower.
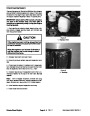
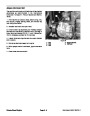
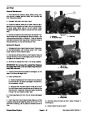
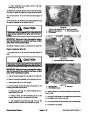
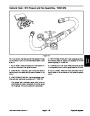
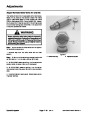
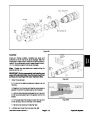
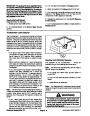
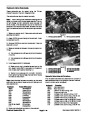
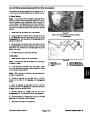
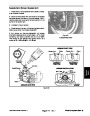
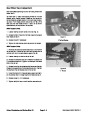
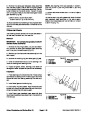
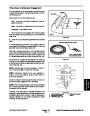
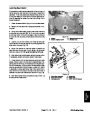
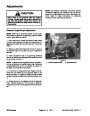
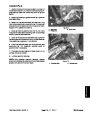
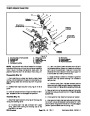
Clean outside of the steering valve and the area
around the hydraulic fittings. Disconnect hydraulic lines
from steering valve (Fig. 58). Put caps or plugs on all fit-
tings and lines to prevent contamination.
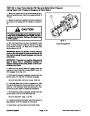
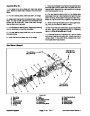
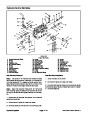
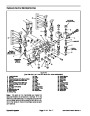
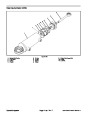
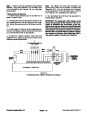
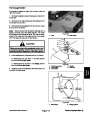
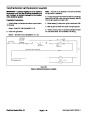
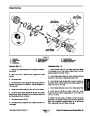
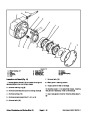
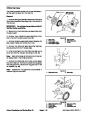
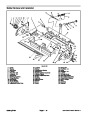
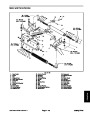
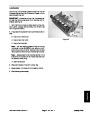
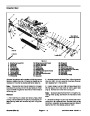
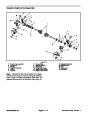
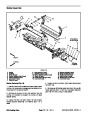
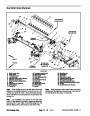
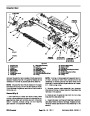
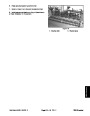
Figure 58
3.
4.
Note:
To ease reassembly, tag each of the lines to
1.
2.
Steering Valve
Hydraulic Line
Clamp
Flange Head Screw
show their correct position on the steering cylinder.
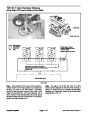
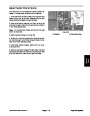
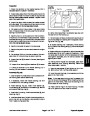
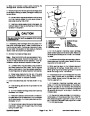
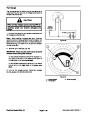
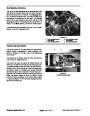
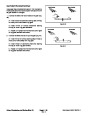
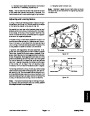
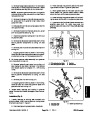
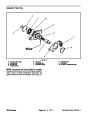
5.
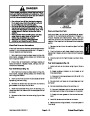
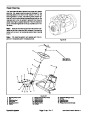
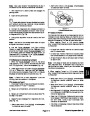
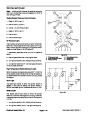
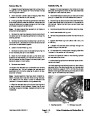
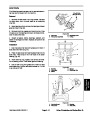
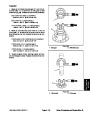
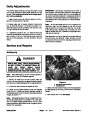
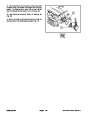
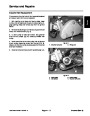
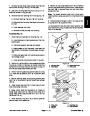
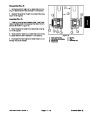
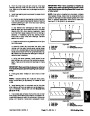
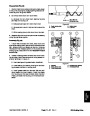
Remove the steering wheel:
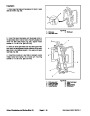
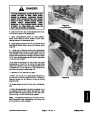
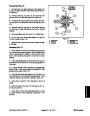
3. Install the steering wheel:
A. Remove cover from center of steering wheel.
A. Use the steering wheel to put the rear wheels in
the straight ahead position.
B. Remove the lock nut that secures the steering
wheel to the shaft.
B. Slide the dust cover and the steering wheel onto
the steering shaft and secure the steering wheel in
place with the lock nut. Tighten the nut from 20 to 26
ft-lbs. (28 to 35 Nm).
C. Pull the steering wheel and dust cover off the
steering valve shaft.
Note:
remove the steering wheel from the steering shaft.
It may be necessary to use a jaw-type puller to
C. Install steering wheel cover.
4.
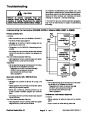
and check hydraulic connections for leaks (see “Bleed-
ing the Hydraulic System” inthis section of this manual).
Connect hydraulic lines. Bleed the hydraulic system
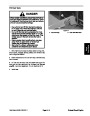
IMPORTANT: DO NOT hit the steering shaft with a
hammer.Thiscoulddamagethesteeringvalvecom-
ponents.
5.
Check hydraulic connections for leaks.
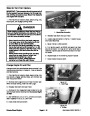
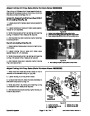
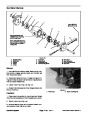
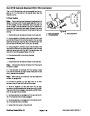
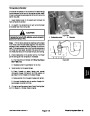
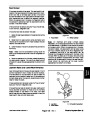
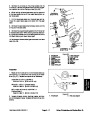
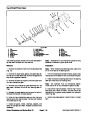
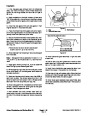
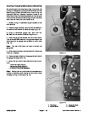
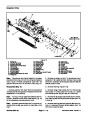
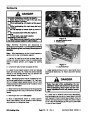
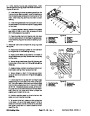
6.
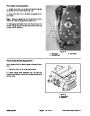
Remove the clamp securing the steering column to
the steering tower.
6. Install cap screws and cover to steering tower.
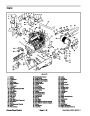
7.
steering valve to steering tower.
Remove three (3) flange head screws securing
7. Install the front center cutting unit (see Chap-
ter 7-Cutting Units in this manual).
8.
steering valve and column out through bottom of steer-
ing tower.
Carefully move hydraulic lines to the side and pull
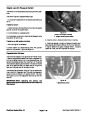
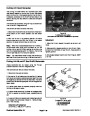
Installation (Figs. 57 and 58)
1.
Carefully feed the steering valve and column into the
steering tower through the bottom.
2.
securing steering valve to steering tower.
Install three (3) flange head screws and the clamp
Reelmaster 6500-D/6700-D
Page 4 - 89 Rev. E
Hydraulic System
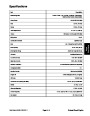
| Categories | Lawn Mower Manual, Toro Lawn Mower Manual |
|---|---|
| Tags | Toro Reelmaster 6500-D, Toro Reelmaster 6700-D |
| Download File |
|
| Document Type | Service Manual |
| Language | English |
| Product Brand | Toro. Customer Service Representatives are available by phone:
Monday - Friday 7:30 a.m. to 9:00 p.m. (CDT) - Saturday 8:00 a.m. to 8:00 p.m. (CDT) - Sunday 10:00 a.m. to 8:00 p.m. (CDT)
Canada 1-888-225-4886 USA 1-888-384-9939, Lawn Mower |
| Product Type | Walk Behind Mower |
| Engine Manufacturer | Toro |
| Document File Type | |
| Publisher | toro.com |
| Wikipedia's Page | Toro Company |
| Copyright | Attribution Non-commercial |
(0 votes, average: 0 out of 5)