


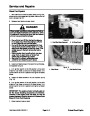


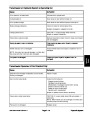


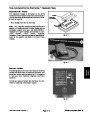
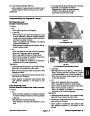
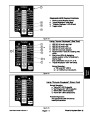


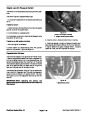

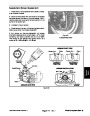
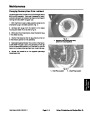


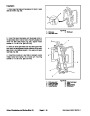
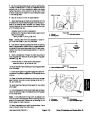
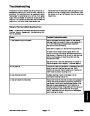


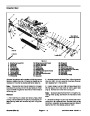


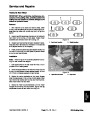


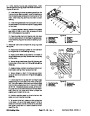


A. The “inputs displayed” LED, on lower right
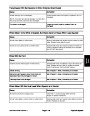
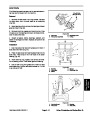
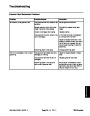
D. If the output LED’s are on as specified, but the
machine does not function properly, this indicates a
non-electrical problem. Repair as necessary.
column
of
the
Diagnostic
ACE,
should
be
illuminated.If“outputs displayed” LEDisilluminated,
pressthetogglebuttononDiagnosticACEtochange
to “inputs displayed” LED. Do not hold button.
Note:
Due to electrical system constraints, the output
LED’sfor“START”,“PREHEAT”and“ETR/ALT”maynot
blink even though an electrical problem may exist for
those functions. If the machine problem appears to be
with one of these functions, be certain to check the
electrical circuit with a volt/ohm meter to verify that no
electrical problem exists to these functions.
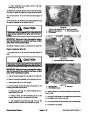
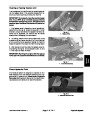
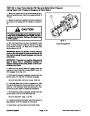
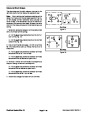
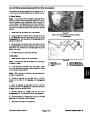
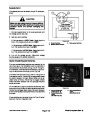
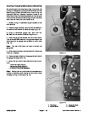
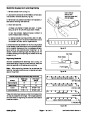
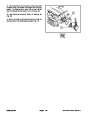
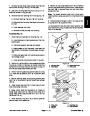
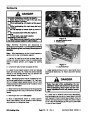
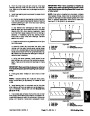
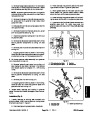
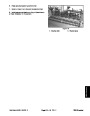
B. The Diagnostic ACE will illuminate the LED
associated with each of the inputs when that input
switch is closed. Individually, change each of the
switches from open to closed (i.e., sit on seat, en-
gage traction pedal, etc.), and note thattheappropri-
ateLEDonDiagnosticACEwillblinkonandoffwhen
corresponding switch is closed. Repeat on each
switch that is possible to be changed by hand.
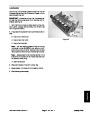
E. If each output switch is in the correct position and
functioning correctly, but the output LED’s are not
correctly illuminated, this indicates an controller
problem. If this occurs, contact your Toro Distributor
for assistance.
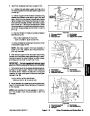
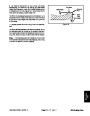
C. If switch is closed and appropriate LED does not
turn on, check all wiring and connections to switch
and/or check switches with an ohm meter. Replace
any defective switches and repair any defective wir-
ing.
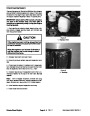
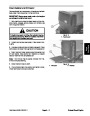
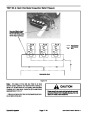
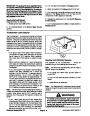
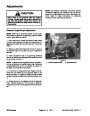
IMPORTANT: The Diagnostic ACE display must not
be left connected to the machine. It is not designed
to withstand the environment of the machine’s ev-
ery day use. When done using Diagnostic ACE, dis-
connect it from the machine and reconnect
loop-back connector to harness connector. Ma-
chine will not operate without loop-back connector
installed on harness. Store Diagnostic ACE in dry,
secure location in shop, not on machine.
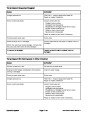
D. If each input switch is in the correct position and
functioning correctly, but the input LED’s are not cor-
rectly illuminated, this indicates an controller prob-
lem. If this occurs, contact your Toro Distributor for
assistance.
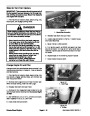
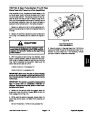
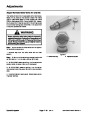
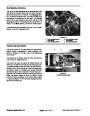
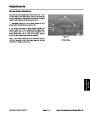
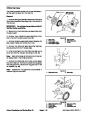
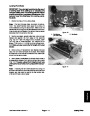
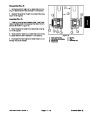
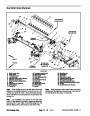
4.
Check Output Functions
A. The “outputs displayed” LED, on lower right
column of Diagnostic ACE, should be illuminated. If
“inputs displayed” LED is illuminated, press the
toggle button on the Diagnostic ACE to change the
LED to “outputs displayed”.
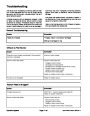
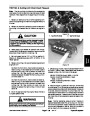
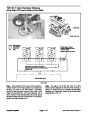
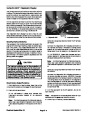
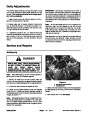
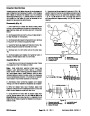
Fault Memory and Retrieval
If the Controller senses a fault on one of the output so-
lenoids, it will flash the machines diagnostic Lamp (red
diagnostic lamp on steering tower or green diagnostic
lamp under console) and store the fault into the control-
ler memory. The fault can then be retrieved and viewed
withtheDiagnosticACEhandheldtooloralaptop/PCat
anytime. The controller will store one (1) fault at a time
andwillnotstoreanother differentfault untilthe firstfault
is cleared.
Note:
It may be necessary to toggle between “in-
puts displayed” and “outputs displayed” several
times to do the following step. To toggle back and
forth, press toggle button once. This may be done as
often as required. Do not hold button.
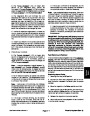
Retrieving Stored Faults
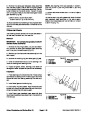
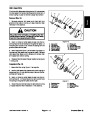
B. Sit on seat and attempt to operate the desired
function of the machine. The appropriate output
LED’s should illuminate to indicate that the controller
is turning on that function.
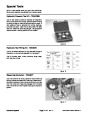
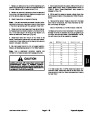
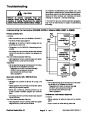
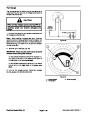
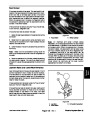
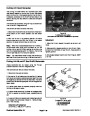
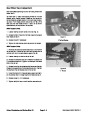
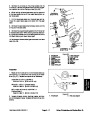
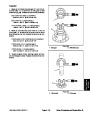
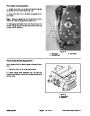
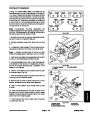
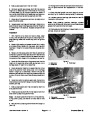
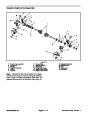
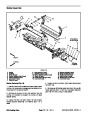
1.
Rotate ignition key to Off position.
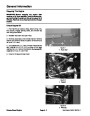
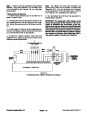
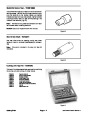
2.
sired Controller Loopback Connector (use the proper
overlay).
Connect the Hand held Diagnostic Tool to the de-
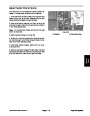
Note:
If any output LED is blinking, this indicates
an electrical problem with thatOUTPUT. Repair and/
or replace defective electrical parts immediately. To
reset a blinking LED, turn the key switch “OFF”, then
back “ON” and retest. Memory must also be cleared
(see Clearing the Fault Memory in this section of this
manual).
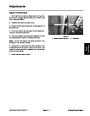
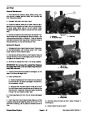
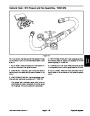
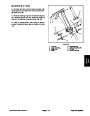
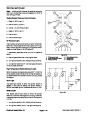
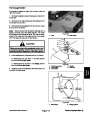
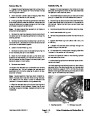
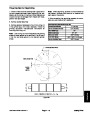
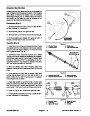
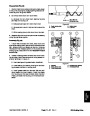
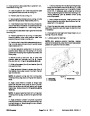
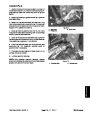
3.
Move the Joystick to the Raise position and hold.
4. Rotate ignition key to On position, and continue to
hold the Joystick in Raise position until the top left Diag-
nostic Tool light comes on (approx. 2 seconds).
5.
Release the Joystick to the center position.
C. If no output LED’s are blinking, but the correct
output LED’s do not illuminate, verify that the re-
quired input switches are in the necessary positions
to allow that function to occur. Verify correct switch
function.
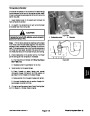
6. Hand held Tool will now playback the fault retained
in the Controller memory.
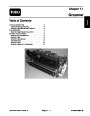
Reelmaster 6500-D/6700-D
Electrical System (Rev. C)
Page 5 - 7
| Categories | Lawn Mower Manual, Toro Lawn Mower Manual |
|---|---|
| Tags | Toro Reelmaster 6500-D, Toro Reelmaster 6700-D |
| Download File |
|
| Document Type | Service Manual |
| Language | English |
| Product Brand | Toro. Customer Service Representatives are available by phone:
Monday - Friday 7:30 a.m. to 9:00 p.m. (CDT) - Saturday 8:00 a.m. to 8:00 p.m. (CDT) - Sunday 10:00 a.m. to 8:00 p.m. (CDT)
Canada 1-888-225-4886 USA 1-888-384-9939, Lawn Mower |
| Product Type | Walk Behind Mower |
| Engine Manufacturer | Toro |
| Document File Type | |
| Publisher | toro.com |
| Wikipedia's Page | Toro Company |
| Copyright | Attribution Non-commercial |
(0 votes, average: 0 out of 5)