


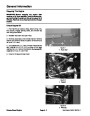


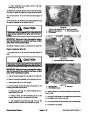


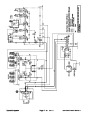
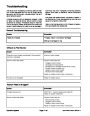


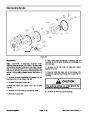


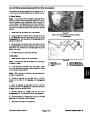
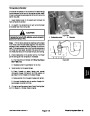


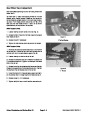

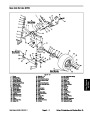

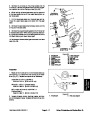
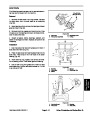
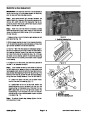


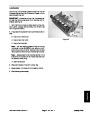

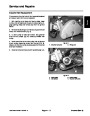


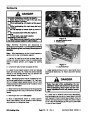


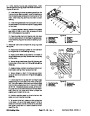


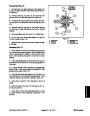


7.
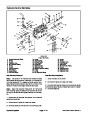
secure drive housing to cutting unit side plate.
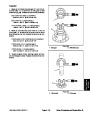
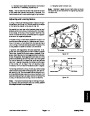
Remove two (2) flange head screws (item 20) that
8. Make sure that pulley spacer (item 15) and washer
(item 31) are positioned on groomer shaft. Place square
key (item 28) in groomer shaft slot and slide driven
pulley onto shaft.
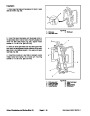
8.
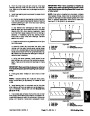
cate and retrieve o--ring (item 25).
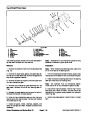
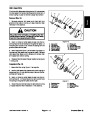
Slide drive housing assembly from cutting unit. Lo-
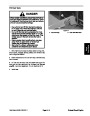
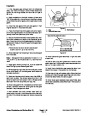
Note:
installing driven pulley, use wrench on shaft flats to hold
shaft.
To prevent groomer shaft from turning when
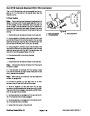
9.
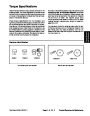
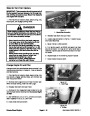
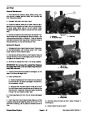
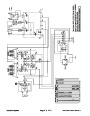
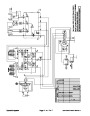
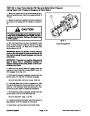
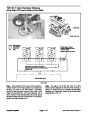
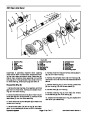
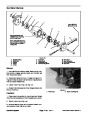
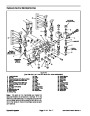
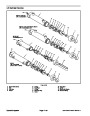
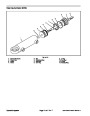
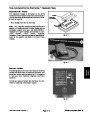
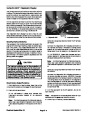
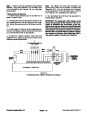
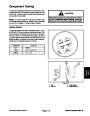
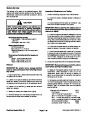
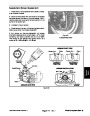
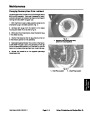
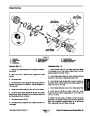
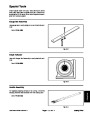
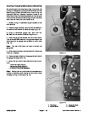
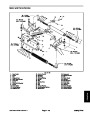
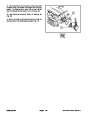
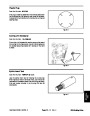
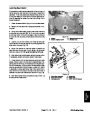
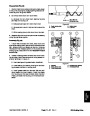
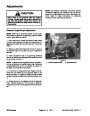
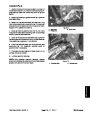
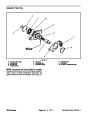
Remove shaft and bearings from housing (Fig. 14):
A. Remove retaining ring (item 18) from housing.
9.
en pulley (item 12) to groomer shaft.
Install and tighten flange nut (item 11) to secure driv-
B. Slideshaftfromhousing.Bearingsshouldremain
on shaft.
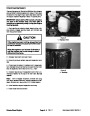
10.Install
cover(item2)tocuttingunit(seeGroomerBeltReplace-
ment in this section).
groomer drive belt (item 3) and groomer belt
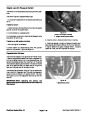
C. Press bearings from shaft.
D. Remove oil seal (item 24) from housing.
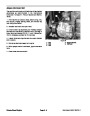
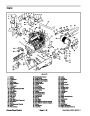
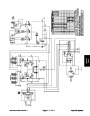
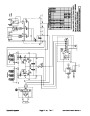
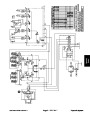
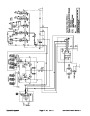
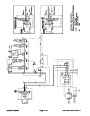
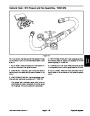
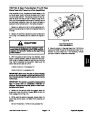
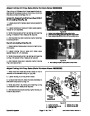
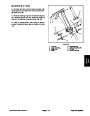
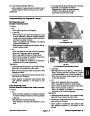
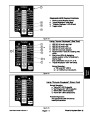
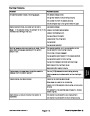
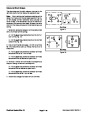
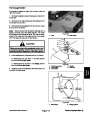
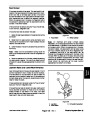
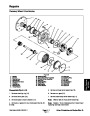
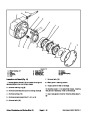
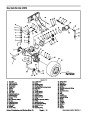
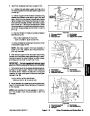
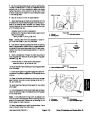
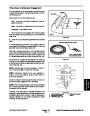
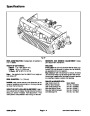
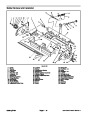
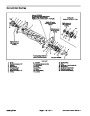
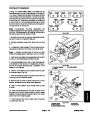
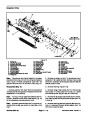
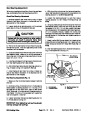
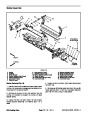
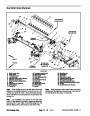
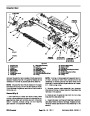
Assembly (Fig. 12)
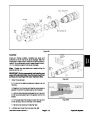
3
2
1.
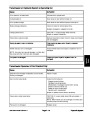
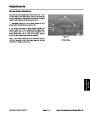
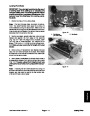
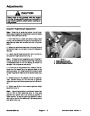
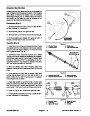
Install shaft and bearings into housing (Fig. 14):
A. Install bearings on shaft by pressing on the inner
bearing race.
B. Pack area between bearings with grease.
1
C. Apply grease to lip of new seal. Install seal into
housing with the flat face of the seal toward the bear-
ings.
D. Slide shaft assembly into housing taking care to
not damage oil seal.
4
E. Install retaining ring to secure shaft in housing.
Position o--ring(item 25) on housing assembly.Slide
2.
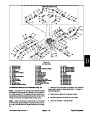
Figure 13
3.
4.
housing to cutting unit making sure to align drive shaft
splines with cutting reel. Secure housing to cutting unit
with two (2) flange head screws (item 20).
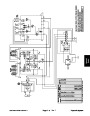
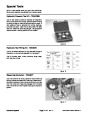
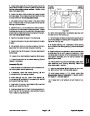
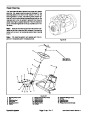
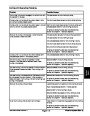
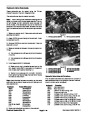
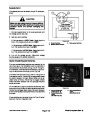
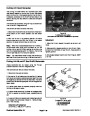
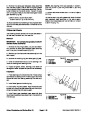
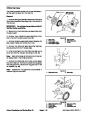
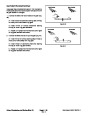
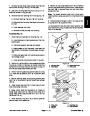
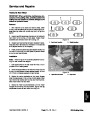
1.
2.
Groomer plate
Brush plate
Brush drive cover
Drive cover
3.
unit. Place two (2) spacers (item 10) in groomer plate
slots.
Position retaining plate and groomer plate to cutting
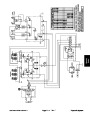
5
3
4
4.
Secure retaining plate (item 9) and groomer plate
(item 14) to housing with two (2) flange head screws
(item 4).
5.
Place square key (item 22) in drive shaft slot and
slide drive pulley onto shaft.
6.
flange head screw (item 4). Secure drive pulley with
flange head screw. Torque screw from 15 to 19 ft lbs
Apply Loctite #242 (or equivalent) to threads of
1
(20.3
to 25.7 N--m).
2
2
7.
Install retaining ring (item 13) to secure groomer
plate to height of cut assembly.
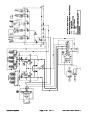
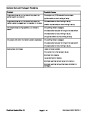
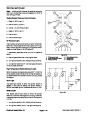
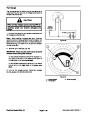
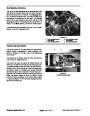
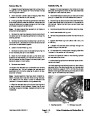
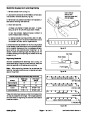
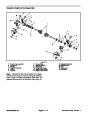
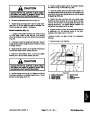
Figure 14
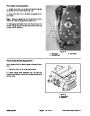
1.
2.
3.
Drive shaft
Bearing
Oil seal
4.
5.
Retaining ring
Drive housing
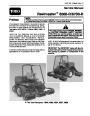
Reelmaster 6500--D/6700--D
Page 7.1 -- 11
Groomer (Rev. C)
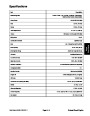
| Categories | Lawn Mower Manual, Toro Lawn Mower Manual |
|---|---|
| Tags | Toro Reelmaster 6500-D, Toro Reelmaster 6700-D |
| Download File |
|
| Document Type | Service Manual |
| Language | English |
| Product Brand | Toro. Customer Service Representatives are available by phone:
Monday - Friday 7:30 a.m. to 9:00 p.m. (CDT) - Saturday 8:00 a.m. to 8:00 p.m. (CDT) - Sunday 10:00 a.m. to 8:00 p.m. (CDT)
Canada 1-888-225-4886 USA 1-888-384-9939, Lawn Mower |
| Product Type | Walk Behind Mower |
| Engine Manufacturer | Toro |
| Document File Type | |
| Publisher | toro.com |
| Wikipedia's Page | Toro Company |
| Copyright | Attribution Non-commercial |
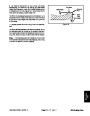
(0 votes, average: 0 out of 5)