

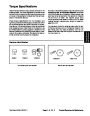


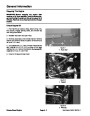
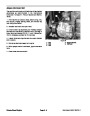


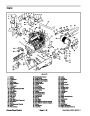

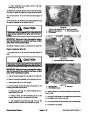


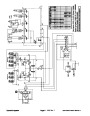


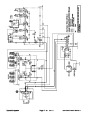
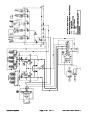


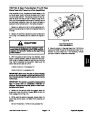
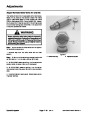
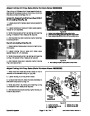


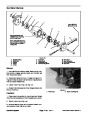
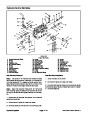
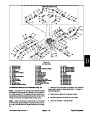


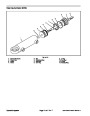

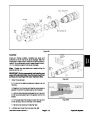


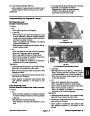
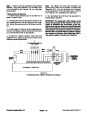
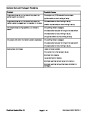

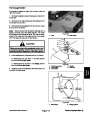


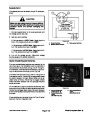

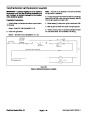

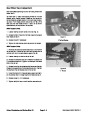
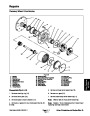

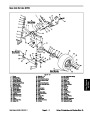
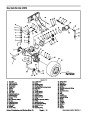
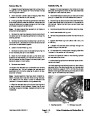

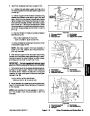
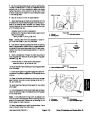
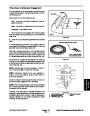
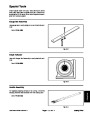
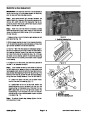
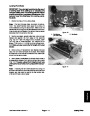

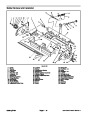


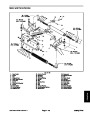


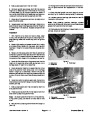
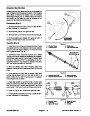
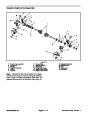


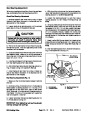

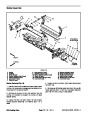


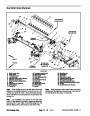


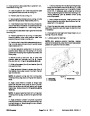
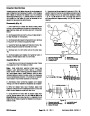
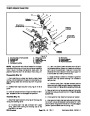


Removal (Fig. 15)
Engage the parking brakes, lower the cutting units to
the ground, turn the engine OFF and remove the key
from the ignition switch.
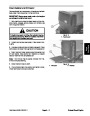
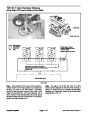
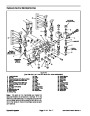
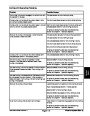
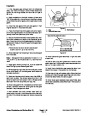
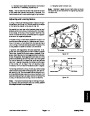
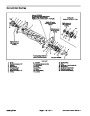
Installation (Fig. 15)
1.
1. Apply a thin coat of grease to the inside of the rear
axle pivot bushings and move the rear axle assembly
into position under machine frame.
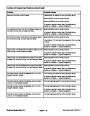
2.
Lubricant in this section of this manual).
Drain rear axle lubricant (see Changing Rear Axle
2. Install washer(s) and axle pivot pin. Secure the axle
pivot pin in place with the thrust washer and locknut.
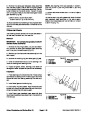
3.
Thoroughly clean the steering cylinder and rear axle
3. Install thetie rodball joints and check rear wheeltoe-
in (see Rear Wheel Toe-in Adjustment in this section of
this manual). Tighten ball joint hex nuts and install new
cotter pins.
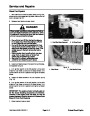
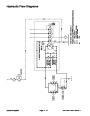
drive motor hydraulic hose connections. Disconnect the
hydraulic hoses and put caps or plugs on all the fittings
and hoses to prevent contamination.
Note:
To ease reassembly, tag each of the hoses to
4. Install steering cylinder and cylinder retaining rings.
show their correct position.
5.
Install rear wheels and lug nuts.
4.
the barrel end of the steering cylinder and remove the
steering cylinder.
Remove the retaining rings securing the rod end and
6.
floor.
Removethejackstandsandlowerthemachinetothe
7.
to 136 Nm).
Tighten rear wheel lug nuts to 85 to 100 ft-lbs. (115
5.
tierodballjoints.Useaballjointforkandremovetheball
joints from the axle case supports.
Remove the cotter pins andslotted hexnuts fromthe
8.
Lubricate the rear axle pivot bushings through the
grease fitting on the pivot pin.
6.
7.
Loosen the rear wheel lug nuts.
9.
Fill rear axle with lubricant (see Changing Rear Axle
Lubricant in this section of this manual).
Remove the locknut and thrust washer securing the
end of the axle pivot pin to the chassis.
10.Install
and rear axle drive motor.
the hydraulic hoses to the steering cylinder
8.
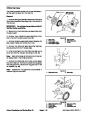
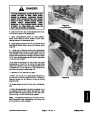
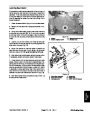
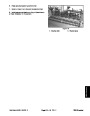
Block the front wheels and jack up the frame (just
ahead of the rear wheels) until the rear tire is about 1 in.
mm) above the floor. Support the machine with jack
stands to prevent it from falling.
(25
11.
Check steering cylinder and rear axle hydraulic con-
nections for leaks.
9.
Remove rear wheels.
the rear axle from underneath and remove
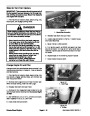
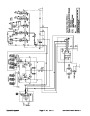
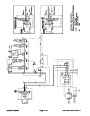
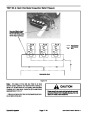
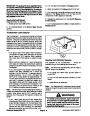
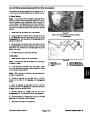
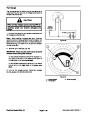
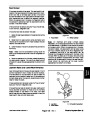
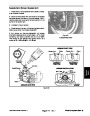
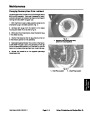
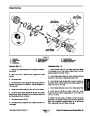
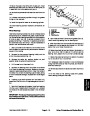
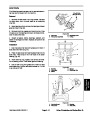
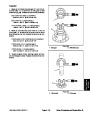
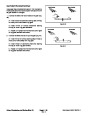
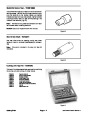
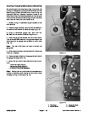
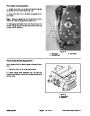
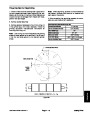
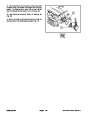
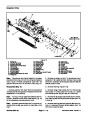
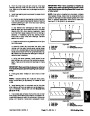
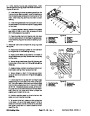
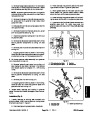
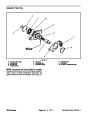
12.Check
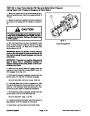
steering stop bolt adjustment on both side of
rear axle. When the steering cylinder is fully extended
(either direction), a gap of 1/16” (1.6 mm) should exist
between bevel gear case casting and stop bolt on axle
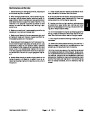
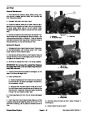
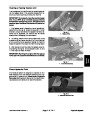
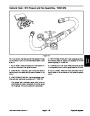
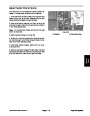
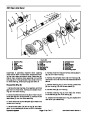
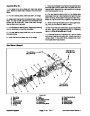
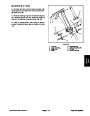
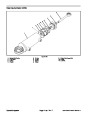
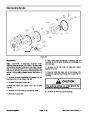
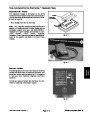
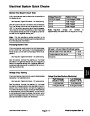
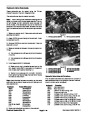
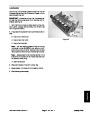
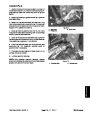
case. Figure 16 shows stop bolt location.
10.Support
the axle pivot pin. This will release the rear axle and
washer(s) from the frame, allowing the axle to be low-
ered and removed.
Note:
Several washers may have been installed be-
tween the axle pivot tube and frame during manufac-
ture. Make sure the same number of washers are
installed in the same location during reassembly.
11.
Wipe the rear axle pivot pin and pivot bushings with
1
a rag to remove dirt and grease. Inspect the pin and
bushings for wear or damage. Replace components as
necessary.
2
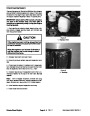
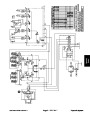
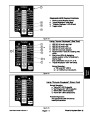
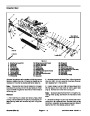
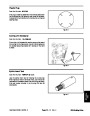
Figure 16
1.
Steering stop bolt
2. Bevel gear case (LH)
Reelmaster 6500-D/6700-D
Page 6 - 15
Axles, Planetaries and Brakes (Rev. C)
Rev. E
| Categories | Lawn Mower Manual, Toro Lawn Mower Manual |
|---|---|
| Tags | Toro Reelmaster 6500-D, Toro Reelmaster 6700-D |
| Download File |
|
| Document Type | Service Manual |
| Language | English |
| Product Brand | Toro. Customer Service Representatives are available by phone:
Monday - Friday 7:30 a.m. to 9:00 p.m. (CDT) - Saturday 8:00 a.m. to 8:00 p.m. (CDT) - Sunday 10:00 a.m. to 8:00 p.m. (CDT)
Canada 1-888-225-4886 USA 1-888-384-9939, Lawn Mower |
| Product Type | Walk Behind Mower |
| Engine Manufacturer | Toro |
| Document File Type | |
| Publisher | toro.com |
| Wikipedia's Page | Toro Company |
| Copyright | Attribution Non-commercial |
(0 votes, average: 0 out of 5)