

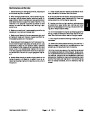


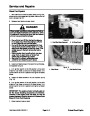


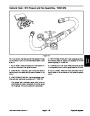
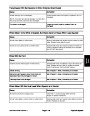


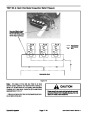


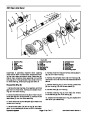
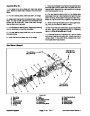


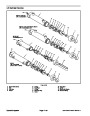


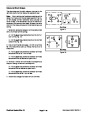

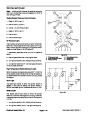
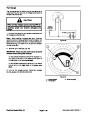


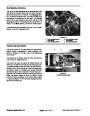

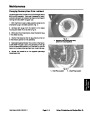


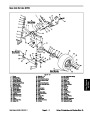
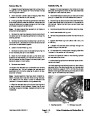

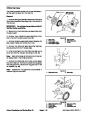
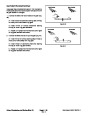
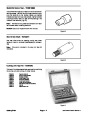
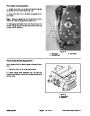


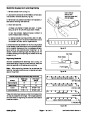

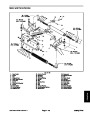


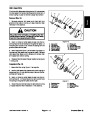

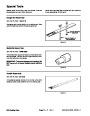


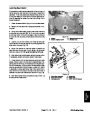

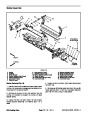


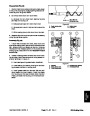


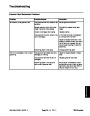


Axle Pivot Bushings
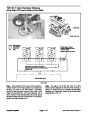
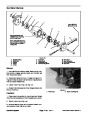
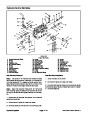
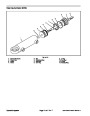
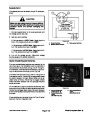
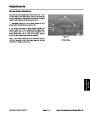
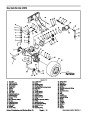
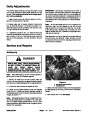
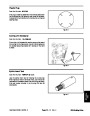
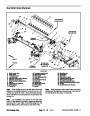
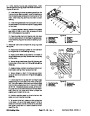
Axle Spindle Bushings
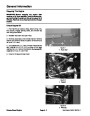
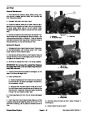
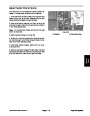
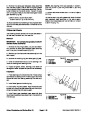
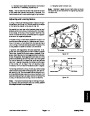
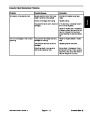
The rear axle must be held in place snugly by the axle
pin. Excessive movement of the axle, which is charac-
terized by erratic steering, usually indicates worn bush-
ings. To correct the problem, replace the bushings.
The rear wheel spindles must fit snugly in the rear axle.
Excessive movement of the spindle inthe axle indicates
that the bushings are probably worn and must be re-
placed.
1.
cylinder. Put caps or plugs on all the fittings and hoses
to prevent contamination.
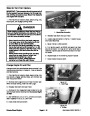
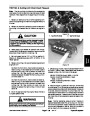
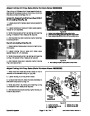
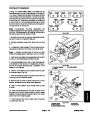
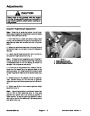
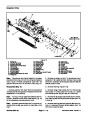
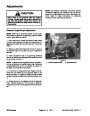
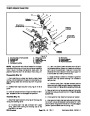
Disconnect the hydraulic hoses from the steering
1. Disconnect the hydraulic hoses from the steering
cylinder. Put caps or plugs on the fittings and hoses to
prevent contamination.
Note:
show their correct position on the steering cylinder.
To ease reassembly, tag each of the hoses to
Note:
show their correct position on the steering cylinder.
To ease reassembly, tag each of the hoses to
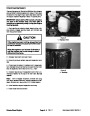
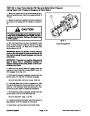
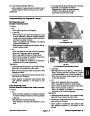
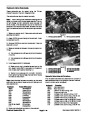
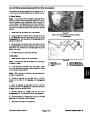
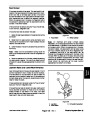
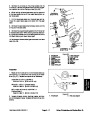
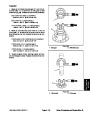
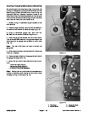
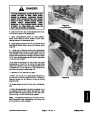
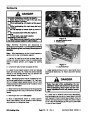
2.
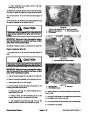
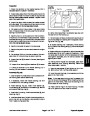
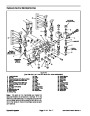
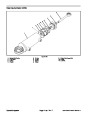
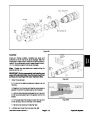
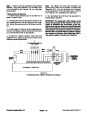
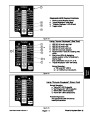
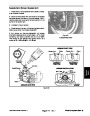
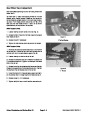
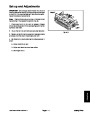
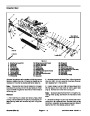
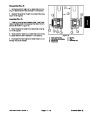
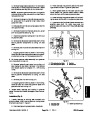
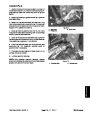
end of the axle pivot pin to the chassis (Fig. 13).
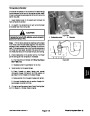
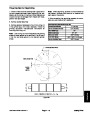
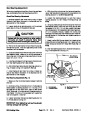
Remove the locknut and thrust washer securing the
2. Remove the jamnut and thrust washer securing the
end of the axle pivot pin to the chassis (Fig. 13).
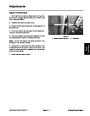
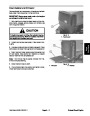
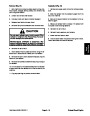
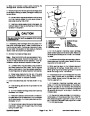
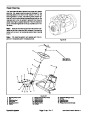
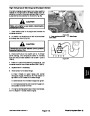
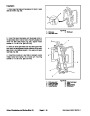
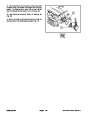
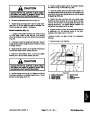
3.
til pressure is taken off the axle pivot pin. Support the
machine with jack stands to prevent it from falling.
Jack up the frame (just ahead of the rear wheels) un-
3. Jack up the frame (just ahead of the rear wheels) un-
til pressure is taken off the axle pivot pin. Support the
machine with jackstands to prevent it from falling.
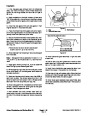
4.
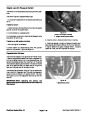
Pull the axle pivot pin out. This will release the rear
4. Pull the axle pivot pin out. This will release the rear
axleandwasher(s) fromtheframe.Carefully pulltheen-
tire axle and wheel assembly out from under the ma-
chine.
axleandwasher(s) fromtheframe.Carefully pulltheen-
tire axle and wheel assembly out from under the ma-
chine.
Note:
Several washers may have been installed be-
Note:
Several washers may have been installed be-
tween the axle pivot tube and frame during manufac-
ture. Make sure the same number of washers are
installed during reassembly.
tween the axle pivot tube and frame during manufac-
ture. Make sure the same number of washers are
installed during reassembly.
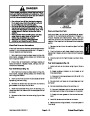
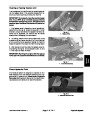
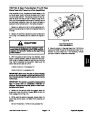
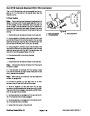
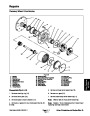
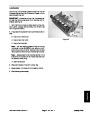
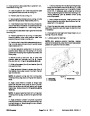
5.
out of the axle. Clean the inside of the axle pivot tube to
remove dirt and foreign material.
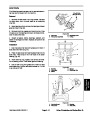
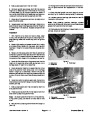
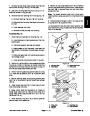
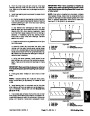
Useadriftpunch andhammer todrivebothbushings
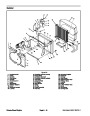
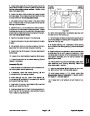
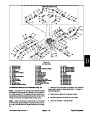
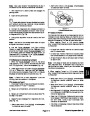
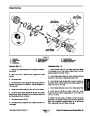
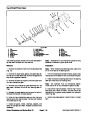
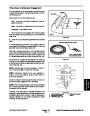
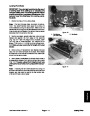
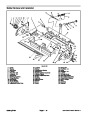
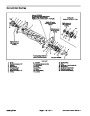
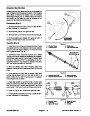
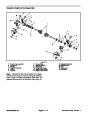
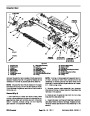
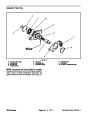
5. Remove the cotter pin and castle nut securing the
steering cylinder and/or tie rod end to the spindle arm.
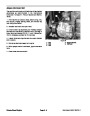
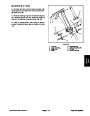
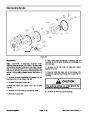
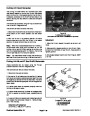
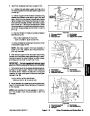
6.
Remove the capscrew, spindle cap, retaining ring,
6.
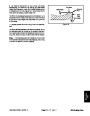
Apply grease to the inside and outside of the new
and washers that secure the wheel spindle into the axle
tube.Slidethespindle,washer,andwheelassembly out
of the axle tube to expose the bushings.
bushing. Use an arbor press to install the bushings into
the top and bottom of theaxle pivot tube. Bushings must
be flush with the axle tube.
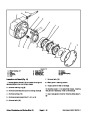
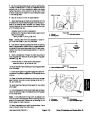
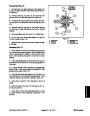
7.
Use a punch and hammer to drive both bushings out
7.
and grease. Inspect the pin for wear or damage and re-
place as necessary.
Wipe the rear axle pivot pin with a rag to remove dirt
of the axle tube. Clean the inside of the axle tube to re-
move any dirt and foreign material.
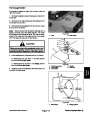
8.
Apply grease to the inside and outside of the new
8.
washer(s) and axle pivot pin. Secure the axle pivot pin
in place with the thrust washer and jamnut.
Mount the axle to the frame with the axle pin. Install
bushings. Use an arbor press to install the bushings into
the top and bottom of the axle tube. The bushings must
be flush with the axle tube.
9.
floor.
Removethejackstandsandlowerthemachinetothe
9. Wipe the spindle shaft with a rag to remove any dirt
and grease. Inspect the spindles for wear and replace
as necessary.
10.Lubricate
the rear axle pivot bushings through the
grease fitting on the pivot pin.
10.Install a washer onto the spindle shaft and push the
shaft through the axle tube. Hold the wheel and spindle
shaft assembly in place and install the thrust washer flat
washer and retaining ring onto the end of the spindle
shaft. Install the spindle cap and capscrew.
11.
Install the hydraulic hoses to the steering cylinder.
12.Check
leaks.
steering cylinder hydraulic connections for
11.
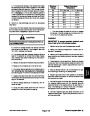
Connect steering cylinder and/or tie rod end to the
spindle arm. Tighten the castle nut(s) to 25 to 33 ft-lbs.
(34
to 45 Nm). and install new cotter pins.
Reelmaster 6500-D/6700-D
Axles, Planetaries and Brakes (Rev. C)
Page 6 - 12
| Categories | Lawn Mower Manual, Toro Lawn Mower Manual |
|---|---|
| Tags | Toro Reelmaster 6500-D, Toro Reelmaster 6700-D |
| Download File |
|
| Document Type | Service Manual |
| Language | English |
| Product Brand | Toro. Customer Service Representatives are available by phone:
Monday - Friday 7:30 a.m. to 9:00 p.m. (CDT) - Saturday 8:00 a.m. to 8:00 p.m. (CDT) - Sunday 10:00 a.m. to 8:00 p.m. (CDT)
Canada 1-888-225-4886 USA 1-888-384-9939, Lawn Mower |
| Product Type | Walk Behind Mower |
| Engine Manufacturer | Toro |
| Document File Type | |
| Publisher | toro.com |
| Wikipedia's Page | Toro Company |
| Copyright | Attribution Non-commercial |
(0 votes, average: 0 out of 5)