


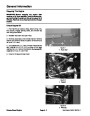


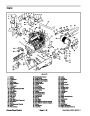


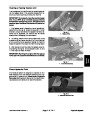


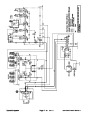
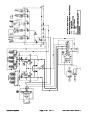
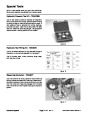


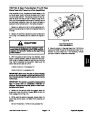
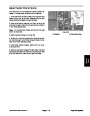


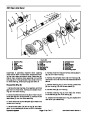
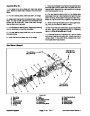
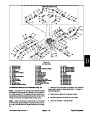


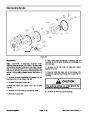


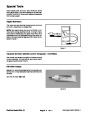
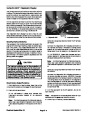
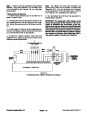

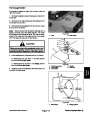


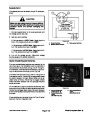

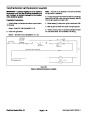

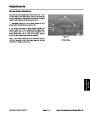

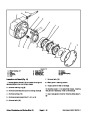
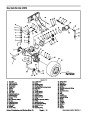

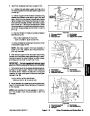
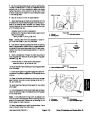
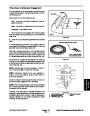
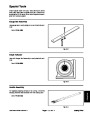
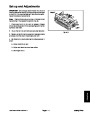

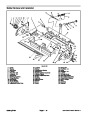


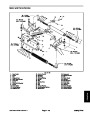

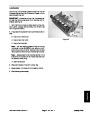

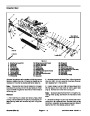
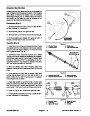
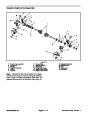


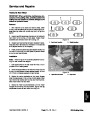
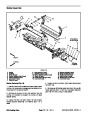


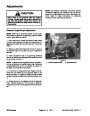


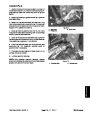


Reel Removal
Reel Installation
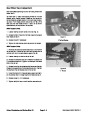
1.
2.
3.
4.
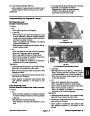
Remove weight from cutting unit.
Remove bedbar assembly.
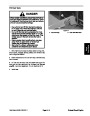
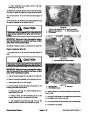
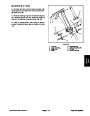
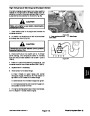
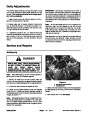
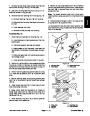
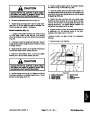
CAUTION
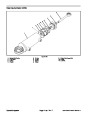
Remove front roller assembly.
Contact with the reel, bedknife or other cutting
unit parts can result in personal injury. Use
heavy gloves when installing the cutting reel.
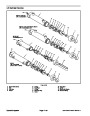
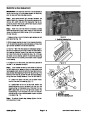
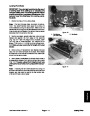
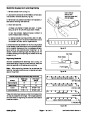
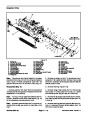
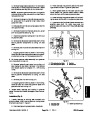
Loosen set screw and remove bearing adjustment
nut from L.H. bearing housing.
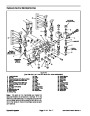
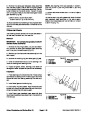
5.
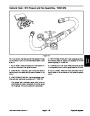
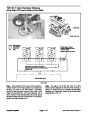
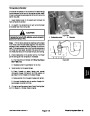
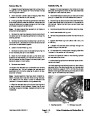
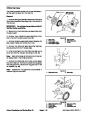
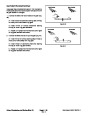
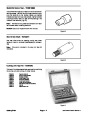
L.H. bearing housing. Remove L.H. bearing housing. It
is not necessary to remove the R.H. bearing housing.
Use a hammer and punch to drive out roll pins from
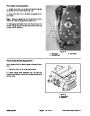
1. Set cutting unit frame in a vertical position so R.H.
bearing housing is down. Install reel into R.H. bearing
housing.
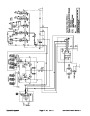
6.
from the R.H. bearing housing and remove from cutting
unit frame.
Carefully slide the cutting reel with bearing and seal
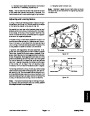
2. Install L.H. bearing housing onto bearing and seal on
cuttingreel.InstallrollpinstopositionL.H.bearinghous-
ing to side plate. Secure bearing housing with screws
and lock nuts.
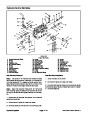
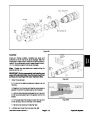
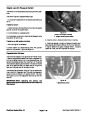
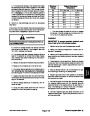
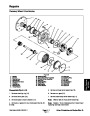
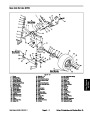
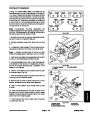
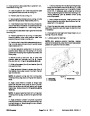
Inspection
3.
Place cutting unit in a horizontal position.
1.
Replace reel if diameter has decreased to the service
limit (see Reel Grinding Specifications).
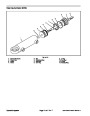
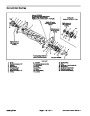
4. Hit end of reel shaft with a brass hammer to make
sure that R.H. reel bearing is seated on shoulder of R.H.
bearing housing.
2.
3.
Replace reel if blades are bent or cracked.
Inspect reel shaft splined inserts and replace if worn
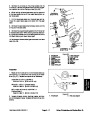
5.
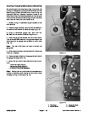
Apply a film of grease to outside diameter of bearing
or damaged.
adjustment nut. Install adjustment nut into L.H. bearing
housing and use special spanner wrench TOR4064 to
tighten the adjustment nut approximately 1/4 turn past
first contact with the bearing.
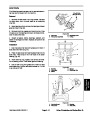
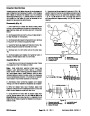
The splined inserts are installed with thread locking
compound (Loctite 242 or equivalent). One side is
L.H. threads and the other R.H. threads (the side of
the reel with R.H. threads has an identification
groove on outer surface of flange). To remove or
install threaded spline inserts, use tool TOR4074.
Before installing inserts into reel shaft, clean all
threads and apply Loctite 242 or equivalent to
threads. Install and tighten insert to a torque of 75 -
Note:
Reel bearings do not require pre--load. Over
tightening reel bearing adjustment nut will damage reel
bearings.
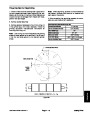
6. Loosen the bearing adjustment nut and then tighten
adjustment nut to a torque of 15 - 17 in--lb (17 - 19
KgCm).
85
ft-lb (10.4 - 11.8 KgM).
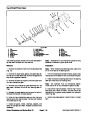
4.
bearings:
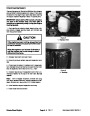
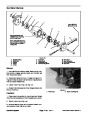
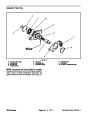
Inspect reel bearings and seals. To replace seals and
7.
alent) to threads of set screw. Tighten set screw to
secure bearing adjustment nut.
Applythreadlockingcompound(Loctite242orequiv-
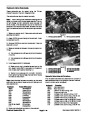
A. Use a bearing puller tool to remove the bearings
fromthereelshaft.Removetheseals.NOTE:Ifbear-
ings and seals are removed from reel shaft, discard
and replace removed components.
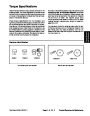
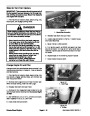
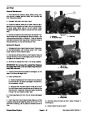
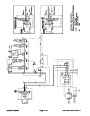
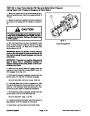
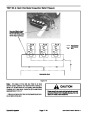
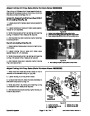
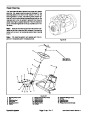
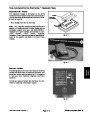
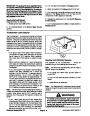
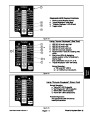
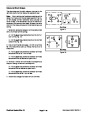
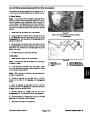
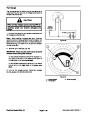
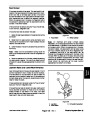
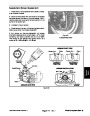
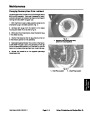
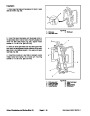
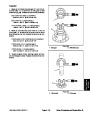
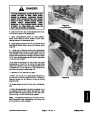
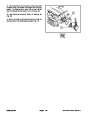
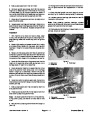
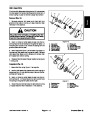
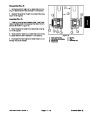
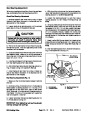
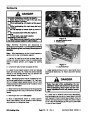
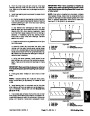
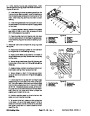
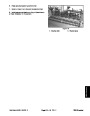
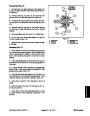
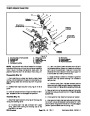
A. For socket head set screw (Fig. 34), tighten set
screw one-half turn beyond initial contact minimum.
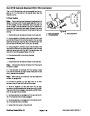
B. For square head set screw (Fig. 35), tighten set
screw to a torque of 25 - 35 in-lb (29 - 40 KgCm).
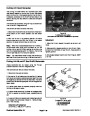
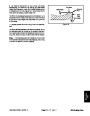
IMPORTANT: The seals should be installed so
the metal side of the seal is toward the bearing
location.
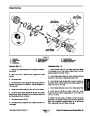
8.
9.
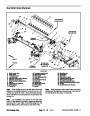
Install front roller assembly.
Install bedbar assembly.
B. Install new seals on the reel shaft pressing on the
steel surface of the seal. Make sure seals are
installed square to shaft and are pressed fully to reel
shaft shoulder.
10.
Apply anti-seize lubricant to internal splines of
splined couplers.
C. Pack bearings with No. 2 general purpose grease
before installing. Install bearings on reel shaft by
pressing equally on inner and outer bearing race.
Bearings should bottom on reel shaft shoulder.
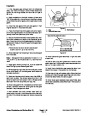
11. Install weight assembly to cutting unit.
D. Apply a film of grease to outside diameter ofseals
and bearings.
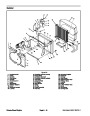
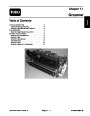
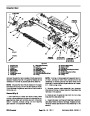
Cutting Units
Page 7 - 22 Rev. E
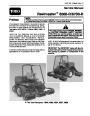
Reelmaster 6500-D/6700-D
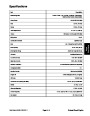
| Categories | Lawn Mower Manual, Toro Lawn Mower Manual |
|---|---|
| Tags | Toro Reelmaster 6500-D, Toro Reelmaster 6700-D |
| Download File |
|
| Document Type | Service Manual |
| Language | English |
| Product Brand | Toro. Customer Service Representatives are available by phone:
Monday - Friday 7:30 a.m. to 9:00 p.m. (CDT) - Saturday 8:00 a.m. to 8:00 p.m. (CDT) - Sunday 10:00 a.m. to 8:00 p.m. (CDT)
Canada 1-888-225-4886 USA 1-888-384-9939, Lawn Mower |
| Product Type | Walk Behind Mower |
| Engine Manufacturer | Toro |
| Document File Type | |
| Publisher | toro.com |
| Wikipedia's Page | Toro Company |
| Copyright | Attribution Non-commercial |
(0 votes, average: 0 out of 5)