


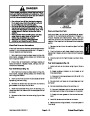


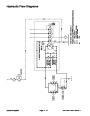


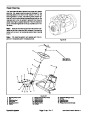


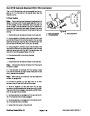


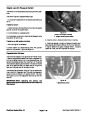


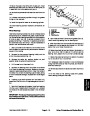

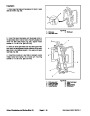
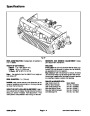


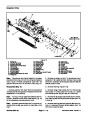

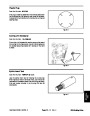


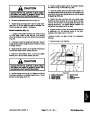


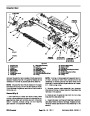


Hydraulic Valve Solenoids
These solenoids can be tested using the “Output
Checks” feature of the ACE Diagnostic tool.
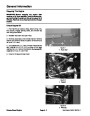
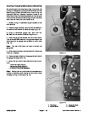
1
2
The solenoids can also be tested manually.
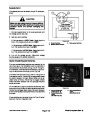
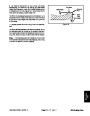
Note:
Prior to taking small resistance readings with a
digital multimeter, short the test leads together. The me-
ter will display a small resistance value (usually 0.5
ohms or less). This resistance is due to the internal re-
sistance of the meter and test leads. Subtract this value
fromthe measured value ofthecomponent you aretest-
ing.
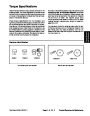
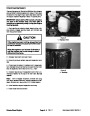
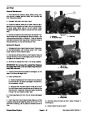
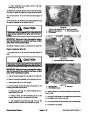
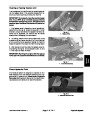
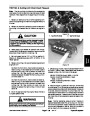
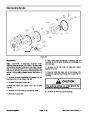
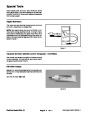
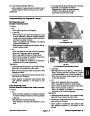
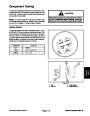
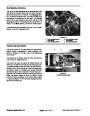
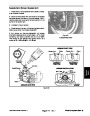
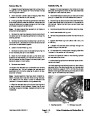
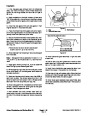
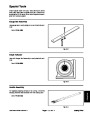
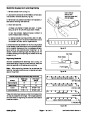
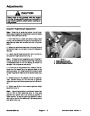
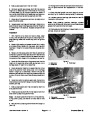
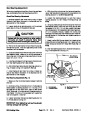
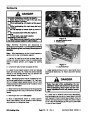
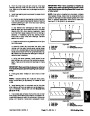
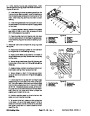
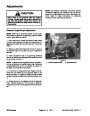
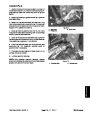
1.
electrical connector.
Make sure engine is off. Disconnect solenoid valve
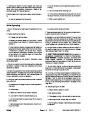
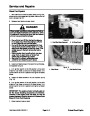
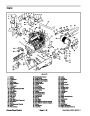
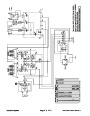
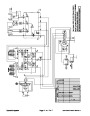
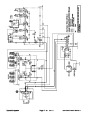
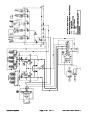
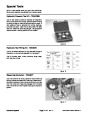
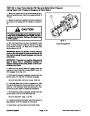
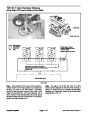
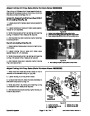
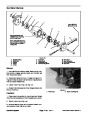
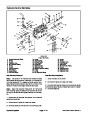
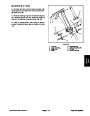
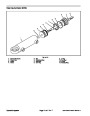
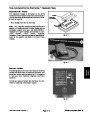
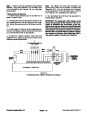
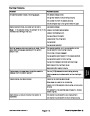
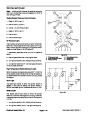
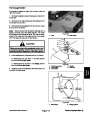
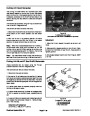
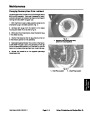
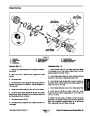
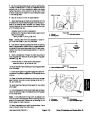
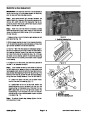
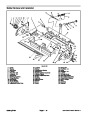
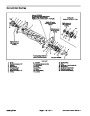
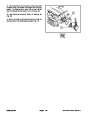
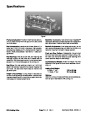
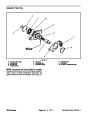
Figure 21
1.
20 watt solenoid (MSV1)
2.
20 watt solenoid (MSV2)
2.
Apply 12VDC source directly to the solenoid. Listen
for solenoid to shift.
2
3
1
6
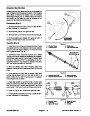
3.
Remove 12VDC source from the solenoid. Listen for
solenoid to return.
4.
minals.
Measure resistance between the two connector ter-
4
A. The resistance for a 20 watt coil should be about
5
7.2
ohms.
B. The resistance for a 28 watt coil should be about
5.1
ohms.
5.
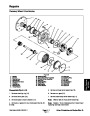
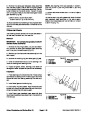
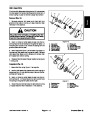
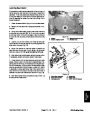
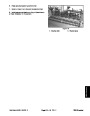
Install new solenoid if necessary.
A. Make sure o-ring is installed at each end of the
coil. Apply ”Loctite 242” or equivalent to threads on
end of valve stem before installing nut.
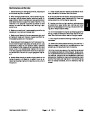
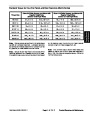
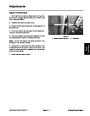
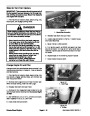
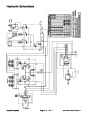
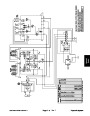
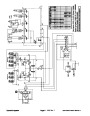
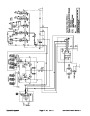
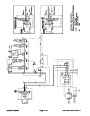
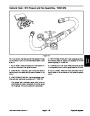
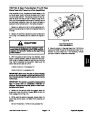
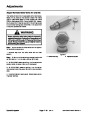
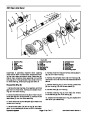
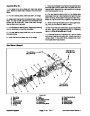
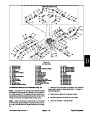
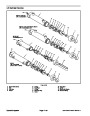
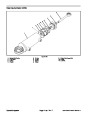
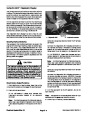
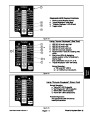
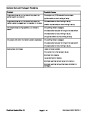
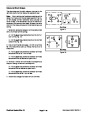
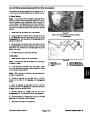
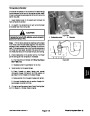
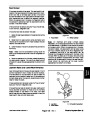
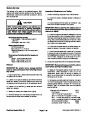
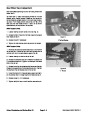
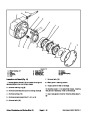
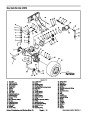
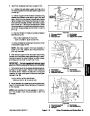
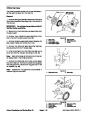
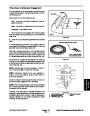
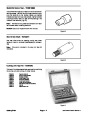
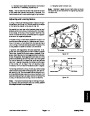
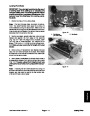
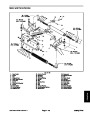
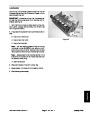
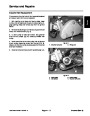
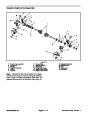
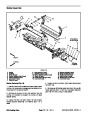
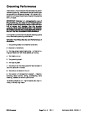
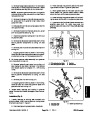
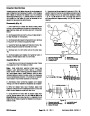
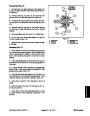
Figure 22
1.
2.
3.
4.
20 watt solenoid (SV1)
5.
6.
20 watt solenoid (SV5)
20 watt solenoid (SV8)
(if equipped)
28 watt solenoid (SV2)
20 watt solenoid (SV3)
20 watt solenoid (SV4)
B. Tighten nut to a torque of 2 - 5 ft-lb (2.7 - 6.8 Nm).
Over-tightening may damage the solenoid or cause
the valve to malfunction.
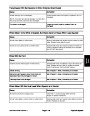
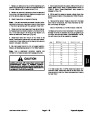
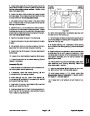
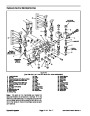
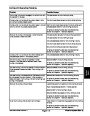
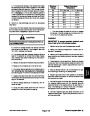
Hydraulic Valve Solenoid Functions
The list below identifies and describes the function of
each valve solenoid on the hydraulic manifold. Each so-
lenoid functions when energized.
Note: Each electrical harness connection for the valve
solenoids has a colored power wire and black ground
wire attached to it.
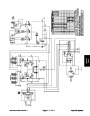
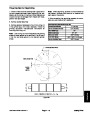
Solenoid
MSV1
MSV2
SV1
Function
Front reel circuit
Rear reel circuit
Lower or lift any cutting units
Lift any cutting units
Solenoid
MSV1
MSV2
SV1
SV2
SV3
Power Wire Color
Yellow/White
Brown/White
Yellow/Black
Orange/Blue
Pink/Blue
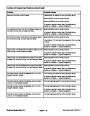
SV2
SV3
SV4
SV5
SV6
SV7
SV8
FD1
Lift/lower front, center cutting unit #1
Lift/lower front outer cutting units #4 & 5
Lift/lower rear cutting units #2 & 3
Lift/lowerrearcuttingunit#6(6700-Donly)
Lift/lowerrearcuttingunit#7(6700-Donly)
Lower any cutting units (if equipped)
Lift/lower front outer cutting units #4 & 5
SV4
SV5
Orange/Red
Black/Red
SV6
SV7
Yellow/Black
Yellow/White
SV8 (if equipped)
FD1
White/Black
Orange/Red
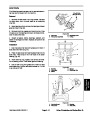
6.
Reconnect electrical connector to the solenoid.
Electrical System (Rev. C)
Reelmaster 6500-D/6700-D
Page 5 - 22
| Categories | Lawn Mower Manual, Toro Lawn Mower Manual |
|---|---|
| Tags | Toro Reelmaster 6500-D, Toro Reelmaster 6700-D |
| Download File |
|
| Document Type | Service Manual |
| Language | English |
| Product Brand | Toro. Customer Service Representatives are available by phone:
Monday - Friday 7:30 a.m. to 9:00 p.m. (CDT) - Saturday 8:00 a.m. to 8:00 p.m. (CDT) - Sunday 10:00 a.m. to 8:00 p.m. (CDT)
Canada 1-888-225-4886 USA 1-888-384-9939, Lawn Mower |
| Product Type | Walk Behind Mower |
| Engine Manufacturer | Toro |
| Document File Type | |
| Publisher | toro.com |
| Wikipedia's Page | Toro Company |
| Copyright | Attribution Non-commercial |
(0 votes, average: 0 out of 5)