


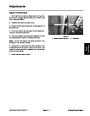


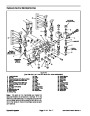


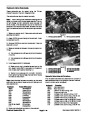


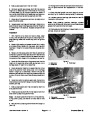


5.
6.
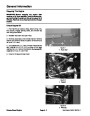
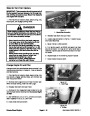
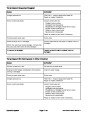
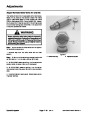
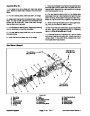
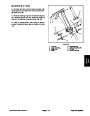
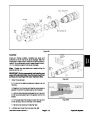
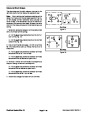
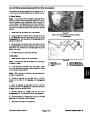
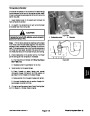
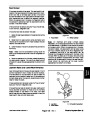
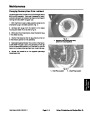
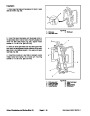
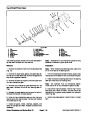
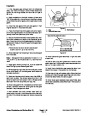
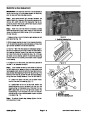
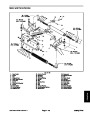
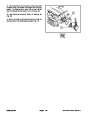
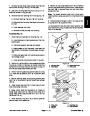
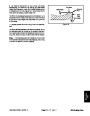
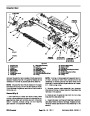
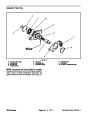
height of cut assembly (non--drive side) to the cutting
unit side plates (Fig. 6). Support groomer to prevent it
from falling. Slide height of cut assembly from groomer.
Locate and retrieve two (2) flat washers (item 32).
Slide pulley spacer (item 19) from shaft.
10.Install groomerdrivebeltandbeltcovertosideofcut-
ting unit (see Groomer Belt Replacement in this sec-
tion).
Remove two (2) cap screws (item 26) that secure
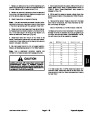
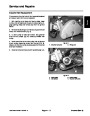
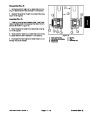
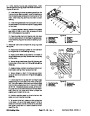
11.Check that seal guards just touch height of cut as-
sembly (Fig. 6). Reposition seal guard(s) if necessary.
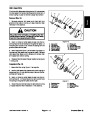
12.Lubricate
groomer bearings (see Groomer Reel Kit
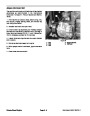
7.
Carefully pull the groomer reel from the height of cut
Installation Instructions).
assembly (drive side).
Note:
After greasing groomer bearings, operate
8.
Inspect seals, bushings and bearings in height of cut
groomer for 30 seconds, stop machine and wipe excess
grease from groomer shaft and seals.
assemblies for wear or damage (see Groomer Height of
Cut Assembly in this section). Replace components as
needed.
13.Check
groomerreelheightandmowerheight--of--cut
settings. Adjust as needed.
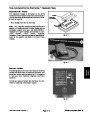
Installation
1.
Park machine on a clean and level surface, lower
cutting units completely to the ground, stop engine, en-
gage parking brake and remove key from the ignition
switch.
2.
Apply a light coating of grease to seal lips in height
of cut assemblies. Make sure that seals, bushings and
bearings in height of cut assemblies are properly posi-
tioned.
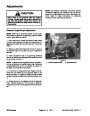
1
2
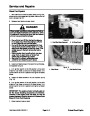
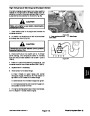
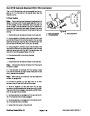
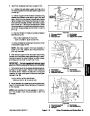
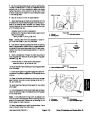
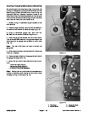
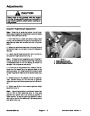
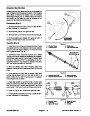
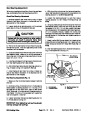
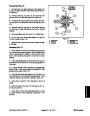
3.
Make sure that seal guards (item 24) are positioned
correctly on groomer shaft (see Groomer Reel Service
in this section). The seal lip should be toward the end of
the groomer shaft. Apply a film of grease onto seal lip.
3
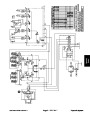
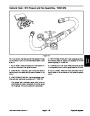
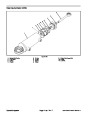
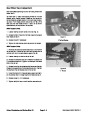
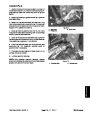
4.
height of cut assembly (drive side) taking care not to
damage seals in height of cut assembly.
Carefully slide drive end of the groomer reel into the
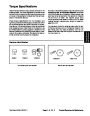
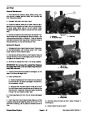
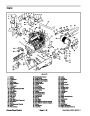
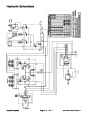
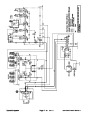
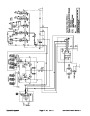
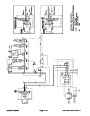
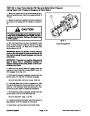
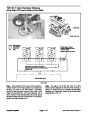
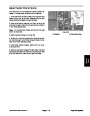
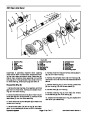
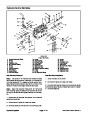
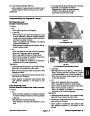
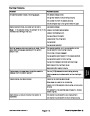
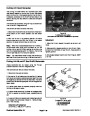
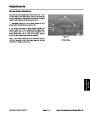
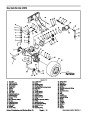
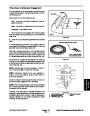
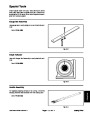
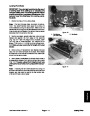
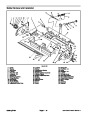
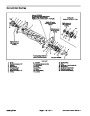
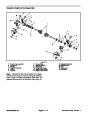
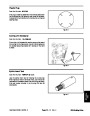
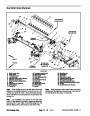
Figure 5
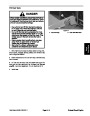
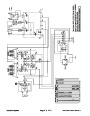
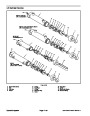
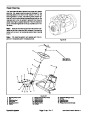
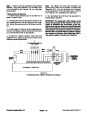
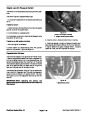
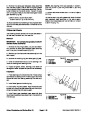
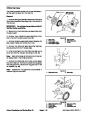
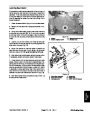
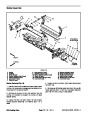
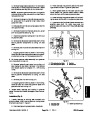
3.
1.
2.
Cap screw
Flange nut
Front roller
5.
Carefully position height of cut assembly (non--drive
side) onto groomer shaft taking care not to damage
seals in height of cut assembly. Position two (2) flat
washers(item32)andthenheightofcutassembly tothe
cutting unit frame. Secure with two (2) cap screws (item
26).
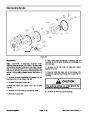
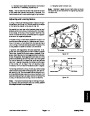
1
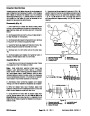
6.
rollerandsecurerollerwithflangenuts(item23)andcap
screws (item 22).
Installfrontrollerintorollersupportrods.Centerfront
7.
onto groomer shaft.
Slide pulley spacer (item 19) and washer (item 31)
2
3
8.
slide driven pulley onto groomer shaft.
Place square key (item 25) in shaft key slot and then
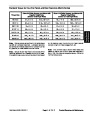
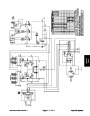
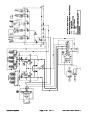
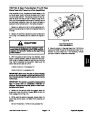
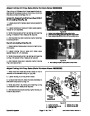
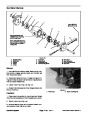
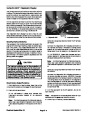
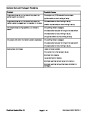
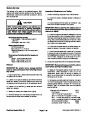
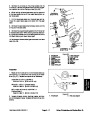
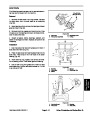
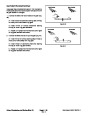
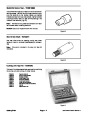
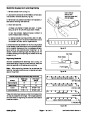
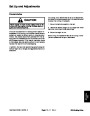
Figure 6
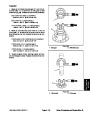
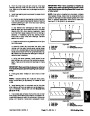
Note:
curing driven pulley, use wrench on shaft flats to hold
shaft.
Toprevent groomer shaft from turning when se-
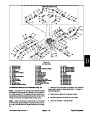
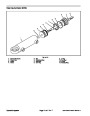
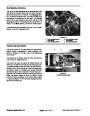
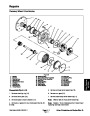
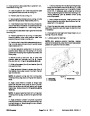
1.
2.
Cap screw
3.
Seal guard
Height of cut assembly
9.
Secure driven pulley togroomer shaftwith flangenut
(item 15).
Reelmaster 6500--D/6700--D
Page 7.1 -- 7
Groomer (Rev. C)
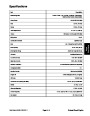
| Categories | Lawn Mower Manual, Toro Lawn Mower Manual |
|---|---|
| Tags | Toro Reelmaster 6500-D, Toro Reelmaster 6700-D |
| Download File |
|
| Document Type | Service Manual |
| Language | English |
| Product Brand | Toro. Customer Service Representatives are available by phone:
Monday - Friday 7:30 a.m. to 9:00 p.m. (CDT) - Saturday 8:00 a.m. to 8:00 p.m. (CDT) - Sunday 10:00 a.m. to 8:00 p.m. (CDT)
Canada 1-888-225-4886 USA 1-888-384-9939, Lawn Mower |
| Product Type | Walk Behind Mower |
| Engine Manufacturer | Toro |
| Document File Type | |
| Publisher | toro.com |
| Wikipedia's Page | Toro Company |
| Copyright | Attribution Non-commercial |
(0 votes, average: 0 out of 5)