


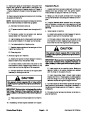


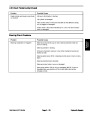
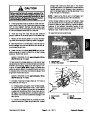
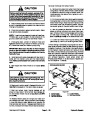
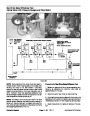


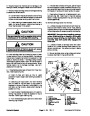


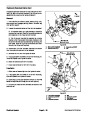


5.
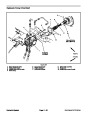
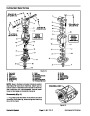
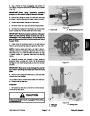
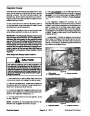
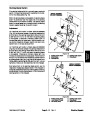
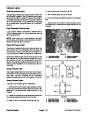
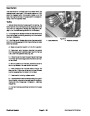
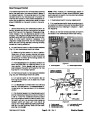
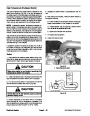
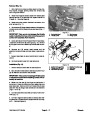
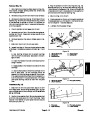
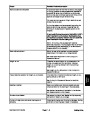
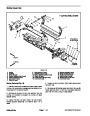
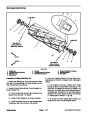
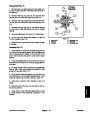
cess to steering column fasteners (Fig. 3).
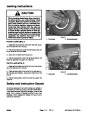
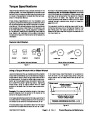
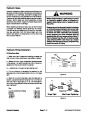
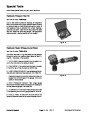
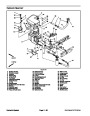
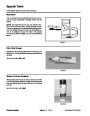
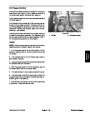
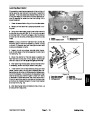
Remove platform shroud from machine to allow ac-
9. Secure steering wheel to steering column with flat
washer and lock nut. Torque hex nut from 20 to 26 ft--lb
(28
to 35 N--m).
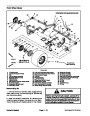
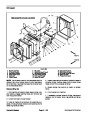
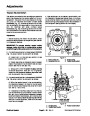
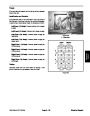
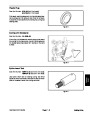
A. Remove cover plate from platform.
10.Install
steering wheel cover to steering wheel.
3
B. Remove fasteners that secure shroud to ma-
chine.
C. Remove shroud from machine.
1
2
D. Locate and retrieve two (2) rubber bushings and
spacers.
4
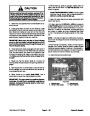
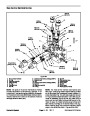
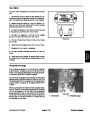
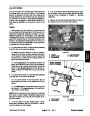
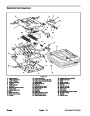
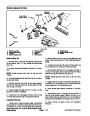
6.
cess to fasteners that secure steering column to ma-
chine.
Slide rubber bellows up steering column to allow ac-
5
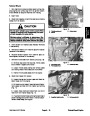
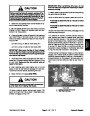
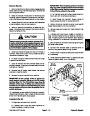
7.
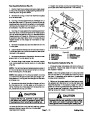
Support steering control valve to prevent it from fal-
3
ling during steering column removal.
6
7
8
8.
Loosen and remove four (4) socket head screws
(item 6) that secure steering control valve to steering
column.
9.
(item 15) and flange nuts (item 7) that secure steering
column to machine.
Loosen and remove four (4) flange head screws
10.Slide
trol valve and machine.
steering column assembly from steering con-
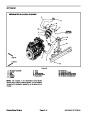
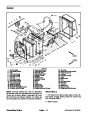
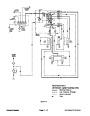
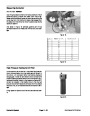
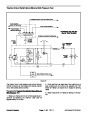
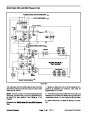
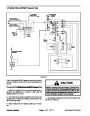
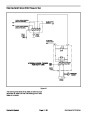
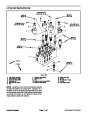
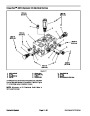
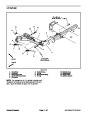
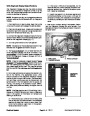
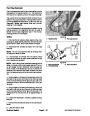
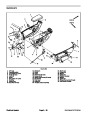
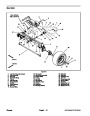
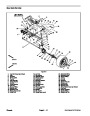
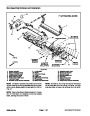
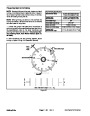
Figure 3
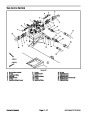
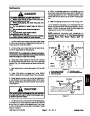
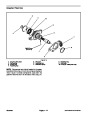
1.
2.
3.
4.
Washer (2 used)
5.
6.
7.
8.
Lock nut
Cover plate
Bushing (2 used)
Spacer (2 used)
Screw (2 used)
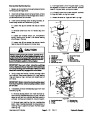
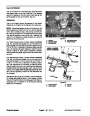
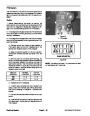
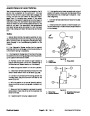
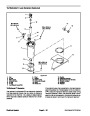
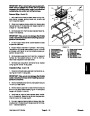
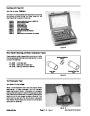
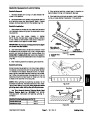
11.
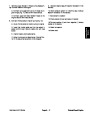
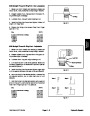
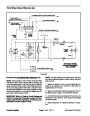
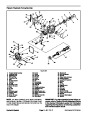
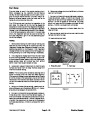
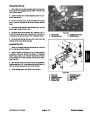
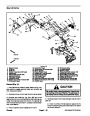
Disassemble steering column assembly as needed
Washer head screw
Platform shroud
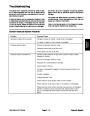
using Figure 4 as a guide.
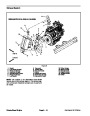
Installation (Fig. 2)
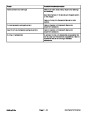
1.
Apply antiseize lubricant to input shaft of steering
control valve.
1
2.
Secure steering column in place with four (4) flange
head screws (item 15) and flange nuts (item 7).
Slide steering column onto steering control valve.
4
3.
four (4) socket head screws (item 6).
Securesteeringcontrolvalvetosteeringcolumnwith
5
6
4.
5.
shroud. Position shroud in place and secure with re-
moved fasteners.
Slide rubber bellows to bottom of steering column.
Place rubber bushings and spacers into holes of
7
8
2
3
9
12
10
6.
Slide foam collar onto steering column.
11
7.
Thoroughlycleantaperedsurfacesofsteeringwheel
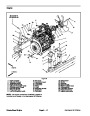
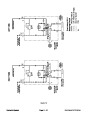
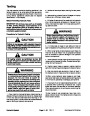
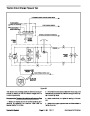
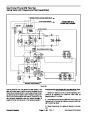
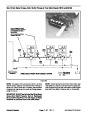
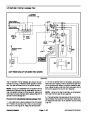
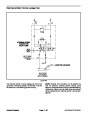
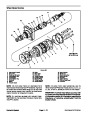
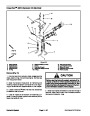
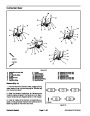
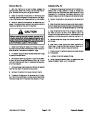
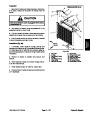
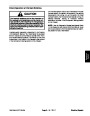
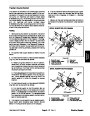
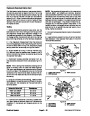
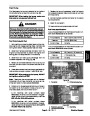
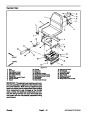
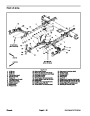
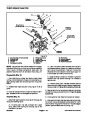
Figure 4
and steering column.
1.
2.
3.
4.
5.
6.
Steering column
Pin
Universal joint
Pin
Lock washer (2 used)
Cylinder
7.
8.
9.
10. Pedal cover
11. Pedal
12. Spring
Bolt (2 used)
Pin
Pedal block
8.
Apply antiseize lubricant to splines of steering col-
umn taking care tokeep antiseize lubricant from column
taper. Slide steering wheel onto steering column.
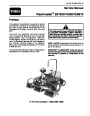
Reelmaster 5010 Series
Page 6 -- 7
Chassis
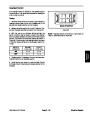
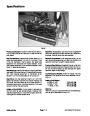
| Categories | Lawn Mower Manual, Sprinkler and Irrigation Manuals, Toro Sprinkler and Irrigation Manuals |
|---|---|
| Tags | Toro 5210, Toro 5410, Toro 5510, Toro 5610 |
| Download File |
|
| Document Type | Catalog, Service Manual |
| Language | English |
| Product Brand | Toro. Customer Service Representatives are available by phone:
Monday - Friday 7:30 a.m. to 9:00 p.m. (CDT) - Saturday 8:00 a.m. to 8:00 p.m. (CDT) - Sunday 10:00 a.m. to 8:00 p.m. (CDT)
Canada 1-888-225-4886 USA 1-888-384-9939, Lawn Mower |
| Document File Type | |
| Publisher | toro.com |
| Wikipedia's Page | Toro Company |
| Copyright | Attribution Non-commercial |
(1 votes, average: 4 out of 4)
Lawn and Garden readers have rated Toro 06148SL Rev B Reelmaster 5210 5410 5510 5610 Service Manual 4.0 out of 4.0 based on 1 product reviews. i hope is going to work