


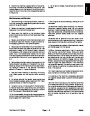


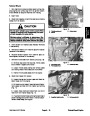


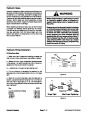


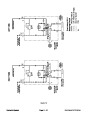


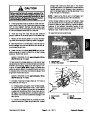


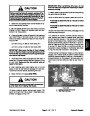

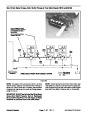


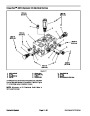


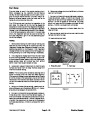


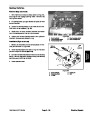


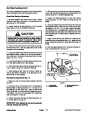
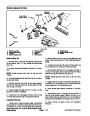


Hydraulic Hoses
Hydraulic hoses are subject to extreme conditions such
as pressure differentials during operation and exposure
to weather, sun, chemicals, very warm storage condi-
tionsormishandling duringoperation andmaintenance.
Theseconditionscancausedamageorprematuredete-
rioration. Some hoses are more susceptible to these
conditions than others. Inspect the hoses frequently for
signs of deterioration or damage.
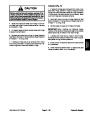
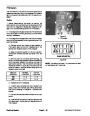
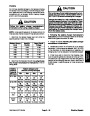
WARNING
Before disconnecting or performing any work
on hydraulic system, relieve all pressure in
system. Stop engine; lower or support all cut-
ting units.
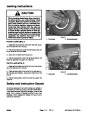
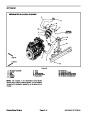
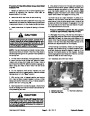
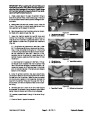
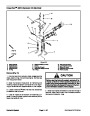
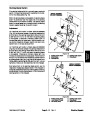
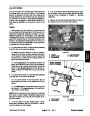
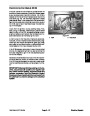
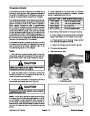
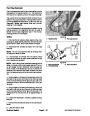
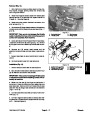
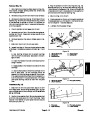
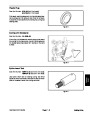
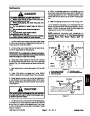
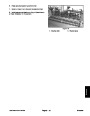
When replacing a hydraulic hose, be sure that the hose
is straight (not twisted) before tightening the fittings.
This can be done by observing the imprint on the hose.
Use two wrenches; hold the hose straight with one
wrench and tighten the hose swivel nut onto the fitting
with the other wrench.
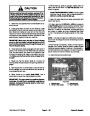
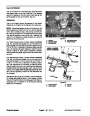
Keepbodyandhandsawayfrompinholeleaks
or nozzles that eject hydraulic fluid under high
pressure. Use paper or cardboard, not hands,
to search for leaks. Hydraulic fluid escaping
under pressure can have sufficient force to
penetrate the skin and cause serious injury. If
fluid is injected into the skin, it must be surgi-
cally removed within a few hours by a doctor
familiar with this type of injury. Gangrene may
result from such an injury.
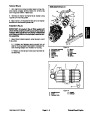
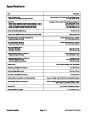
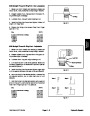
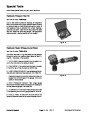
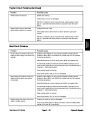
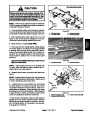
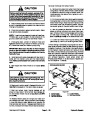
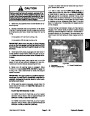
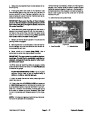
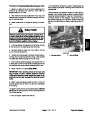
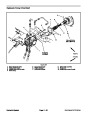
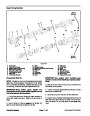
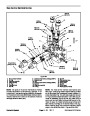
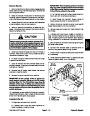
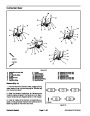
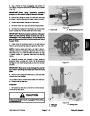
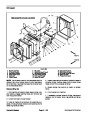
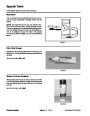
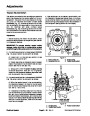
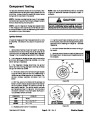
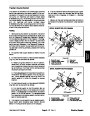
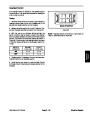
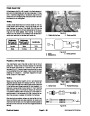
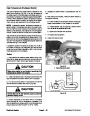
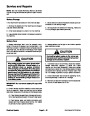
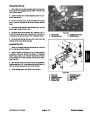
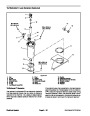
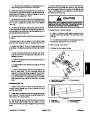
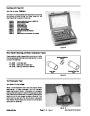
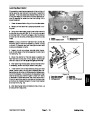
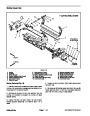
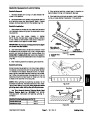
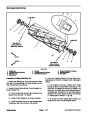
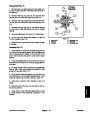
Hydraulic Fitting Installation
O--Ring Face Seal
Nut
Body
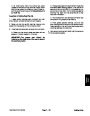
1.
free of burrs, nicks, scratches or any foreign material.
Make sure both threads and sealing surfaces are
Sleeve
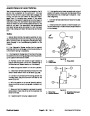
2.
in the groove. It is recommended that the o--ring be re-
placed any time the connection is opened.
Makesuretheo--ringisinstalledandproperlyseated
Seal
3.
4.
face seal end of the fitting and tighten the nut until finger
tight.
Lubricate the o--ring with a light coating of oil.
Put the tube and nut squarely into position on the
Figure 3
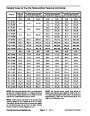
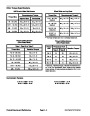
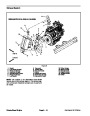
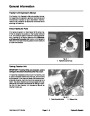
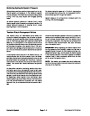
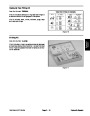
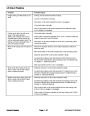
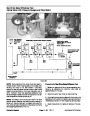
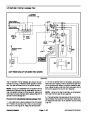
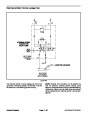
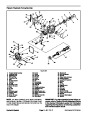
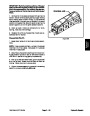
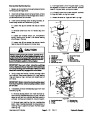
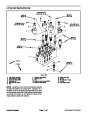
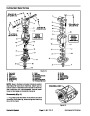
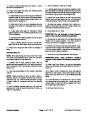
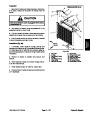
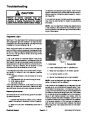
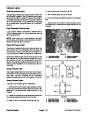
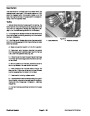
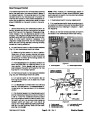
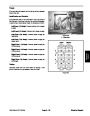
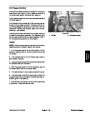
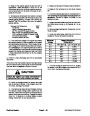
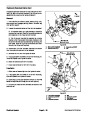
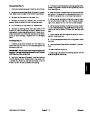
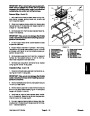
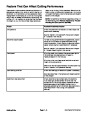
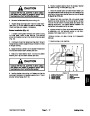
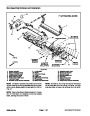
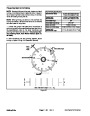
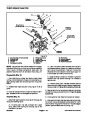
5.
Mark the nut and fitting body. Hold the body with a
wrench.Useanotherwrenchtotightenthenuttothecor-
rect Flats From Finger Tight (F.F.F.T.). The markings on
thenutandfittingbodywillverifythattheconnectionhas
been tightened.
Final
Position
Mark Nut
and Body
Size
F.F.F.T.
Initial
4
6
8
10
12
16
(1/4 in. nominal hose or tubing)
(3/8 in.)
(1/2 in.)
(5/8 in.)
(3/4 in.)
(1 in.)
0.75 + 0.25
0.75 + 0.25
0.75 + 0.25
1.00 + 0.25
0.75 + 0.25
0.75 + 0.25
Extend Line
Position
Finger Tight
After Proper Tightening
Figure 4
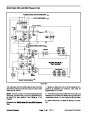
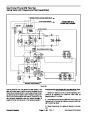
Hydraulic System
Page 4 -- 4
Reelmaster 5010 Series
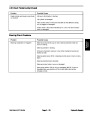
| Categories | Lawn Mower Manual, Sprinkler and Irrigation Manuals, Toro Sprinkler and Irrigation Manuals |
|---|---|
| Tags | Toro 5210, Toro 5410, Toro 5510, Toro 5610 |
| Download File |
|
| Document Type | Catalog, Service Manual |
| Language | English |
| Product Brand | Toro. Customer Service Representatives are available by phone:
Monday - Friday 7:30 a.m. to 9:00 p.m. (CDT) - Saturday 8:00 a.m. to 8:00 p.m. (CDT) - Sunday 10:00 a.m. to 8:00 p.m. (CDT)
Canada 1-888-225-4886 USA 1-888-384-9939, Lawn Mower |
| Document File Type | |
| Publisher | toro.com |
| Wikipedia's Page | Toro Company |
| Copyright | Attribution Non-commercial |
(1 votes, average: 4 out of 4)
Lawn and Garden readers have rated Toro 06148SL Rev B Reelmaster 5210 5410 5510 5610 Service Manual 4.0 out of 4.0 based on 1 product reviews. i hope is going to work